Part1Demo

Demo代码如下:
HTML
<!DOCTYPE html>
<html lang="en">
<head>
    <meta charset="UTF-8">
    <meta http-equiv="X-UA-Compatible" content="IE=edge">
    <meta name="viewport" content="width=device-width, initial-scale=1.0">
    <link rel="stylesheet" href="style.css">
    <title>Document</title>
</head>
<body>
    <section><span></span></section>
</body>
</html>
CSS
html, body {
  margin: 0;
  height: 100%;
}

body {
  display: flex;
  justify-content: center;
  align-items: center;
  background: #222f3e;
  /* background-color: #82466e; */
  animation: backColor 4s infinite;
}

section {
  width: 650px;
  height: 300px;
  padding: 10px;
  position: relative;
  display: flex;
  align-items: center;
  justify-content: center;
  border: 2px solid white;
}

span {
  width: 8px;
  height: 40px;
  border-radius: 4px;
  display: inline-block;
  position: relative;
  background: white;
  color: white;
  animation: loading 0.6s 0s linear infinite alternate;
}

span::before, span::after {
  content: '';
  width: 8px;
  height: 40px;
  border-radius: 4px;
  background: white;
  position: absolute;
  top: 50%;
  transform: translateY(-50%);
  left: 20px;
  animation: loading 0.6s 0.3s linear infinite alternate;
}

span::after {
  left: -20px;
  animation-delay: 0.6s;
}

@keyframes loading {
  0% {
    height: 64px;
  }
  100% {
    height: 5px;
  }
}
Part2原理详解
步骤1
使用span标签,设置为
宽度:8px 高度:40px 背景色:白色 color:白色 相对定位 border-radius: 4px
span {
  width: 8px;
  height: 40px;
  border-radius: 4px;
  position: relative;
  background: white;
  color: white;
}
效果图如下

步骤2
为span添加动画
动画效果描述为:span的长度从短变长再变短
具体设置:
初始状态:高度64px 末尾状态:高度5px
动画设置为
持续时间0.6s 开始延迟0s 速度曲线:linear,均匀变化 无限循环 动画交替进行
animation: loading 0.6s 0s linear infinite alternate;
@keyframes loading {
  0% {
    height: 64px;
  }
  100% {
    height: 5px;
  }
}
效果图如下

注:产生上述条件的前提是海轰事先将span设置为页面居中(上下左右都居中)
步骤3
使用span::before和span::after伪元素
先同时设置
其属性设置为
绝对定位(left:20px) 宽度:8px 高度:40px border-radius: 4px 背景色:白色
span::before, span::after {
  content: '';
  width: 8px;
  height: 40px;
  border-radius: 4px;
  background: white;
  position: absolute;
  left: 20px;
}
效果图如下

注:上述效果图span动画暂时不生效
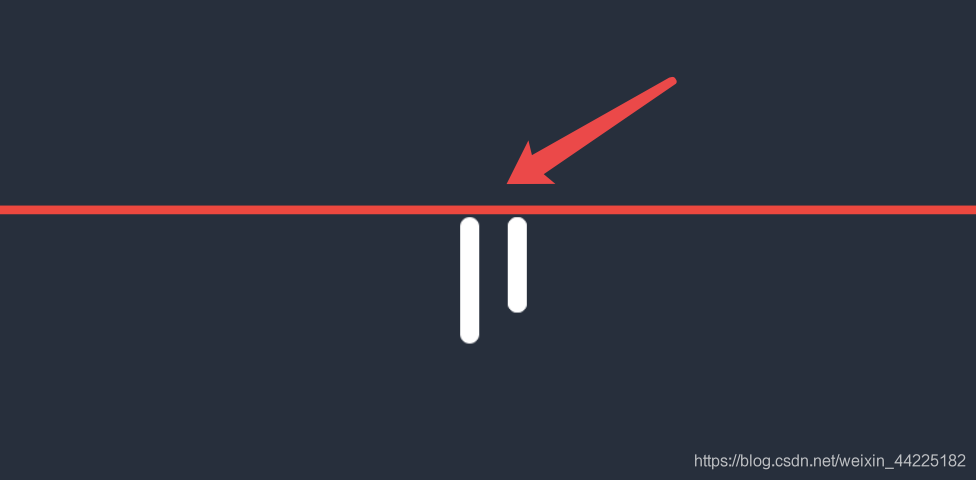
当span动画生效时,效果如下

可以发现:右边的白色部分最上部分一直与左边最上部分处于同一水平线
步骤4
为了将span::before、span::after固定,不随span上下移动
设置
span::before, span::after {
  top: 50%;
  transform: translateY(-50%);
}
效果图为

步骤5
为span::before和span::after添加动画
效果同span的动画一样,只是动画开始延迟0.3s,与span动画形成前后关系即可
span::before, span::after {
  animation: loading 0.6s 0.3s linear infinite alternate;
}
@keyframes loading {
  0% {
    height: 64px;
  }
  100% {
    height: 5px;
  }
}
效果图如下

步骤6
分离span::before和span::after
单独再设置span::after
定位为span左边20px处 动画开始延迟时间为0.6s
span::after {
  left: -20px;
  animation-delay: 0.6s;
}
位置关系如下
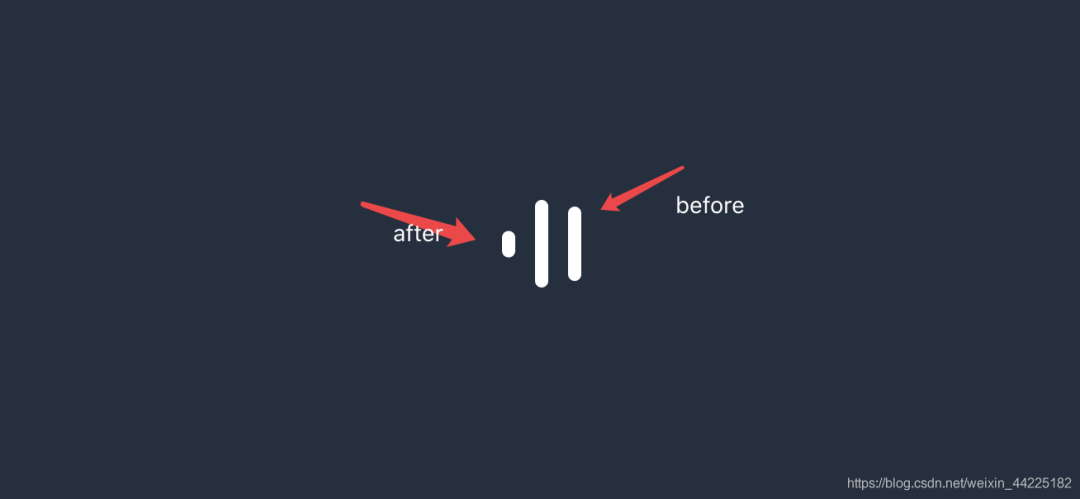
最终效果为:

Part3疑问解答
为什么步骤四中 top: 50%; transform: translateY(-50%);可以将span::after、before固定页面上下中间呢?
为了弄清楚原理
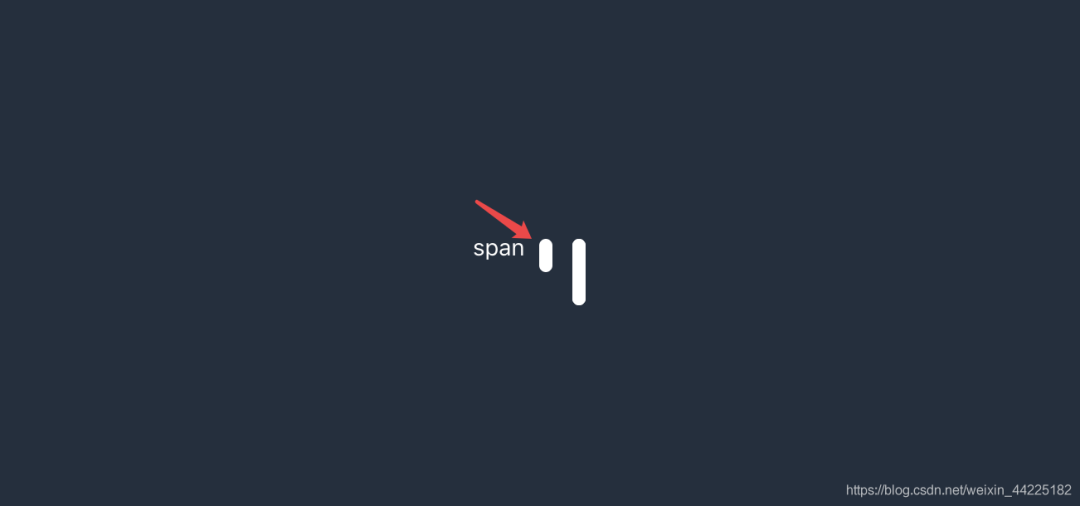
首先我们先假设span高度为20px,宽度为8px
before和after位置定位时只设置left为20px(高度为40px)
效果图如下
然后为before和after设置top: 50%;
效果图如下

可以发现右边的before和after向下移动了,而实际移动的距离就span总长度20px一半(50%)的距离:10px
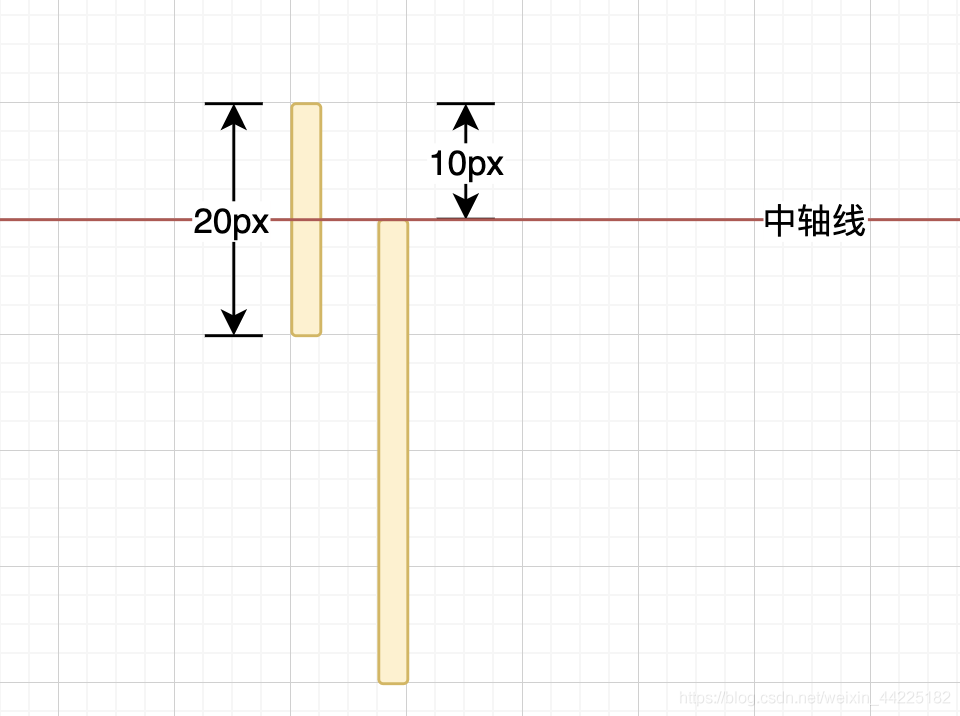
通过实际效果展示可以发现:此时span::before和span::after中设置的top为50%,基准是相对于span的
比如span长100px,如果before为top:50%,那么就是向下移动100* 50% = 50px;如果span长40px,那么before和after就下移20px
总之,top是相对于span进行参考的!
再设置 translateY(-50%);
效果图如下

可以发现此时span和span::after、before中心处于同一轴线上
这是因为translateY(-50%)中的50%是指移动相对于自身的50%
此时before和after长为40px,那么自身长度的50%为40*50%=20px
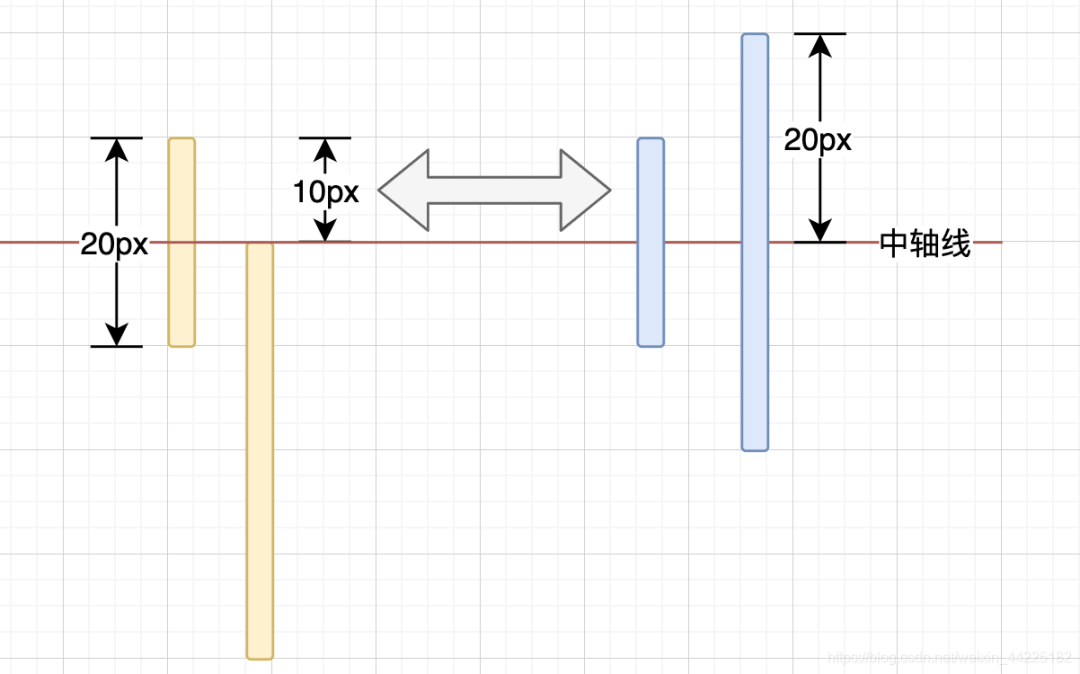
这样一来,span和before、after中心就会处于同一水平线上
再一般的说
无论span长度为多少、span::before、span::after长度为多少,只要配合
top: 50%; transform: translateY(-50%);,都可以使得它们中心处于同一水平线上
一般情况时:
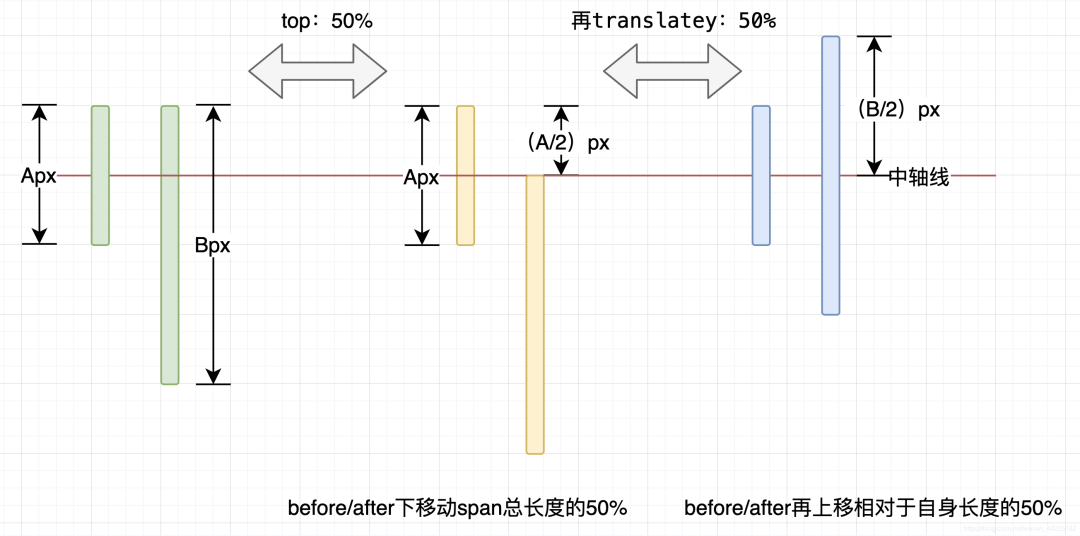
Part4结语
希望对您有所帮助
如有错误欢迎小伙伴指正~
我是 海轰ଘ(੭ˊᵕˋ)੭
如果您觉得写得可以的话
请点个赞吧
谢谢支持❤️