 技术漫谈
技术漫谈


前后端分离
前端项目采用的技术栈是基于Vue + Vant + Axios,用vue-cli构建前端界面,后端项目采用的技术栈是基于Node.js + Express + MySQL,用Express搭建的后端服务器。后续开发后台管理系统采用的技术栈是基于Vue + Element-ui前端架构。
在线演示DEMO地址👉:http://106.55.168.13
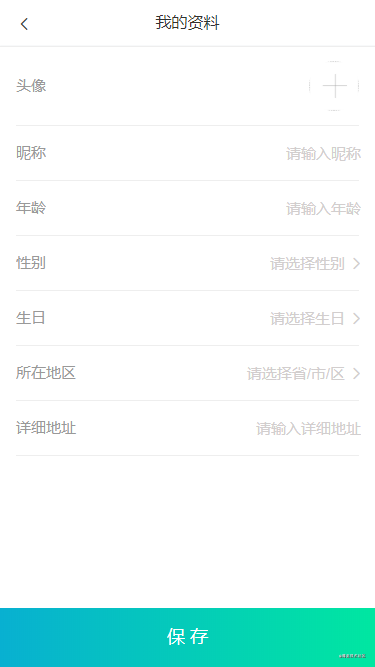
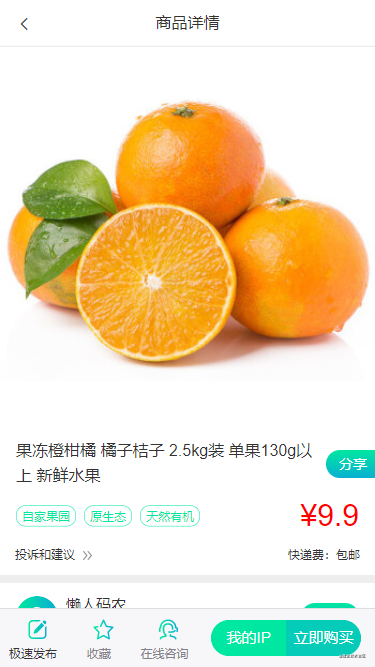
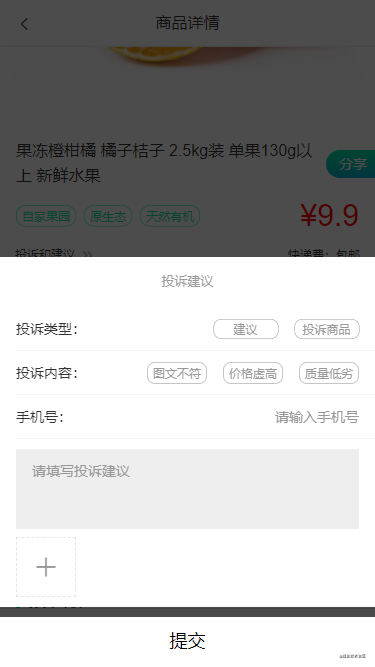
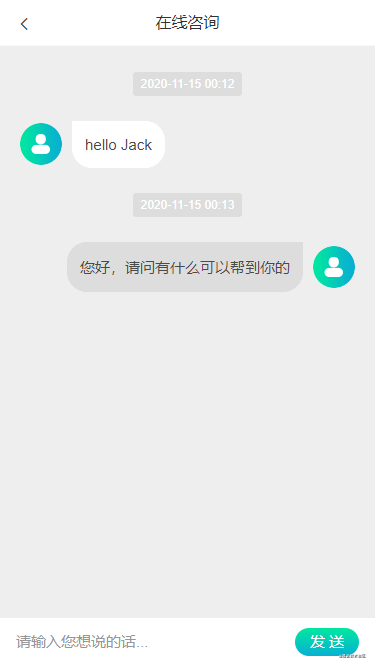
部分界面截图

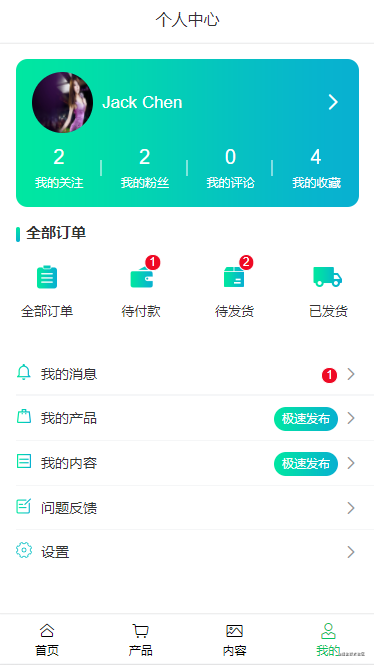


需求清单
验证码登录 微博/github/微信/QQ登录 密码登录 个人资料 上传头像 退出登录 首页界面 发布功能(产品/内容) 详情页(产品/内容) 分页功能(产品/内容) 评论功能(产品/内容) 常用地址 添加地址 确认订单 订单详情 问题反馈 我的关注 我的粉丝(关注者) 我的评论 我的收藏 我的订单(待付款/待发货/已发货) 在线咨询 消息列表 消息详情 账户设置 绑定账号 关于我们
后端
基础环境
安装配置 Node.js
Node.js 安装包及源码下载地址为:https://nodejs.org/en/download/。
不同操作系统环境的安装配置 Node.js,请移步到菜鸟教程 https://www.runoob.com/nodejs/nodejs-install-setup.html
创建工程目录
首先假定你已经安装了 Node.js,接下来为你的应用创建一个目录,然后进入此目录并将其作为当前工作目录。
mkdir myapp
cd myapp
为你的应用创建 package.json 文件
npm init -y
在 myapp 目录下安装 Express 并将其保存到依赖列表中
npm install express -S
在 myapp 目录中,创建名为 app.js 的文件,然后添加以下代码:
const express = require('express');
const app = express();
const port = process.env.PORT || 3000;

app.get('/', (req, res) => {
  res.send('Hello World!');
})

app.listen(port, () => {
  console.log(`服务已启动 http://localhost:${port}`);
})
使用以下命令运行应用程序
node app.js
然后,在浏览器中输入 http://localhost:3000/ 以查看输出 Hello World!。
或者选择Express应用程序生成器
npm install -g express-generator
通过应用生成器工具 express-generator 可以快速创建一个应用的骨架,具体操作流程请移步到 Express 官方文档 https://www.expressjs.com.cn/starter/generator.html
项目结构
│  app.js                             // 入口文件
│  package.json                       // npm包管理所需模块及配置信息
├─db
│      dbConfig.js                    // mysql数据库基础配置
├─public
│  └─uploads                          // 图片文件夹
├─routes
│      index.js                       // 初始化路由信息,自定义全局异常处理
│      users.js                       // 用户路由模块
├─services
│      authService.js                 // 业务逻辑处理 - 任务相关接口
│      userService.js                 // 业务逻辑处理 - 用户相关接口
└─utils
        constant.js                   // 自定义常量
        index.js                      // 封装连接mysql模块
        md5.js                        // 后端封装md5方法
        smsConfig.js                  // 腾讯云短信接入Nodejs SDK
        user-jwt.js                   // jwt-token验证和解析函数
技术栈
Node.js v10 express v4 mysql v5.7 express-jwt express-session nodemon crypto cors boom moment multer svg-captcha tencentcloud-sdk-nodejs
功能模块
验证码登录 图形验证码 密码登录 微博/github登录 修改头像 编辑/获取个人信息
代码实现
后端用户登录功能使用了 jwt-token 认证模式来实现。使用 Express、express-session、body-parser、cookie-parser、boom、cors、jsonwebtoken、express-jwt、MySQL、multer、svg-captcha、moment 等中间件和JS库来简化开发。
express-session:是基于 Express 框架专门用于处理 session 的中间件。session 的认证机制离不开 cookie,需要同时使用 cookieParser 中间件。body-parser:对 post 请求的请求体进行解析的 Express 中间件。cookie-parser:是 Node.js 中间件用来对cookie进行解析,主要包括普通cookie的解析和签名cookie的解析。boom:处理程序异常状态,boom 是一个兼容 HTTP 的错误对象,他提供了一些标准的 HTTP 错误,比如400(参数错误)等。cors:实现 Node 服务端跨域的 JS 库。jsonwebtoken:基于 jwt 的概念实现安全的加密方案库,实现加密 token 和解析 token 的功能。express-jwt:express-jwt 是在 jsonwebtoken 的基础上做了上层封装,基于 Express 框架下认证 jwt 的中间件,来实现 jwt 的认证功能。MySQL:Node.js 连接 MySQL 数据库。multer:是 Node.js 中间件,用于处理 multipart/form-data 类型的表单数据,它主要用于上传文件.svg-captcha:在 Node.js 中生成一个 SVG 格式的验证码。moment:JavaScript 日期处理类库。
安装依赖库
npm i -S express body-parser cookie-parser express-session express-validator express-jwt
npm i -S boom cors jsonwebtoken mysql multer svg-captcha moment
功能实现
工具类方法
上一篇文章有详细讲解工具类方法,这里就不重复,请移步到我的另一篇博文《NodeJS全栈开发一个功能完善的Express项目》
业务逻辑层
在services文件夹下新建userService.js文件,定义用户验证码登录、密码登录、第三方登录、图形验证码校验、上传文件等API接口开发。
登录模块
先来看下登录模块整个流程图,包括验证码登录、密码登录、第三方登录,如下图:

验证码登录功能实现包含图形验证和短信验证组合,也可以单独分开,都是比较常见的校验方式,先来说说这两种。
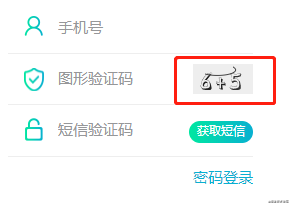
图形验证码
使用 nodejs 做后端开发,需要请求验证码,搜寻了很多 nodejs 验证码库都没找到合适的。最后无意中在 github 上看到了 svg-captcha 这个库,发现他是将 text 转 svg 进行返回的,安全性也有保证,不会被识别成文字,能满足自己的需求。
附上地址👉:https://github.com/produck/svg-captcha
安装
npm install -S svg-captcha
创建图形验证码
const svgCaptcha = require('svg-captcha');

const getCaptcha = (req, res) => {
  let codeConfig = {
    size: 4, // 验证码长度
    ignoreChars: '0o1i', // 验证码字符中排除 0o1i
    noise: 0, // 干扰线条数
    width: 60, // 宽度
    height: 30, // 高度
    inverse: false, // 翻转颜色
    fontSize: 35, // 字体大小
    // color: true, // 验证码的字符是否有颜色,默认没有,如果设定了背景,则默认有
    // background: '#cc9966' // 验证码图片背景颜色
  }
  let getCapCode = svgCaptcha.create(codeConfig); // 图形验证码
  req.session.captcha = getCapCode.text.toLowerCase(); // session存储

  res.type('svg'); // 响应类型
  res.status(200).send(getCapCode.data);
}
示例

创建算数验证码
let getCapCode = svgCaptcha.createMathExpr(codeConfig);
示例
短信验证
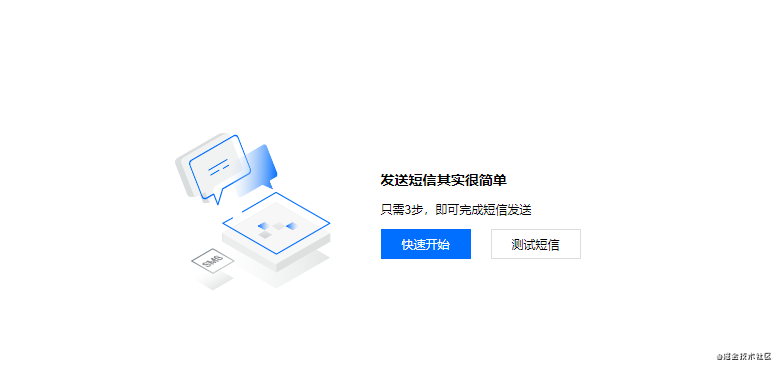
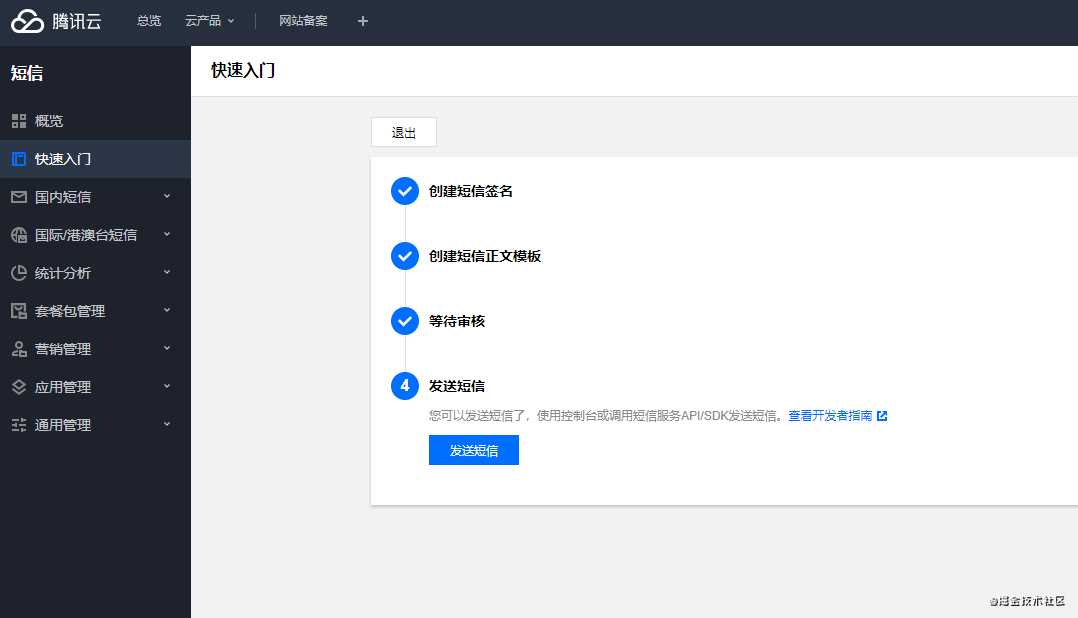
开通短信服务
短信验证需要用到服务器,腾讯云有免费短信开通功能,首次使用免费赠送国内短信100条,用于测试,挺不错的。
短信开通步骤:注册账号 -> 实名认证 -> 进入控制台 -> 选择短信模块,如下图所示:
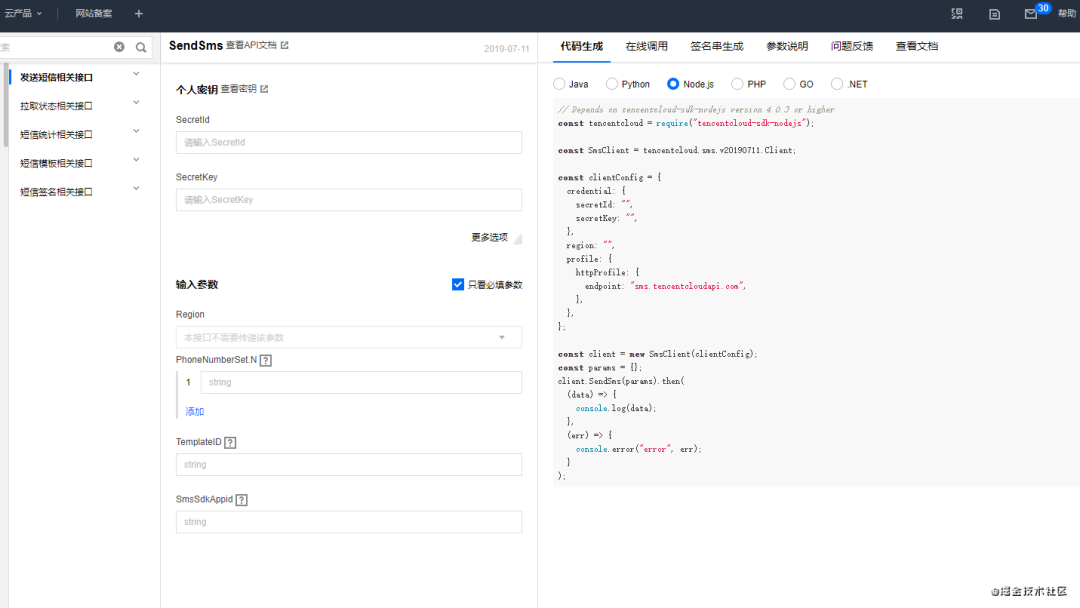
已封装短信API接口,代码如下:
// smsConfig.js
const tencentcloud = require("tencentcloud-sdk-nodejs");

// 导入对应产品模块的client models。
const SmsClient = tencentcloud.sms.v20190711.Client;
const models = tencentcloud.sms.v20190711.Models;

const Credential = tencentcloud.common.Credential;
const ClientProfile = tencentcloud.common.ClientProfile;
const HttpProfile = tencentcloud.common.HttpProfile;

// 实例化一个认证对象,入参需要传入腾讯云账户secretId,secretKey
let cred = new Credential("secretId", "secretKey");

// 实例化一个http选项,可选的,没有特殊需求可以跳过。
let httpProfile = new HttpProfile();
// 指定接入地域域名(默认就近接入)
httpProfile.endpoint = "sms.tencentcloudapi.com";

// 实例化一个client选项,可选的,没有特殊需求可以跳过。
let clientProfile = new ClientProfile();
clientProfile.httpProfile = httpProfile;

module.exports = {
    client: new SmsClient(cred, "", clientProfile),
    reqSms: new models.SendSmsRequest()
}

// userService.js
const sendCoreCode = (req, res) => {
  let { phone } = req.query;
  let sms = randomCode(1000, 9999);
  let params = {
    'PhoneNumberSet': [
      `+86${phone}`
    ],
    'TemplateID': '738936',
    'Sign': '懒人码农',
    'TemplateParamSet': [
      sms,
      '30'
    ],
    'SmsSdkAppid': '1400433036'
  }
  smsConfig.reqSms.from_json_string(JSON.stringify(params));

  smsConfig.client.SendSms(smsConfig.reqSms, (errMsg, response) => {
    // 请求异常返回,打印异常信息
    if (errMsg) {
      res.send({
        code: 400,
        msg: '短信发送失败'
      })
      return;
    }
    // 请求正常返回,打印response对象
    res.send({
      code: 200,
      msg: '短信发送成功'
    })
    validatePhoneCode.push({
      phone: phone,
      sms: sms
    })
  });
}
示例

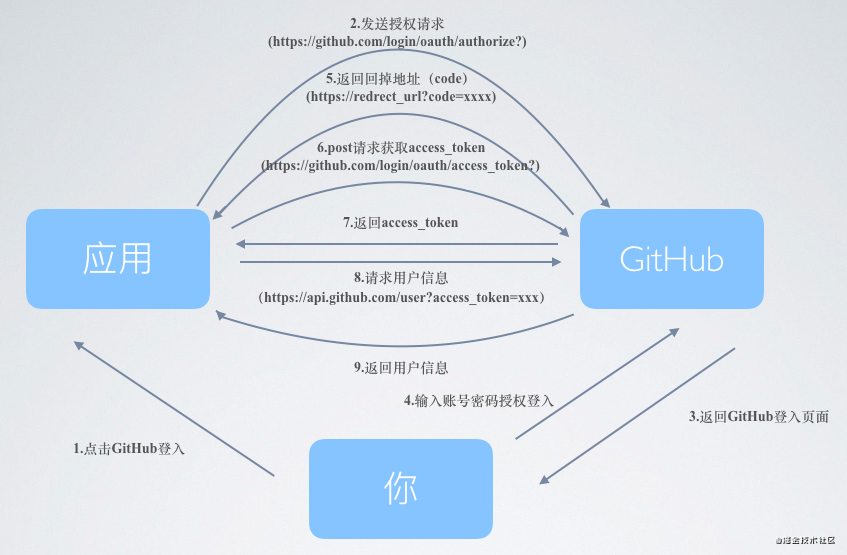
第三方登录
OAuth 2.0 是目前最流行的授权机制,用来授权第三方应用,获取用户数据。比如常用的第三方账号微博、微信、QQ、github 登录方式思路是一样的。
简单说,OAuth 就是一种授权机制。数据的所有者告诉系统,同意授权第三方应用进入系统,获取这些数据。系统从而产生一个短期的进入令牌(token),用来代替密码,供第三方应用使用。
微博登录
申请接入流程:注册账号 -> 成为开发者 -> 创建应用 -> 获取appid & appkey -> 接入微博登录
微博开放平台网址:https://open.weibo.com/connect
其实过程都比较简单,逻辑基本上分成四个步骤:
前端在登录界面进行跳转第三方授权界面进行授权,用户授权成功会跳转我们的回调界面并附加code参数。前端获取到code,将code传参给后端。 后端调用获取access_token的接口,将code以及申请应用得到的app_id、app_secret参数进行传递。获取access_token。 使用获得的access_token调用获取用户基本信息的接口,获取用户第三方平台的基本信息。 将用户基本信息保存到数据库,然后将用户信息返回给前端。
参考微博API接口文档:https://open.weibo.com/wiki/%E6%8E%88%E6%9D%83%E6%9C%BA%E5%88%B6
代码实现
// utils/index.js weibo配置
const weiboConfig = {
  // oauth_uri: 'https://api.weibo.com/oauth2/authorize',
  access_token_url: 'https://api.weibo.com/oauth2/access_token',
  // 获取 weibo 用户信息 url // eg: https://api.weibo.com/2/users/show.json?access_token=******&uid=******
  user_url: 'https://api.weibo.com/2/users/show.json',

  redirect_uri: 'http://localhost:8080',
  client_id: '',
  client_secret: '',
};

// authService.js
const oauthWeibo = async (req, res, next) => {
  const err = validationResult(req);
  if (!err.isEmpty()) {
    const [{ msg }] = err.errors;
    next(boom.badRequest(msg));
  } else {
    let { code } = req.query;
    let tokenResponse = await axios({
      method: "post",
      url: `${weiboConfig.access_token_url}?client_id=${weiboConfig.client_id}&client_secret=${weiboConfig.client_secret}&grant_type=authorization_code&redirect_uri=${weiboConfig.redirect_uri}&code=${code}`,
      headers: {
        accept: "application/json",
      }
    }).then().catch(err => {
      return err.response;
    });

    let accessToken = tokenResponse.data.access_token;

    if (accessToken) {
      let uid = tokenResponse.data.uid;
      let result = await axios({
        method: "get",
        url: `${weiboConfig.user_url}?access_token=${accessToken}&uid=${uid}`,
        headers: {
          accept: "application/json",
        }
      });

      let token = getToken(accessToken);
      if (result.status == 200) {
        let user = await validateAuthUser(uid);
        if (user) {
          user[0].login_times += 1;
          let updateAuthUser = await setAuthUser(result.data, 2, accessToken, 0, user[0].login_times);
          if (updateAuthUser.affectedRows == 1) {
            let userinfo = {
              id: user[0].id,
              openid: user[0].openid,
              user_id: user[0].user_id,
              username: user[0].username,
              nickname: user[0].nickname,
              type: user[0].type,
              avatar_url: user[0].avatar_url,
              create_time: user[0].create_time,
              expire_time: user[0].expire_time,
              expires_in: user[0].expires_in,
              login_time: user[0].login_time,
              login_times: user[0].login_times,
            };
            res.send({
              code: CODE_SUCCESS,
              msg: "weibo账号登录成功",
              data: {
                token,
                userinfo,
              },
            });

          } else {
            res.send({
              code: CODE_ERROR,
              msg: "weibo账号登录失败",
              data: null,
            });
          }

        } else {
          let addAuthUser = await setAuthUser(result.data, 2, accessToken, 1, null);
          console.log("addAuthUser===", addAuthUser);
          if (addAuthUser.affectedRows == 1) {
            let queryUser = await getAuthUser(addAuthUser.insertId);
            let userImage = await addUserImage(queryUser[0].openid);

            if (userImage) {
              let userinfo = {
                id: queryUser[0].id,
                openid: queryUser[0].openid,
                user_id: queryUser[0].user_id,
                username: queryUser[0].username,
                nickname: queryUser[0].nickname,
                type: queryUser[0].type,
                avatar_url: queryUser[0].avatar_url,
                create_time: queryUser[0].create_time,
                expire_time: queryUser[0].expire_time,
                expires_in: queryUser[0].expires_in,
                login_time: queryUser[0].login_time,
                login_times: queryUser[0].login_times,
              };

              res.send({
                code: CODE_SUCCESS,
                msg: "weibo账号登录成功",
                data: {
                  token,
                  userinfo,
                },
              });
            }
          } else {
            res.send({
              code: CODE_ERROR,
              msg: "weibo账号登录失败",
              data: null,
            });
          }
        }

      } else {
        res.send({
          code: CODE_ERROR,
          msg: "weibo账号登录失败",
          data: null,
        });
      }

    } else {
      if (tokenResponse.data.error_code == 21325) {
        res.send({
          code: CODE_ERROR,
          msg: "code码无效或已过期",
        });
      } else if (tokenResponse.data.error_code == 21327) {
        res.send({
          code: -2,
          msg: "token已过期",
        });
      } else {
        res.send({
          code: CODE_ERROR,
          msg: tokenResponse.data.error_description,
        });
      }
    }
  }
};
github登录
github应用登记流程如下图所示:

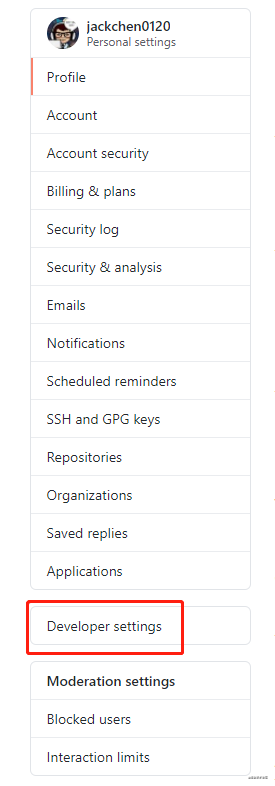

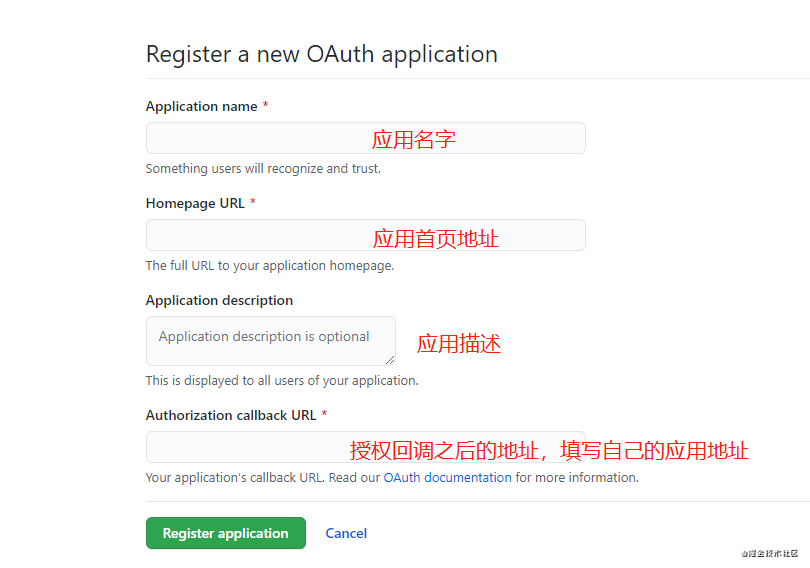
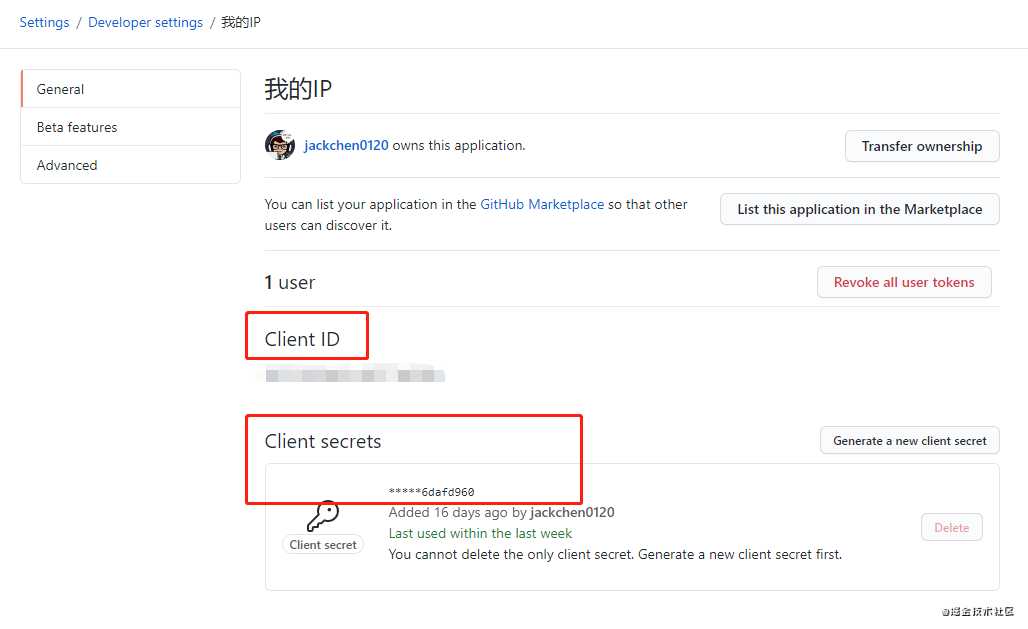
创建完之后记住页面上方的 Client ID 和 Client Secret,后面开发时需要用到这两个参数。
代码实现
// utils/index.js github配置
const githubConfig = {
    // oauth_uri: 'https://github.com/login/oauth/authorize',
    access_token_url: 'https://github.com/login/oauth/access_token',
    // 获取 github 用户信息 url // eg: https://api.github.com/user?access_token=******&scope=&token_type=bearer
    user_url: 'https://api.github.com/user',

    redirect_uri: 'http://localhost:8080',
    client_id: '',
    client_secret: '',
};

// authService.js
const oauthGithub = async (req, res, next) => {
  const err = validationResult(req);
  // 如果验证错误,empty不为空
  if (!err.isEmpty()) {
    // 获取错误信息
    const [{ msg }] = err.errors;
    // 抛出错误,交给我们自定义的统一异常处理程序进行错误返回
    next(boom.badRequest(msg));
  } else {
    let { code } = req.query;
    let tokenResponse = await axios({
      method: "post",
      url: `${githubConfig.access_token_url}?client_id=${githubConfig.client_id}&client_secret=${githubConfig.client_secret}&code=${code}`,
      headers: {
        accept: "application/json",
      },
    });

    let accessToken = tokenResponse.data.access_token;
    if (accessToken) {
      let result = await axios({
        method: "get",
        url: `${githubConfig.user_url}`,
        headers: {
          accept: "application/json",
          Authorization: `token ${accessToken}`,
          "User-Agent": "jackchen0120",
        },
      });

      let token = getToken(accessToken);
      if (result.status == 200) {
        let user = await validateAuthUser(result.data.id);
        if (user) {
          user[0].login_times += 1;
          let updateAuthUser = await setAuthUser(result.data, 3, accessToken, 0, user[0].login_times);
          if (updateAuthUser.affectedRows == 1) {
            let userinfo = {
              id: user[0].id,
              openid: user[0].openid,
              user_id: user[0].user_id,
              username: user[0].username,
              nickname: user[0].nickname,
              type: user[0].type,
              avatar_url: user[0].avatar_url,
              create_time: user[0].create_time,
              expire_time: user[0].expire_time,
              expires_in: user[0].expires_in,
              login_time: user[0].login_time,
              login_times: user[0].login_times,
            };
            res.send({
              code: CODE_SUCCESS,
              msg: "github账号登录成功",
              data: {
                token,
                userinfo,
              },
            });
          } else {
            res.send({
              code: CODE_ERROR,
              msg: "github账号登录失败",
              data: null,
            });
          }
        } else {
          let addAuthUser = await setAuthUser(result.data, 3, accessToken, 1, null);
          if (addAuthUser.affectedRows == 1) {
            let queryUser = await getAuthUser(addAuthUser.insertId);
            let userImage = await addUserImage(queryUser[0].openid);

            if (userImage) {
              let userinfo = {
                id: queryUser[0].id,
                openid: queryUser[0].openid,
                user_id: queryUser[0].user_id,
                username: queryUser[0].username,
                nickname: queryUser[0].nickname,
                type: queryUser[0].type,
                avatar_url: queryUser[0].avatar_url,
                create_time: queryUser[0].create_time,
                expire_time: queryUser[0].expire_time,
                expires_in: queryUser[0].expires_in,
                login_time: queryUser[0].login_time,
                login_times: queryUser[0].login_times,
              };

              res.send({
                code: CODE_SUCCESS,
                msg: "github账号登录成功",
                data: {
                  token,
                  userinfo,
                },
              });
            }
          } else {
            res.send({
              code: CODE_ERROR,
              msg: "github账号登录失败",
              data: null,
            });
          }
        }

      } else {
        res.send({
          code: CODE_ERROR,
          msg: "github账号登录失败",
        });
      }

    } else {
      res.send({
        code: CODE_ERROR,
        msg: "code码无效或已过期",
      });
    }
  }
};
上传文件
图片上传是项目开发中经常用到的功能,Node 社区在这方面也有了相对完善的支持。常用的开源组件有 multer、formidable 等,借助这两个开源组件,可以轻松搞定图片上传。
本地创建图片服务器
安装 multer,借助 Express、multer支持单图、多图上传
npm install -S multer
代码实现
// routes/users.js
const multer = require('multer');
const upload = multer({
    dest: path.join(__dirname, '../public/uploads/')
}).single('file');
// 上传头像接口
router.post('/editUserAvatar', upload, user.editUserAvatar);

// userService.js单图上传
const editUserAvatar = async (req, res, next) => {
  const err = validationResult(req);
  if (!err.isEmpty()) {
    const [{ msg }] = err.errors;
    next(boom.badRequest(msg));
  } else {
    let file = req.file;
    console.log(req.file);
    if (!file) {
        // 判断图片文件是否存在
        res.send({
          code: CODE_ERROR,
          msg: '上传失败'
        })
    } else {
        // 存储上传对象信息
        let fileInfo = {};
        // 获取后缀扩展
        // let extName = file.originalname.slice(file.originalname.lastIndexOf('.'));
        let extName = file.mimetype.slice(file.mimetype.lastIndexOf('/')).replace('/', '.');
        let upload = path.join(__dirname, '../public/uploads/');
        // 修改名字,第一个参数为旧路径,第二个参数为新路径(注意:旧路径要和上面的dest保持一致)
        fs.renameSync(upload + file.filename, upload + file.filename + extName);
        // 获取文件信息
        // fileInfo.mimetype = file.mimetype;
        // fileInfo.originalname = file.originalname;
        // fileInfo.size = file.size;
        // fileInfo.path = file.path;

        // 设置响应类型及编码
        res.set({
            'content-type': 'application/json; charset=utf-8'
        })

        let { user_id } = req.body;
        let imgUrl = 'http://localhost:3000/static/uploads/' + file.filename + extName;

        if (user_id) {
            let sql = `update user_image set url='${imgUrl}', create_time='${moment().format('YYYY-MM-DD HH:mm:ss')}' where user_id='${user_id}'`;
            let image = await queryOne(sql);

            if (image) {
              res.send({
                code: CODE_SUCCESS,
                msg: '上传成功',
                url: imgUrl
              })
            } else {
              res.send({
                code: CODE_ERROR,
                msg: '用户user_id不存在'
              })
            }

        } else {
            res.send({
                code: CODE_ERROR,
                msg: '用户user_id不能为空'
            })
        }
    }
  }
}
本地上传图片到七牛云空间
注册账号 -> 实名认证 -> 控制台 -> 选择对象存储kodo -> 新建空间 -> 申请空间成功
免费获取10GB存储空间,七牛云网址:https://www.qiniu.com/

可以参考Nodejs SDK 七牛云开发者文档:https://developer.qiniu.com/kodo/sdk/1289/nodejs
安装
npm install -S qiniu
代码实现
// utils/index.js
const qiniu = require('qiniu');
// 创建七牛云上传凭证
let bucket = ''; // 上传的空间名
let imageUrl = ''; // 域名名称
let accessKey = ''; // 实名认证后可以获取密钥
let secretKey = '';
let mac = new qiniu.auth.digest.Mac(accessKey, secretKey);
let options = {
  scope: bucket,
};
let putPolicy = new qiniu.rs.PutPolicy(options);
let uploadToken = putPolicy.uploadToken(mac);
let qnConfig = new qiniu.conf.Config();
qnConfig.zone = qiniu.zone.Zone_z2;
module.exports = uploadToken;

// userService.js 获取上传凭证
const uploadQiniu = (req, res, next) => {
  const err = validationResult(req);
  if (!err.isEmpty()) {
    const [{ msg }] = err.errors;
    next(boom.badRequest(msg));
  } else {
    res.send({
      code: CODE_SUCCESS,
      msg: '上传凭证获取成功',
      upToken: uploadToken
    })
  }
}
请求路由处理
在routes文件夹下新建index.js和user.js文件。
index.js文件是初始化路由信息,自定义全局异常处理,代码如下:
const express = require('express');
const userRouter = require('./users'); // 引入user路由模块
const { jwtAuth, decode } = require('../utils/user-jwt'); // 引入jwt认证函数
const router = express.Router(); // 注册路由

router.use(jwtAuth); // 注入认证模块

router.use('/api/users', userRouter); // 注入用户路由模块

// 自定义统一异常处理中间件,需要放在代码最后
router.use((err, req, res, next) => {
  // 自定义用户认证失败的错误返回
  if (err && err.name === 'UnauthorizedError') {
    const { status = 401, message } = err;
    // 抛出401异常
    res.status(status).json({
      code: status,
      msg: 'token失效,请重新登录',
      data: null
    })
  } else {
    const { output } = err || {};
    // 错误码和错误信息
    const errCode = (output && output.statusCode) || 500;
    const errMsg = (output && output.payload && output.payload.error) || err.message;
    res.status(errCode).json({
      code: errCode,
      msg: errMsg
    })
  }
})

module.exports = router;
user.js文件是用户路由模块,代码如下:
const express = require('express');
const router = express.Router();
const user = require('../services/userService');
const auth = require('../services/authService');
const path = require('path');

const multer = require('multer');
const upload = multer({
    dest: path.join(__dirname, '../public/uploads/')
}).single('file');

// 验证码登录
router.post('/login', user.login);
// 获取图形验证码
router.get('/getCaptcha', user.getCaptcha);
// 发送短信验证码
router.get('/sendCoreCode', user.sendCoreCode);
// 密码登录
router.post('/loginPwd', user.loginPwd);
// github登录
router.get('/oauthGithub', auth.oauthGithub);
// weibo登录
router.get('/oauthWeibo', auth.oauthWeibo);
// 获取个人信息
router.get('/getMemberInfo', user.getMemberInfo);
// 修改个人信息
router.post('/modifyUser', user.modifyUser);
// 上传头像
router.post('/editUserAvatar', upload, user.editUserAvatar);
// 获取七牛云上传凭证
router.get('/qiniuToken', user.uploadQiniu);

module.exports = router;
入口文件配置
在根目录 app.js 程序入口文件中,导入 Express 模块,再引入常用的中间件和自定义 routes 路由的中间件,代码如下:
const bodyParser = require('body-parser'); // 引入body-parser模块
const cookieParser = require('cookie-parser'); // 引入cookie-parser模块,用于客户端操作cookie
const express = require('express'); // 引入express模块
const path = require('path'); // 引入path模块,处理文件路径小工具
const cors = require('cors'); // 引入cors模块,用于解决跨越
const routes = require('./routes'); //导入自定义路由文件,创建模块化路由
const session = require('express-session'); // 引入express-session模块,用于服务器端操作session
const app = express();

const port = process.env.PORT || 3000;

app.use('/static', express.static(path.join(__dirname, 'public'))); // 静态资源
app.use(bodyParser.json()); // 解析json数据格式
app.use(bodyParser.urlencoded({extended: true})); // 解析form表单提交的数据application/x-www-form-urlencoded

app.use(cookieParser());
app.use(session({
 secret: 'keyboard cat',
 resave: false,
 saveUninitialized: true,
 cookie: ('name', 'value', {maxAge:  5 * 60 * 1000, secure: false})
}));

app.use(cors()); // 注入cors模块解决跨域

app.use('/', routes);

app.listen(port, () => { // 监听3000端口
 console.log('服务已启动 http://localhost:3000');
})
前端
目录结构
│  package.json                      // npm包管理所需模块及配置信息
│  vue.config.js                     // webpack配置
├─public
│      favicon.ico                   // 图标
│      index.html                    // 入口html文件
└─src
    │  App.vue                       // 根组件
    │  main.js                       // 程序入口文件
    │  router.js                     // 单页面路由注册组件
    ├─assets                         // 存放公共图片文件夹
    ├─components
    │  │  Footer.vue                 // 页面底部公用组件
    │  │  Comment.vue                // 评论列表组件
    │  │  List.vue                   // 公用列表组件
    │  │  Loading.vue                // 加载状态组件
    │  │  popupDialog.vue            // 对话框组件
    │  │  Suggest.vue                // 意见反馈表单组件
    │  │
    │  └─address
    │          add.vue               // 添加地址组件
    │          list.vue              // 常用地址列表组件
    ├─js
    │      apis.js                  // API接口统一管理
    │      area.js                  // 省市区JSON数据
    │      axios.js                 // axios封装与拦截器配置
    │      env.js                   // 自动部署服务器环境
    │      utils.js                 // 统一封装工具类方法
    ├─store
    │      index.js                 // 状态管理仓库入口文件
    │      types.js                 // 状态管理常量定义
    ├─style
    │      common.less               // 公共样式文件
    │      style.less                // 基础样式文件
    └─view
        ├─advise
        │      detail.vue            // 问题反馈详情
        │      list.vue              // 问题反馈列表
        ├─client
        │      index.vue             // 我的评论列表
        ├─collect
        │      index.vue             // 我的收藏列表
        ├─contentDetail
        │      index.vue             // 内容详情
        ├─contentsList
        │      index.vue             // 内容列表
        ├─fans
        │      index.vue             // 我的粉丝列表
        ├─follow
        │      index.vue             // 我的关注列表
        ├─login
        │      index.vue             // 登录界面
        ├─message
        │      index.vue             // 消息列表
        ├─my
        │  │  card.vue               // ta的IP详情
        │  │  info.vue               // 我的资料详情
        │  └─card-item
        │          focus.vue         // 是否关注弹框
        ├─online
        │      index.vue             // 在线咨询
        ├─order
        │      detail.vue            // 订单详情
        │      list.vue              // 我的订单列表
        │      placeOrder.vue        // 确认订单
        ├─productDetail
        │      index.vue             // 产品详情
        ├─productsList
        │      index.vue             // 产品列表
        ├─publishCon
        │      index.vue             // 内容发布
        ├─publishPro
        │      index.vue             // 产品发布
        ├─setting
        │      index.vue             // 设置
        └─user
                index.vue            // 个人中心
技术栈
vue2.6 vue-router vuex axios vant amfe-flexible postcss-pxtorem js-cookie flex
MySQL数据库
MySQL数据库安装使用流程,可以移步到我的另一篇博客<前端必知必会MySQL的那些事儿 - NodeJS全栈成长之路>有详细介绍。
表结构设计
使用SQL命令或可视化工具来创建数据库,再根据实际业务需求理清表之间的关系建表,目前有用户表user,用户信息表user_info,第三方用户表user_third_auth,文件存储表user_image等等。
创建数据库
CREATE DATABASE `node_test` DEFAULT CHARACTER SET utf8 COLLATE utf8_general_ci;
创建用户表
CREATE TABLE `user` (
  `id` bigint(20) NOT NULL AUTO_INCREMENT COMMENT '自动递增',
  `user_id` varchar(40) NOT NULL COMMENT '关联的本站用户ID',
  `openid` varchar(64) DEFAULT NULL COMMENT '第三方唯一ID',
  `username` varchar(50) DEFAULT NULL COMMENT '用户名',
  `email` varchar(100) DEFAULT NULL COMMENT '邮箱',
  `phone` bigint(11) DEFAULT NULL COMMENT '手机号',
  `password` varchar(50) DEFAULT NULL COMMENT '密码',
  `status` tinyint(1) DEFAULT NULL COMMENT '用户状态:0-禁用,1-开启',
  `create_time` datetime DEFAULT NULL COMMENT '创建时间',
  `update_time` datetime DEFAULT NULL COMMENT '更新时间',
  PRIMARY KEY (`id`)
) ENGINE=InnoDB AUTO_INCREMENT=1 DEFAULT CHARSET=utf8 COMMENT='用户表';
创建用户信息表
CREATE TABLE `user_info` (
  `id` tinyint(11) NOT NULL AUTO_INCREMENT COMMENT '自增ID',
  `user_id` varchar(36) NOT NULL COMMENT '关联的本站用户ID',
  `avatar` varchar(255) DEFAULT NULL COMMENT '头像',
  `nickname` varchar(30) DEFAULT NULL COMMENT '昵称',
  `age` varchar(3) DEFAULT NULL COMMENT '年龄',
  `sex` varchar(2) DEFAULT NULL COMMENT '性别:u-未知 m-男 w-女',
  `birthday` varchar(10) DEFAULT NULL COMMENT '生日',
  `code` varchar(6) DEFAULT NULL COMMENT '省市区编码',
  `area` varchar(50) DEFAULT NULL COMMENT '所在地区',
  `address` varchar(100) DEFAULT NULL COMMENT '详细地址',
  PRIMARY KEY (`id`)
) ENGINE=InnoDB AUTO_INCREMENT=1 DEFAULT CHARSET=utf8 COMMENT='用户信息表';
创建第三方用户表
CREATE TABLE `user_third_auth` (
   `id` bigint(20) NOT NULL AUTO_INCREMENT COMMENT '自增ID',
  `user_id` varchar(40) DEFAULT '' COMMENT '关联的本站用户ID',
  `openid` varchar(64) DEFAULT NULL COMMENT '第三方唯一ID',
  `type` tinyint(1) DEFAULT NULL COMMENT '类型:1-QQ 2-微博 3-github 4-微信',
  `nickname` varchar(30) DEFAULT NULL COMMENT '第三方昵称',
  `access_token` varchar(128) DEFAULT NULL COMMENT '第三方获取的token(可有可无)',
  `avatar_url` varchar(255) DEFAULT NULL COMMENT '头像',
  `username` varchar(50) DEFAULT NULL COMMENT '第三方用户名',
  `create_time` datetime DEFAULT NULL COMMENT '创建时间',
  `login_time` datetime DEFAULT NULL COMMENT '登录时间',
  `login_times` bigint(12) DEFAULT NULL COMMENT '登录次数',
  `expires_in` bigint(13) DEFAULT NULL COMMENT '有效期',
  `expire_time` datetime DEFAULT NULL COMMENT '过期时间',
  PRIMARY KEY (`id`)
) ENGINE=InnoDB AUTO_INCREMENT=5 DEFAULT CHARSET=utf8 COMMENT='第三方用户表';
创建图片存储表
CREATE TABLE `user_image` (
  `id` bigint(20) NOT NULL AUTO_INCREMENT COMMENT '自增ID',
  `user_id` varchar(40) NOT NULL COMMENT '关联的本站用户ID',
  `url` varchar(500) DEFAULT NULL COMMENT '图片地址',
  `create_time` datetime DEFAULT NULL COMMENT '创建时间',
  PRIMARY KEY (`id`)
) ENGINE=InnoDB AUTO_INCREMENT=2 DEFAULT CHARSET=utf8 COMMENT='图片存储表';
部署上线
前后端部署上线流程,可以移步到我的另一篇博客<NodeJS全栈开发一个功能完善的Express项目>有详细介绍。
写在最后
由于篇幅太长,先写到这吧,后续会作为商城项目实战系列篇进行一一分享出来,主要是介绍自己开发总结及挖坑,不断优化填坑~🐶
如果小伙伴看完真觉得不错,那就点个👍或者给个💖吧!你们的赞和 star 是我编写更多更精彩文章的动力!
附上github地址:https://github.com/jackchen0120/ip-nodejs-api
此项目还有很多不足或优化的地方,期待提供宝贵意见。
看完三件事
转发本文,点赞或者点个「在看」,是对我最大的认可和支持; 关注公众号「技术漫谈」,订阅更多精彩内容,获取更多学习资料; 公众号后台回复「加群」,加入算法和技术交流群,与更多读者交流。


赏个“赞”或“在看”呗~