
微信云开发被释放了,重新写了个足球游戏
共 5193字,需浏览 11分钟
· 2022-11-14
不停歇的球是在2019年年底开发上线的,详细的技术细节见下面这篇文章。
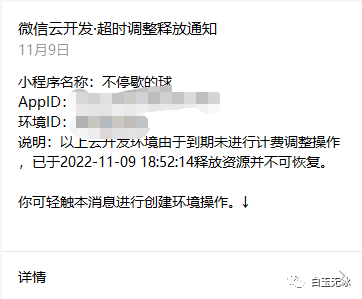
其中微信小游戏的总排行榜和用户数据的存储,采用的是微信云开发中的云函数和数据库。但是最近微信云收费了,无法再进行游戏了。
刚好最近有足球比赛,于是,在网上体验了一些足球相关的小游戏,找了其中的一款并复刻!重新上线!
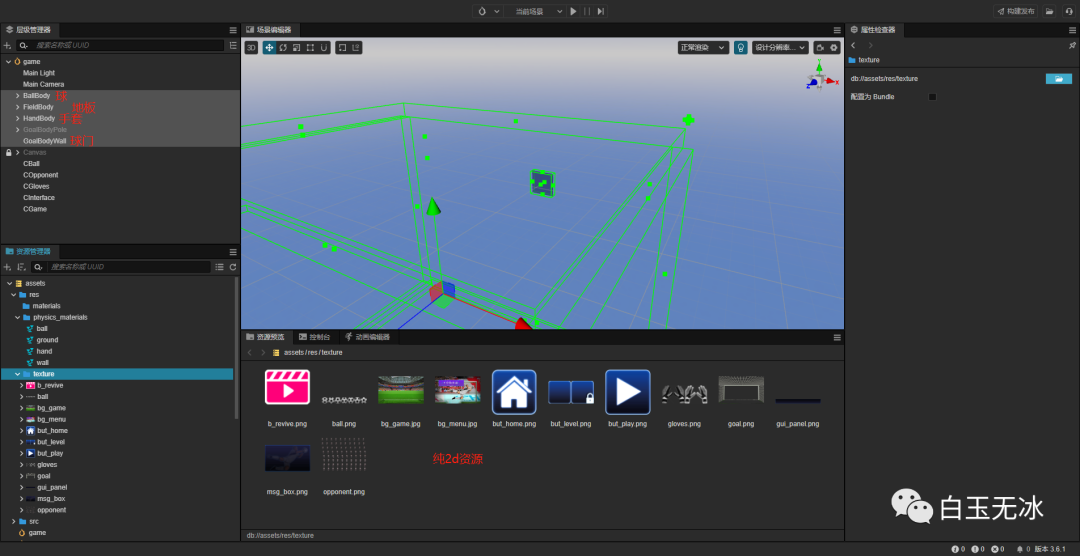
拿到的资源都是2d资源,采用的实现方式是用3D物理模拟,2D图片同步展示。
序列帧动画
动画图是一张大图,每帧动画按照同一大小从左至右,从上到下排列。
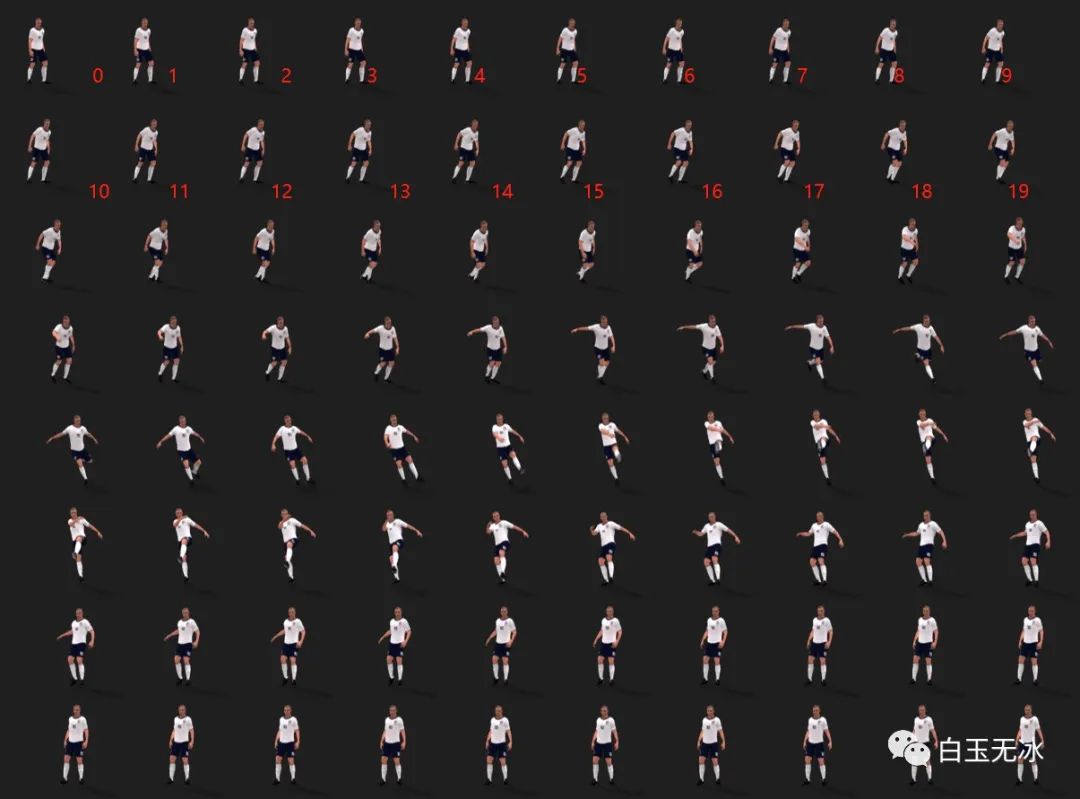
于是写了个脚本分割这些图片,和播放对应的序列帧。
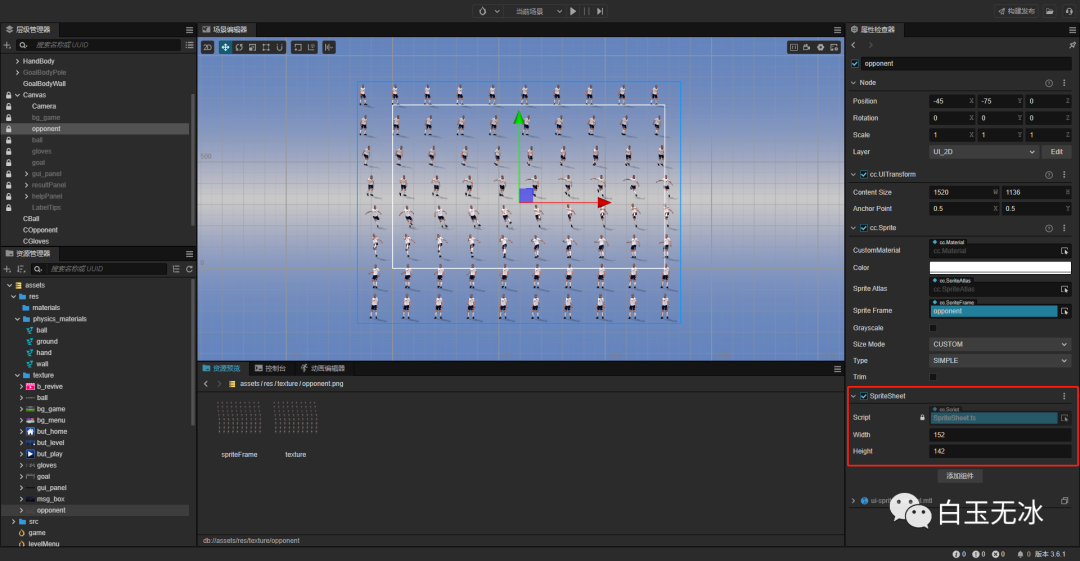
核心逻辑就是拆分 spriteFrame , 重新设置裁剪区域 spriteFrame.rect ,并更新uv。直接看下面的组件代码吧。
    import { _decorator, Component, Node, Sprite, SpriteFrame, Rect, mat4 } from 'cc';
const { ccclass, property, requireComponent } = _decorator;

@ccclass('SpriteSheet')
@requireComponent(Sprite)
export class SpriteSheet extends Component {

private _sprite: Sprite
private _spriteFrame: SpriteFrame
    @property
    width: number = 0
    @property
    height: number = 0

private _rect = new Rect()
private _row = 0;
private _col = 0;

    onLoad() {
this._sprite = this.getComponent(Sprite);
this._spriteFrame = this._sprite.spriteFrame.clone();
this._sprite.spriteFrame = this._spriteFrame
this._row = Math.floor(this._spriteFrame.height / this.height);
this._col = Math.floor(this._spriteFrame.width / this.width);
this.gotoAndStop(0)
    }

    gotoAndStop(frame: number) {
const row = frame % this._col;
const col = Math.floor(frame / this._col) % this._row;
// console.log("gotoAndStop ", frame, row, col)
this._rect.set(this.width * row, this.height * col, this.width, this.height);
this._spriteFrame.rect = this._rect;
this._sprite['_updateUVs']();
    }

private _curFrame: number = -1
private _frameStart: number = -1
private _frameEnd: number = -1
private _aniCb: Function
play(frameStart: number, frameEnd: number, time: number, cb: Function, loop = false) {
        console.log("SpriteSheet play", frameStart, frameEnd)

this._aniCb = cb
const totalFrame = frameEnd - frameStart
this._curFrame = frameStart
this._frameEnd = frameEnd
this.gotoAndStop(frameStart);
this.unschedule(this.playAni)
this.schedule(this.playAni, time / totalFrame, totalFrame)
    }

private playAni() {
this._curFrame++;
this.gotoAndStop(this._curFrame);
if (this._curFrame == this._frameEnd) {
this._aniCb()
        }
    }

}
同步2D表现
位置同步
使用相机的视图投影矩阵,算出3d物体的NDC坐标,然后再根据Canvas的大小与UI相对位置,算出2D的位置。
    convert3dPosTo2dScreen(worldPosition: Vec3) {
const widthHalf = Setting.CANVAS_WIDTH_HALF
const heightHalf = Setting.CANVAS_HEIGHT_HALF
const vector = worldPosition.clone();
const matViewProj = this.oCamera.camera.matViewProj
        Vec3.transformMat4(vector, vector, matViewProj);

vector.x = (vector.x * widthHalf)
vector.y = (vector.y * heightHalf)

return vector;
}
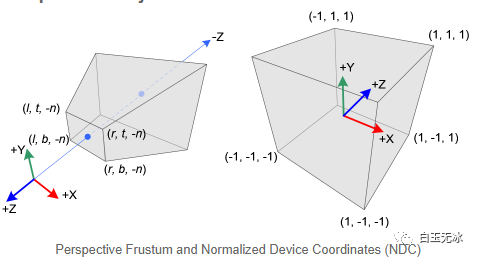
NDC 坐标是个正方体。
-
z坐标在 -1~1 之间, 从小到大可理解为从前到后的映射
-
y坐标在 -1~1 之间, 从小到大可理解为从下到上的映射
-
x坐标在 -1~1 之间, 从小到大可理解为从左到右的映射
再来一张图一起看看。
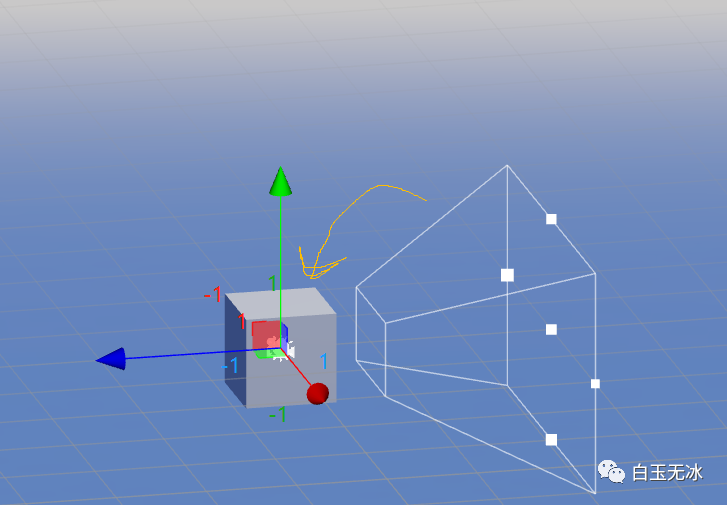
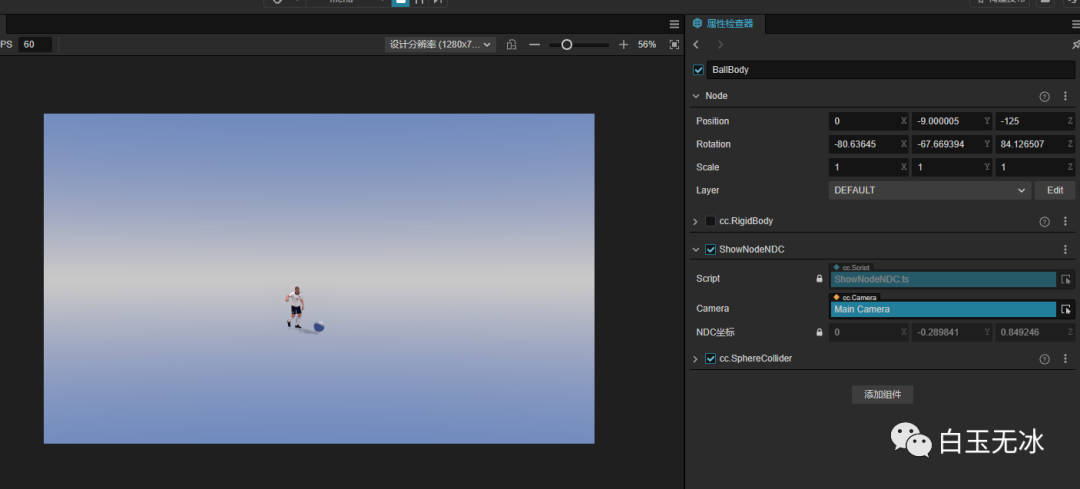
为了更方便看清NDC坐标,这里写了个脚本实时查看节点的NDC坐标。
    import { _decorator, Component, Node, Camera, NodeEventType, Vec4, Vec3 } from 'cc';
const { ccclass, property, executeInEditMode } = _decorator;

@ccclass('ShowNodeNDC')
export class ShowNodeNDC extends Component {

    @property(Camera)
    camera: Camera = null!

    @property({ readonly: true, displayName: "NDC坐标" })
    ndcPos: Vec3 = new Vec3()

    start() {
this.node.on(NodeEventType.TRANSFORM_CHANGED, this.onTransformChange, this)
this.onTransformChange()
    }

private onTransformChange() {
if (!this.camera) return
this.ndcPos = this.node.worldPosition.clone();
const matViewProj = this.camera.camera.matViewProj
        Vec3.transformMat4(this.ndcPos, this.ndcPos, matViewProj);
    }
}
发球前,NDC的Z值比较大
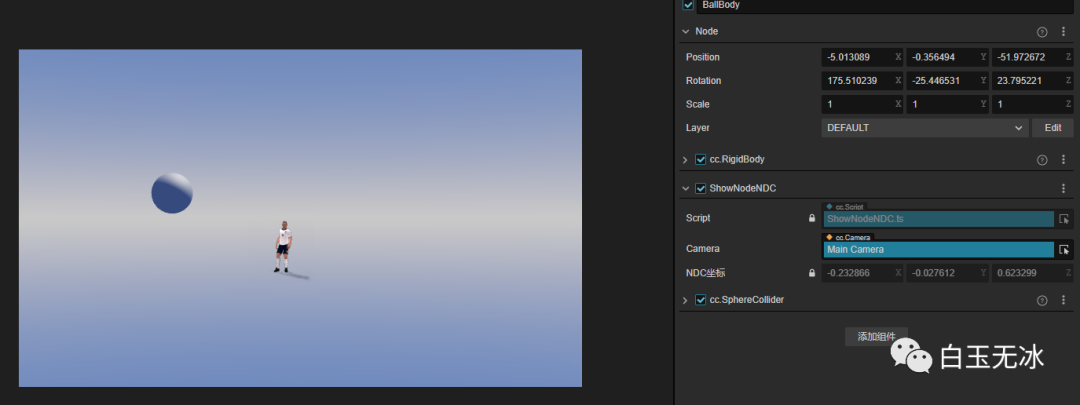
发射至左上角时,观察x,y,z坐标
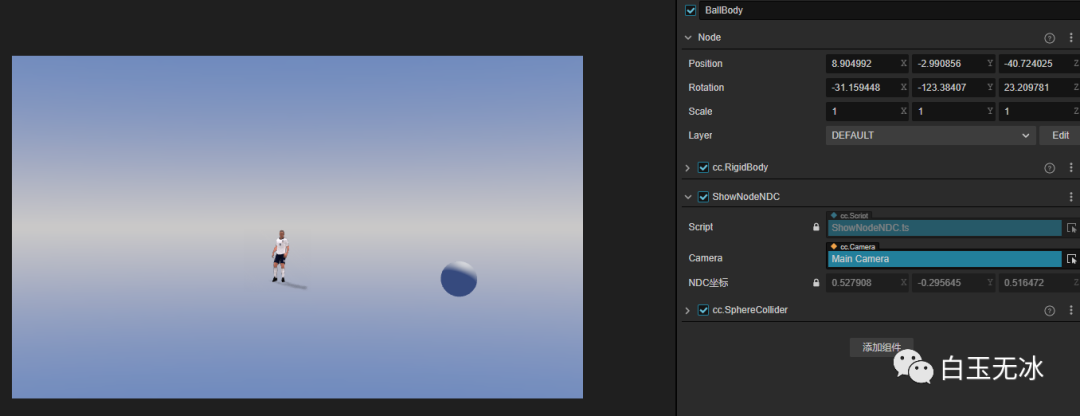
发射右下角时,观察x,y,z坐标
为什么要用相机的视图投影矩阵?主要是为了复习巩固知识 
当然也可以用相机的方法去转换坐标
            /**
         * @en Convert a world position to a screen space (left-top origin) position.
         * @zh 将一个世界空间坐标转换为屏幕空间(左上角为原点)坐标。
         * @param worldPos The position in world space coordinates
         * @param out The output position in screen space coordinates.
         * @returns Return the output position object.
         */
        worldToScreen(worldPos: math.Vec3 | Readonly<math.Vec3>, out?: math.Vec3): math.Vec3;
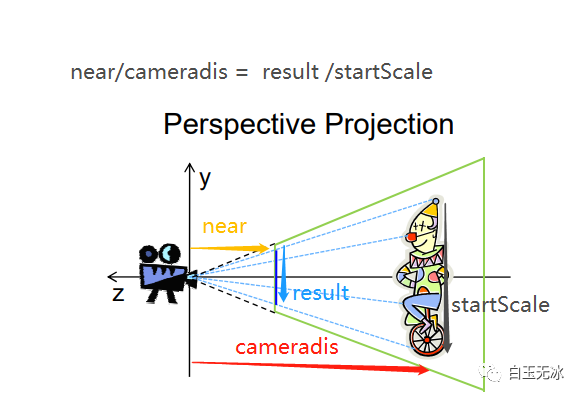
缩放
原理是相似三角形!
this.oBall.scale(this.oCamera.near / cameradis * this.oBall.getStartScale)
触摸同步
同步触摸与手套的位置
-
先同步刚体3d位置
-
再同步2D的图片位置
因为手套在同一的Z平面移动,所以可以先计算射线在z轴的方向上的距离,然后再算其他的轴。
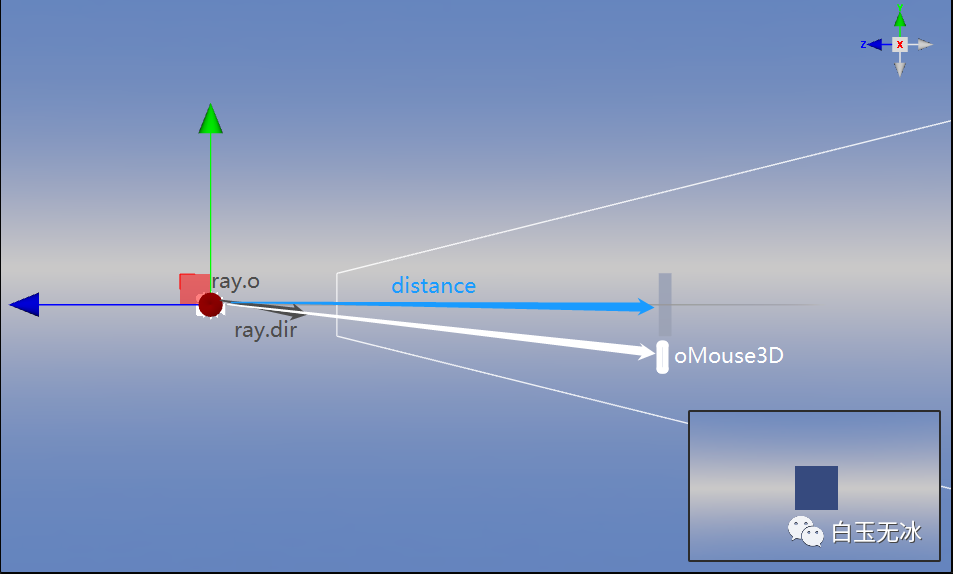
详细见代码
        private _ray: geometry.Ray = new geometry.Ray();
    onHandKeeper(event: EventTouch) {
// 得出射线
const touch = event.touch!;
this.oCamera.screenPointToRay(touch.getLocationX(), touch.getLocationY(), this._ray);

// 手套的3d坐标
const oHandKeeperBody = this.oGloves.oPhysics;
const oHandKeeperBodyPosition = oHandKeeperBody.node.worldPosition.clone();

// 手套的z坐标不变,算出射线与Z轴方向的距离
const distance = -oHandKeeperBodyPosition.z + this._ray.o.z;
const oMouse3D = new Vec3();
        Vec3.scaleAndAdd(oMouse3D, this._ray.o, this._ray.d, distance)
        oMouse3D.z = oHandKeeperBodyPosition.z

        oHandKeeperBody.node.setWorldPosition(oMouse3D);

// 计算2d坐标
var oPos2D = this.convert3dPosTo2dScreen(oMouse3D);
this.oGloves.setPosition(oPos2D.x, oPos2D.y);

    }
小结
在线体验:微信搜【不停歇的球】
代码地址:https://store.cocos.com/app/detail/4227
点击 “阅读原文”查看完成工程
“点赞“ ”在看” 鼓励一下 ▼
▼