 前端进阶学习交流


回复“前端”即可获赠前端相关学习资料
SVG填充图案用于用由图像组成的图案填充形状。该图案可以由SVG图像(形状)或位图图像组成。SVG填充模式看起来就像从Photoshop等中所习惯的那样,被称为“平铺”。
一、填充图案
简单的svg填充模式。
示例:
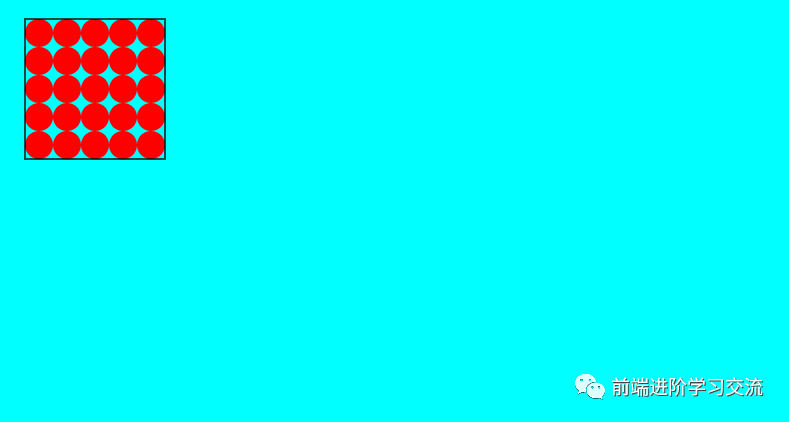
<html><body style="background-color: aqua;"><title>项目</title><svg width="500" height="150"><defs><pattern id="pattern1" x="10" y="10" width="20" height="20" patternunits="userSpaceOnUse"><circle cx="10" cy="10" r="10" style="stroke: none; fill: #FF0000"></circle></pattern></defs><rect x="10" y="10" width="100" height="100" style="stroke: #000000; fill: url(#pattern1);"></rect></svg></body></html>
代码解析:
首先,在<defs>元素内定义<pattern>元素。图案包含一个circle元素。
circle元素将用作填充图案。其次,在CSS属性中<rect>声明一个元素fill,该元素引用<pattern>其style属性中的元素ID。
其次,声明一个<rect>元素,该元素在CSS fill属性中引用其样式属性中的<pattern>元素ID。
运行后图像效果:
注意
<pattern>元素中定义的圆是如何用作矩形的填充的。还要注意圆圈是如何从左到右,从上到下不断重复的。
二、X,Y,宽度和高度
pattern元素的x和y属性定义图案开始在<pattern>元素中的形状中的距离。<pattern>元素的width和height属性定义图案的宽度和高度。
案例分析
这是从头开始的示例,并且将x和y设置为0:
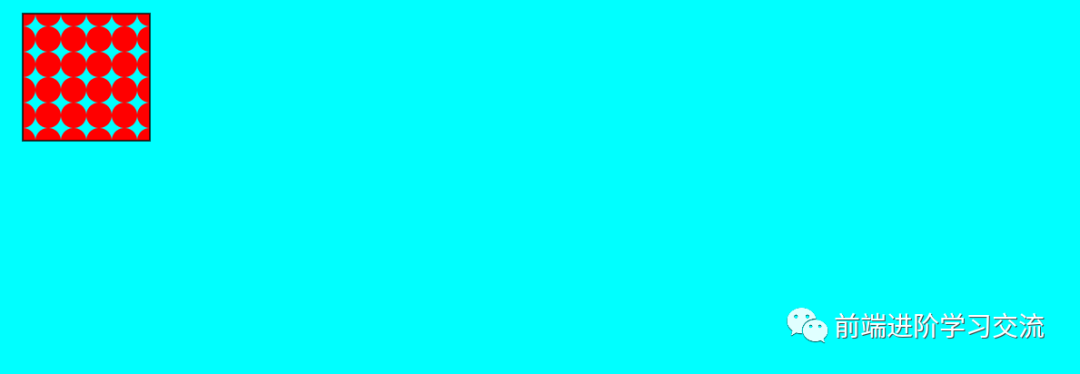
<svg width="500" height="150"><defs><pattern id="pattern2"x="0" y="0" width="20" height="20"patternUnits="userSpaceOnUse"><circle cx="10" cy="10" r="10" style="stroke: none; fill: #FF0000"></circle></pattern></defs><rect x="10" y="10" width="100" height="100"style="stroke: #000000; fill: url(#pattern2);" /></svg>
运行后图像效果:
注意
图案现在是如何从圆的中间开始的(在矩形的顶部和左侧)。创建自己的填充图案时,通过使用x和y属性值来实现所需的效果。
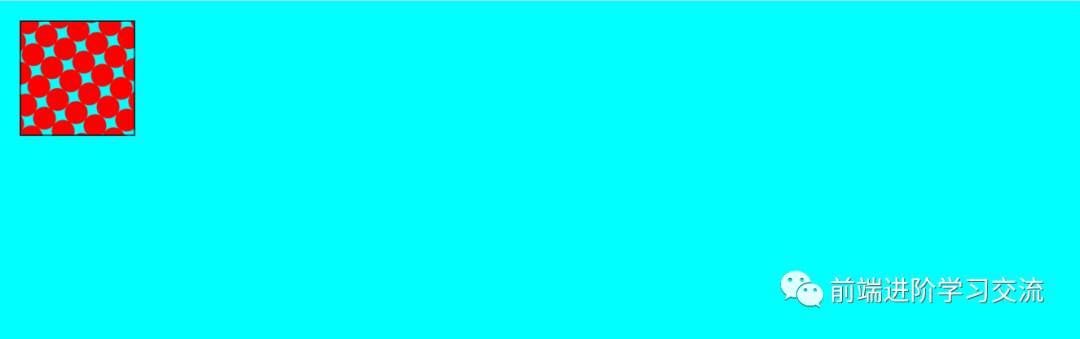
width和height属性设定的图案的宽度和高度。
在前面的示例中width,height它们都设置为20,即圆的直径。因此,圆圈一遍又一遍地重复着,中间没有空格。
设置图案的width(宽度)为25,而不是20。
这样,现在在水平圆圈之间现在有5个像素间隔。
<pattern id="pattern2" x="0" y="0" width="25" height="20" patternUnits="userSpaceOnUse">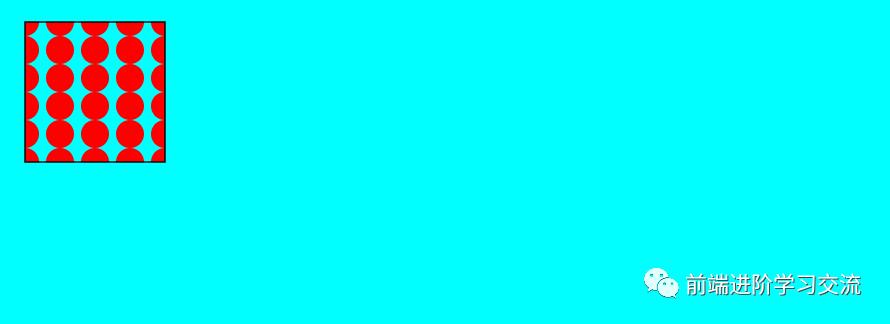
width, height都设置为25
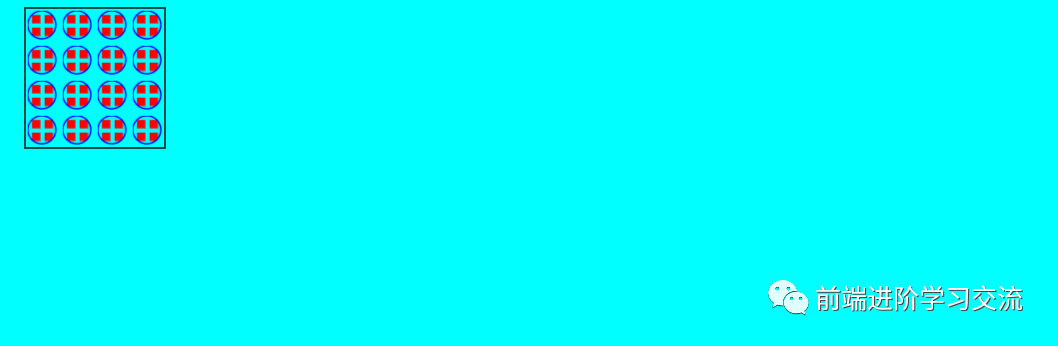
下面是相同的实例,但是x和y设置为10 (<pattern>元素内的圆心)
<pattern id="pattern2" x="10" y="10" width="25" height="25" patternUnits="userSpaceOnUse">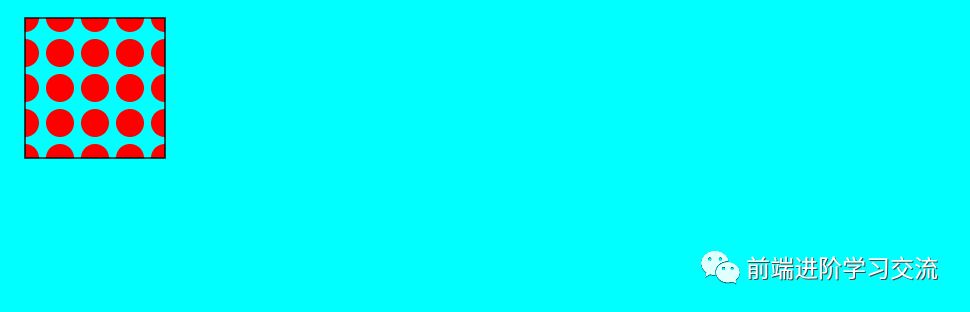
现在,图案从一个完整的圆圈开始,但是仍然有多余的垂直和水平空间。
三、嵌套模式
可以嵌套填充图案,以便填充图案在内部使用另一个填充图案。
该示例具有一个使用圆形作为填充图案的矩形。圆内部使用矩形作为填充图案。
示例:
<svg width="500" height="150"><defs><pattern id="innerPattern" x="3" y="3" width="9" height="9" patternUnits="userSpaceOnUse"><rect x="0" y="0" width="6" height="6" style="stroke: none; fill: #ff0000;" /></pattern><pattern id="outerPattern" x="12" y="12" width="25" height="25" patternUnits="userSpaceOnUse"><circle cx="10" cy="10" r="10" style="stroke: #0000ff; fill: url(#innerPattern)" /></pattern></defs><rect x="10" y="10" width="100" height="100" style="stroke: #000000; fill: url(#outerPattern);" /></svg>
运行后图像效果:
外部矩形现在由圆形填充,圆形又由矩形填充。
四、转换模式
可以使用标准SVG转换函数转换填充模式。可以使用patternTransform属性来实现这一点。
SVG模式转换示例
定义了一个简单的图案,该图案在用作矩形的填充图案之前旋转了35度。
<svg width="500" height="150"><defs><pattern id="transformedPattern"x="10" y="10" width="20" height="20"patternUnits="userSpaceOnUse"patternTransform="rotate(35)"><circle cx="10" cy="10" r="10" style="stroke: none; fill: #0000ff" /></pattern></defs><rect x="10" y="10" width="100" height="100"style="stroke: #000000; fill: url(#transformedPattern);" /></svg>
运行后图像效果:
五、总结
本文基于Html基础,讲解了有关SVG中的填充的相关知识点。如何去填充一个图案,通过改变其中的属性,呈现不一样的填充效果。以及嵌套模式,转换模式的实际应用。
通过案例的分析,效果图的展示,能够让读者更好的去理解填充图的属性。
------------------- End -------------------
往期精彩文章推荐:

欢迎大家点赞,留言,转发,转载,感谢大家的相伴与支持
想加入前端学习群请在后台回复【入群】
万水千山总是情,点个【在看】行不行

