
@vue/composition-api 与 Vue3 的前生今世
compositions-api 的诞生背景 @vue/composition-api 和 vue3 的‘姻缘’ @vue/composition-api 实现原理 @vue/composition-api 的优势与劣势
Why @vue/compositions-api?
首先,来区分一下 compositions-api 和 @vue/compositions-api 这两个东东。
compositions-api(组合式 API) 是 Vue3 提出的一个新的 Vue 概念(语法)。
@vue/compositions-api 是 Vue2 的一个插件,需通过 Vue.use() 进行调用。
为什么会有 compositions-api
根据官方文档描述:
❝composition-api-rfc[1]组合式 API: 一组低侵入式的、函数式的 API,使得我们能够更灵活地「组合」组件的逻辑。
❞
好处是:
更好的逻辑复用与代码组织 更好的类型推导
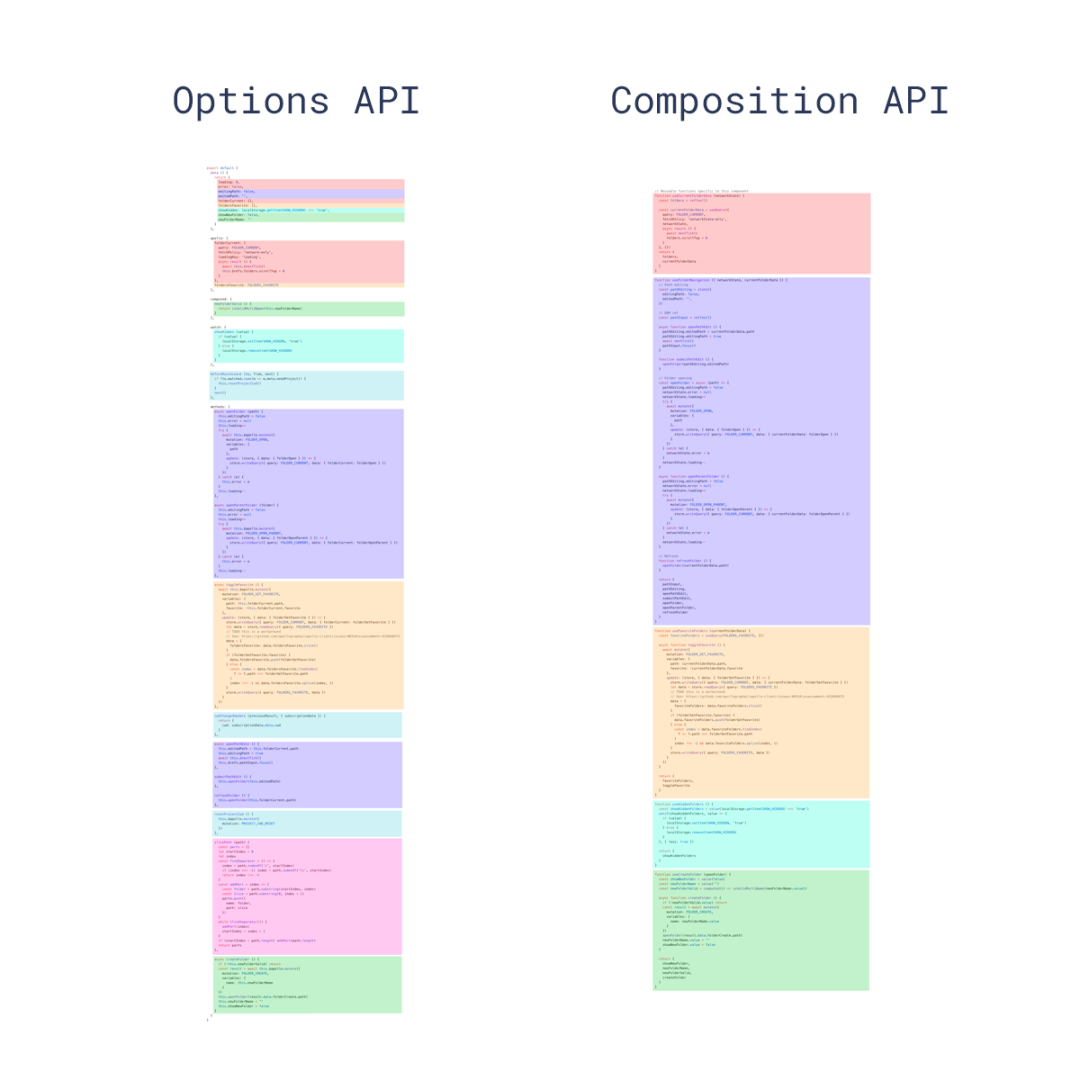
相同组件逻辑下,原来的 options 形式实现与新的 composition-api 实现代码结构对比:
为什么会有 @vue/compositions-api
为了抹平 compositions-api 语法和 Vue2 的 gap,或者说为了让 Vue2 项目也能体验到 compositions-api 带来的便利和快感, Vue团队提供了 @vue/compositions-api 插件的解决方案进行处理。
因此在 Vue2 项目中你也可以欢快的使用 compositions-api 语法(当然了由于实现原理的差异,某些语法功能支持并不友好)。
@vue/composition-api 和 vue3 的‘姻缘’
@vue/composition-api 插件与 Vue3 一样,都是诞生于 2019 年,也就是 在 Vue3 提出来的基于 Proxy 实现的时候,Vue团队就已经考虑到利用 @vue/composition-api 插件,来抹平浏览器的兼容性问题了。
并且上篇文章也已经提到,为什么会有 vue2 + @vue/composition-api 这种产物,直接用 Vue3 不香吗,主要的原因还是 Vue3 的兼容性问题(各大浏览器厂商对Proxy的支持还没普及)。
那么 vue2 + @vue/composition-api 到底是个什么东东呢,怎么用呢?
简单用法如下:
在 vue2 项目中安装
npm install @vue/composition-api
在使用 @vue/composition-api前,必须先通过 Vue.use() 进行安装。之后才可使用新的组合式 API进行组件开发。
import Vue from 'vue'
import VueCompositionAPI from '@vue/composition-api'

Vue.use(VueCompositionAPI)
// 使用 API
import { ref, reactive } from '@vue/composition-api'
// 而在 vue3 中
// 直接 import { ref, reactive } from 'vue' 即可,
// 不需要引入插件,并单独从 '@vue/composition-api' 解构 api
❝💡 当迁移到 Vue 3 时,只需简单的将 @vue/composition-api 替换成 vue 即可。现有的代码几乎无需进行额外的改动。
❞
你可以尽情的享受 composition-api 带来的快感了

@vue/composition-api 部分实现原理
这里我们主要介绍,基于 Vue2 @vue/composition-api 的一些实现原理(基于 Vue3 composition-api实现后面单独篇幅进行讨论)。
源码整体结构如下图(index 入口文件)

可以看出来,默认导出是 install 函数,用于 Vue.use 进行插件安装, 其他的都是一些具体的 composition-api 的功能函数。
那么,为了有侧重点,下面我们主要围绕几个问题进行重点讨论
来一看 install 主要干了什么? setup 中为什么可以随意使用 composition-api,并脱离了 this? 基于 vue2 的 reactive / ref 是怎么实现的?
首先,一起来剖析一下 install 函数
// install(Vue, mixin)

export function install(
  Vue: VueConstructor,
  _install: (Vue: VueConstructor) => void
) {
  // 这里去掉了 dev 调试模式的逻辑
  if (currentVue && currentVue === Vue) {
    return
  }
  // 你可能会困惑 Vue.config.optionMergeStrategies 这个是什么东东?
  // vue2.6 源码中你可以找到答案
  // vue/src/core/util/options.js
  // Option overwriting strategies are functions that handle
  // how to merge a parent option value and a child option
  // value into the final value.
  //
  Vue.config.optionMergeStrategies.setup = function (
    parent: Function,
    child: Function
  ) {
    // mergeData 函数在 vue2.6 源码中同样存在
    // mergeData - recursively merges two data objects together.
    //
    return function mergedSetupFn(props: any, context: any) {
      return mergeData(
        typeof parent === 'function' ? parent(props, context) || {} : undefined,
        typeof child === 'function' ? child(props, context) || {} : undefined
      )
    }
  }
  // 设置全剧唯一 currentVue 实例
  setCurrentVue(Vue)
  // 注册安装到 Vue,@vue/composition-api 最核心逻辑
  _install(Vue)
}
下面来看看 _install(Vue) 到底干了什么, 也就是 mixin 函数
export function mixin(Vue: VueConstructor) {
  // 可以看出核心逻辑 就是通过 Vue.mixin 并结合 hooks
  // 混入一些初始化 composition-api 的功能逻辑
  // functionApiInit  updateTemplateRef 主要这两个核心函数的插入
  // 可以看出来,结合 hooks 机制,侵入性并不强,不会影响到原有的 Vue2 功能的正常使用
  Vue.mixin({
    beforeCreate: functionApiInit,
    mounted(this: ComponentInstance) {
      updateTemplateRef(this)
    },
    updated(this: ComponentInstance) {
      updateTemplateRef(this)
    },
  })

  // ...

  // 其实 functionApiInit 做的事情很简单,
  // 如果 vm.$options 中存在 setup, render 就复写 setup, render 做一些处理
  function functionApiInit(this: ComponentInstance) {
    const vm = this
    const $options = vm.$options
    const { setup, render } = $options
    // 如果存在 render 函数,复写 $options.render
    if (render) {
      // keep currentInstance accessible for createElement
      $options.render = function (...args: any): any {
        // activateCurrentInstance 维护当前 vm, 并执行 render-fn
        return activateCurrentInstance(vm, () => render.apply(this, args))
        // 这里列出来 activateCurrentInstance 函数的具体逻辑
          /*
          // 维护全局的 currentInstance 对象,
          // 让 setup、render 的执行始终是在正确的 vm 对象(必须要维护当前执行的组件实例,因为没有了 this)
          function activateCurrentInstance(vm, fn) {
            let preVm = getCurrentInstance()
            setCurrentVM(vm)
            try {
              return fn(vm)
            } catch (err) {} finally {
              setCurrentVM(preVm)
            }
          }
          */
      }
    }

    if (!setup) {
      return
    }
    if (typeof setup !== 'function') {
      return
    }

    const { data } = $options
    // wrapper the data option, so we can invoke setup before data get resolved
    // 把 this.data 复写, 引入 initSetup()
    $options.data = function wrappedData() {
      // 核心功能函数, 初始化注册 setup
      initSetup(vm, vm.$props)
      return typeof data === 'function'
        ? data.call(vm, vm)
        : data || {}
    }
  }

  // 最最核心的逻辑之一
  function initSetup(vm: ComponentInstance, props: Record<any, any> = {}) {
    const setup = vm.$options.setup!
    // 创建 setup 上下文对象 ,因为 setup 本身也可以接受一些 vm 实例的参数
    const ctx = createSetupContext(vm)

    // mark props as reactive
    markReactive(props)

    // resolve scopedSlots and slots to functions
    resolveScopedSlots(vm, ctx.slots)

    let binding
    // 同样的,涉及到 setup的执行,需要维护全局的 currentInstance 对象
    activateCurrentInstance(vm, () => {
      // setup 函数执行后,如果有返回,并且是响应式对象,是需要在 view 层 template 中处理
      binding = setup(props, ctx)
    })

    if (!binding) return
    // 如果 binding 是 对象则进行处理
    if (isPlainObject(binding)) {
      const bindingObj = binding
      // vm.__secret_vfa_state__[rawBindings] = binding
      vmStateManager.set(vm, 'rawBindings', binding)
      // 遍历 binding 对象 keys
      Object.keys(binding).forEach((name) => {
        let bindingValue = bindingObj[name]
        // 如果 binding[key] 不是响应式的, 需要进一步响应式处理,
        // 因为需要维护 view 层变更, 也就是响应式系统的双向绑定关系
        // only make primitive value reactive
        if (!isRef(bindingValue)) {
          // ...
          // ref 这不是 vue3 提出来的吗,怎么vue2 也能用
          bindingValue = ref(bindingValue)
          // ...
        }
        // 如果 name 不存在 vm 中, 并且也没有 vm.$options.props[name]
        // 则进行代理处理 proxy(vm, name, {get, set}),proxy 即 Object.defineProperty
        asVmProperty(vm, name, bindingValue)
      })
      return
    }
  }

  // 这里不详细介绍,不是本篇重点
  function updateTemplateRef() {
    // ...
  }
}
下面来看看 ref / reactive 这些 vue3 的新语法功能 为什么 vue2 中也能进行使用
❝预备知识: Object.seal(obj)方法封闭一个对象, 阻止添加新属性并将所有现有属性标记为不可配置。当前属性的值只要原来是可写的就可以改变。obj 是将要被密封的对象,返回一个 被密封的对象。
❞
// 来看看 ref 干了什么
export function ref(raw?: unknown) {
if (isRef(raw)) {
return raw
}
// 利用 reactive 函数生成响应式对象
const value = reactive({ [RefKey]: raw })
// 利用 createRef 返回 ref 对象
return createRef({
get: () => value[RefKey] as any,
set: (v) => ((value[RefKey] as any) = v),
})
}
// createRef 函数
export function createRef<T>(options: RefOption
// seal the ref, this could prevent ref from being observed
// It's safe to seal the ref, since we really shouldn't extend it.
return Object.seal(new RefImpl(options))
// RefImpl 类具体内容如下,会初始化 value 属性,并在构造函数中进行 proxy 处理,
// 上面也提到了 proxy 就是 Object.defineProperty
// 当然了, 在 vue3 中是基于 Proxy api 实现的,在 vue2 中则是基于 Object.defineProperty 实现
/*
class RefImpl implements Ref {
readonly [_refBrand]!: true
public value!: T
constructor({ get, set }: RefOption) {
proxy(this, 'value', {
get,
set,
})
}
}
*/
}
// reactivity 函数
// Make obj reactivity
export function reactive<T extends object>(obj: T): UnwrapRef<T> {
if (
!isPlainObject(obj) ||
isReactive(obj) ||
isRaw(obj) ||
!Object.isExtensible(obj)
) {
return obj
}
// observe 函数 即 Vue.observable(obj) 用于初始化构建响应式对象,vue2.6 源码中的 api
// 具体细节见 vue/src/core/global-api/index.js
const observed = observe(obj)
// Object.defineProperty(obj, ReactiveIdentifierKey, ReactiveIdentifier);
// markReactive(obj)
// setupAccessControl(observed)
return observed
}
看到这里, 再回头想一想刚刚提到的三个问题:
install 主要干了什么? setup 中为什么可以随意使用 composition-api,并脱离了 this? 基于 vue2 的 reactive / ref 是怎么实现的?
现在是不是已经知道答案了呢。
其实这些问题本身并不难,难的是能不能花心思和精力去进行专研,思考。
@vue/composition-api 的优势与劣势
最后,来看看 基于 Vue2 的 composition-api 有哪些优缺点。优点其实上面也已经提到了,这里主要看一下缺点。
composition-api 的使用限制[2] 不能在数组中使用含有 ref 的普通对象。在数组中,应该总是将 ref 存放到 reactive 对象中 reactive() 会返回一个修改过的原始的对象。此行为与 Vue 2 中的 Vue.observable 一致。在 Vue 3 中,reactive() 会返回一个新的的代理对象 watch 中不支持 onTrack 和 onTrigger 选项 Vue 3 新引入的 API ,在本插件中暂不适用: onRenderTrackedonRenderTriggeredisProxy在 data() 中使用 ref, reactive 或其他组合式 API 将不会生效 emit 选项, emit 仅因在类型定义中对齐 Vue3 的选项而提供,不会有任何效果。 性能影响 由于 Vue 2 的公共 API 的限制,@vue/composition-api 不可避免地引入了额外的性能开销
至此,对于 @vue/composition-api 先介绍到这里,如果还有什么疑问或者想讨论的,后台回复 好友 即可加笔者微信。
Reference
1: https://github.com/vuejs/composition-api-rfc/blob/master/index.md
[2]2: https://github.com/vuejs/composition-api/blob/main/README.md