
ActiveMQ在分布式项目中的实际应用
共 12413字,需浏览 25分钟
· 2021-07-31

具体需求:
后台添加商品后,需要执行两个操作:
同步索引库(商品搜索使用了Solr实现) 生成静态页面(使用freemarker)
实现构思:
使用消息队列。MQ作为消息中间件,传递的消息内容为新增商品的ID。

准备工作:
在需要的地方添加相应的依赖(基础依赖就不再说了)
商品服务需要发送商品添加消息,所以需要添加三个依赖,分别是整合Spring需要的两个Jar和ActiveMQ的Jar:
<dependency>
 <groupId>org.springframework</groupId>
 <artifactId>spring-jms</artifactId>
</dependency>
<dependency>
 <groupId>org.springframework</groupId>
 <artifactId>spring-context-support</artifactId>
</dependency>
<dependency>
 <groupId>org.apache.activemq</groupId>
 <artifactId>activemq-all</artifactId>
</dependency>
索引服务需要接收消息,然后同步索引库,所以需要添加四个依赖,分别是整合Spring需要的两个Jar和ActiveMQ的Jar和Solr客户端的Jar:
<dependency>
 <groupId>org.springframework</groupId>
 <artifactId>spring-jms</artifactId>
</dependency>
<dependency>
 <groupId>org.springframework</groupId>
 <artifactId>spring-context-support</artifactId>
</dependency>
<dependency>
 <groupId>org.apache.activemq</groupId>
 <artifactId>activemq-all</artifactId>
</dependency>
<dependency>
 <groupId>org.apache.solr</groupId>
 <artifactId>solr-solrj</artifactId>
</dependency>
商品详情工程需要就收消息,然后生成静态页面,所以需要添加四个依赖,分别是整合Spring需要的两个Jar和ActiveMQ的Jar和Solr客户端的Jar:
<dependency>
 <groupId>org.springframework</groupId>
 <artifactId>spring-jms</artifactId>
</dependency>
<dependency>
 <groupId>org.springframework</groupId>
 <artifactId>spring-context-support</artifactId>
</dependency>
<dependency>
 <groupId>org.apache.activemq</groupId>
 <artifactId>activemq-all</artifactId>
</dependency>
<dependency>
        <groupId>org.freemarker</groupId>
        <artifactId>freemarker</artifactId>
</dependency>
具体实现:
1.商品服务添加商品信息后,发布商品添加消息
spring-activemq.xml
<!-- 真正可以产生Connection的ConnectionFactory,由对应的 JMS服务厂商提供 -->
<bean id="targetConnectionFactory" class="org.apache.activemq.ActiveMQConnectionFactory">
 <property name="brokerURL" value="tcp://192.168.25.131:61616" /><!-- activemq地址 -->
</bean>

<!-- Spring用于管理真正的ConnectionFactory的ConnectionFactory -->
<bean id="connectionFactory" class="org.springframework.jms.connection.SingleConnectionFactory">
 <!-- 目标ConnectionFactory对应真实的可以产生JMS Connection的ConnectionFactory -->
 <property name="targetConnectionFactory" ref="targetConnectionFactory" />
</bean>

<!-- 配置生产者 -->
<!-- Spring提供的JMS工具类,它可以进行消息发送、接收等 -->
<bean id="jmsTemplate" class="org.springframework.jms.core.JmsTemplate">
 <!-- 这个connectionFactory对应的是我们定义的Spring提供的那个ConnectionFactory对象 -->
 <property name="connectionFactory" ref="connectionFactory" />
</bean>

<!--配置主题目的地,一对多的,以为我们有多个接收方,所以这里使用topic而不是queue -->
<bean id="topicDestination" class="org.apache.activemq.command.ActiveMQTopic">
 <constructor-arg value="itemAddTopic" />
</bean>
ItemServiceImpl.java
@Autowired
private JmsTemplate jmsTemplate;
@Resource // 默认通过id注入,找不到再通过类型注入
private Destination topicDestination;

@Override
public E3Result addItem(TbItem item, String desc, String itemParams) {
 // 生成商品ID
 final long itemId = IDUtils.genItemId();

 /**
  * 将商品信息插入数据库中
  */

 // 发送一个商品添加消息
 jmsTemplate.send(topicDestination, new MessageCreator() {

  @Override
  public Message createMessage(Session session) throws JMSException {
   TextMessage textMessage = session.createTextMessage(itemId + "");
   return textMessage;
  }
 });
 // 返回成功
 return E3Result.ok();
}
2.索引服务配置监听器,接收到商品添加消息后,同步索引库
ItemAddMessageListener.java
public class ItemAddMessageListener implements MessageListener {

 @Autowired
 private ItemMapper itemMapper;
 @Autowired
 private SolrServer solrServer;

 @Override
 public void onMessage(Message message) {
  try {
   // 从消息中取商品ID
   TextMessage textMessage = (TextMessage) message;
   String text = textMessage.getText();
   Long itemId = new Long(text);
   // 等待事务提交,不等待的话有可能下面会查不到商品信息
   Thread.sleep(1000);
   // 根据商品ID查询商品信息
   SearchItem searchItem = itemMapper.getItemById(itemId);
   // 创建一个文档对象
   SolrInputDocument document = new SolrInputDocument();
   // 向文档对象中添加域
   document.addField("id", searchItem.getId());
   document.addField("item_title", searchItem.getTitle());
   document.addField("item_sell_point", searchItem.getSell_point());
   document.addField("item_price", searchItem.getPrice());
   document.addField("item_image", searchItem.getImage());
   document.addField("item_category_name", searchItem.getCategory_name());
   // 把文档对象写入索引库
   solrServer.add(document);
   // 提交
   solrServer.commit();
  } catch (Exception e) {
   e.printStackTrace();
  }
 }
}
spring-activemq.xml
<!-- 真正可以产生Connection的ConnectionFactory,由对应的 JMS服务厂商提供 -->
<bean id="targetConnectionFactory" class="org.apache.activemq.ActiveMQConnectionFactory">
 <property name="brokerURL" value="tcp://192.168.25.131:61616" /><!-- activemq地址 -->
</bean>

<!-- Spring用于管理真正的ConnectionFactory的ConnectionFactory -->
<bean id="connectionFactory" class="org.springframework.jms.connection.SingleConnectionFactory">
 <!-- 目标ConnectionFactory对应真实的可以产生JMS Connection的ConnectionFactory -->
 <property name="targetConnectionFactory" ref="targetConnectionFactory" />
</bean>

<!--配置主题目的地,一对多的 -->
<bean id="topicDestination" class="org.apache.activemq.command.ActiveMQTopic">
 <constructor-arg value="itemAddTopic" />
</bean>

<!-- 接收消息 -->
<!-- 配置消息监听器,监听商品添加消息,同步索引库 -->
<bean id="itemAddMessageListener" class="cn.e3mall.search.message.ItemAddMessageListener"/>
<!-- 消息监听容器 -->
<bean class="org.springframework.jms.listener.DefaultMessageListenerContainer">
 <property name="connectionFactory" ref="connectionFactory" />
 <property name="destination" ref="topicDestination" />
 <property name="messageListener" ref="itemAddMessageListener" />
</bean>
3.商品详情工程配置监听器,接收到商品添加消息后,生成商品详情静态页面
首先需要配置用于生成静态页面的模板,具体的配置方法请参看FreeMarker教程,在这里就不详细叙述了,我这里配置好的模板如下:
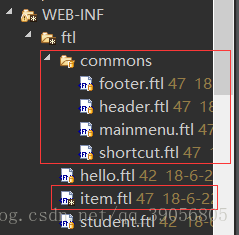
item.ftl是商品详情页面,其他的几个ftl是include进去的,都需要配置。
FreeMarker的配置:
<!-- 配置Freemaker -->
<bean id="freemarkerConfig" class="org.springframework.web.servlet.view.freemarker.FreeMarkerConfigurer">
 <property name="templateLoaderPath" value="/WEB-INF/ftl/" /><!-- 指定模板所在目录 -->
 <property name="defaultEncoding" value="UTF-8" /><!-- 指定默认编码方式 -->
</bean>
监听器:
public class HtmlGenListener implements MessageListener {

 @Autowired
 private ItemService itemService;
 @Autowired
 private FreeMarkerConfigurer freeMarkerConfigurer;
 @Value("${HTML_GEN_PATH}")
 private String HTML_GEN_PATH; // 生成的静态页面保存的位置

 @Override
 public void onMessage(Message message) {
  try {
   // 从商品中取商品ID
   TextMessage textMessage = (TextMessage) message;
   String text = textMessage.getText();
   Long itemId = new Long(text);
   // 等待事务提交(防止还未插入数据库就查询)
   Thread.sleep(1000);
   // 根据商品id查询商品信息,商品基本信息和商品描述信息
   TbItem tbItem= itemService.getItemById(itemId);
   Item item = new Item(tbItem);
   item.setPrice(item.getPrice() / 100); // 转换价格
   // 取商品描述
   TbItemDesc itemDesc = itemService.getItemDesc(itemId);
   // 创建一个数据集,将模板所需的数据全部放进去
   Map<String, Object> data = new HashMap<>();
   data.put("item", item);
   data.put("itemDesc", itemDesc);
   // 加载模板对象
   Configuration configuration = freeMarkerConfigurer.getConfiguration();
   Template template = configuration.getTemplate("item.ftl");
   // 创建一个输出流,指定输出的目录以及文件名
   Writer out = new FileWriter(HTML_GEN_PATH + itemId + ".html");
   // 生成静态页面
   template.process(data, out);
   // 关闭流
   out.close();
  } catch (Exception e) {
   e.printStackTrace();
  }
 }
}
引用外部文件:

监听器配置:
<!-- 真正可以产生Connection的ConnectionFactory,由对应的 JMS服务厂商提供 -->
<bean id="targetConnectionFactory" class="org.apache.activemq.ActiveMQConnectionFactory">
 <property name="brokerURL" value="tcp://192.168.25.131:61616" />
</bean>

<!-- Spring用于管理真正的ConnectionFactory的ConnectionFactory -->
<bean id="connectionFactory" class="org.springframework.jms.connection.SingleConnectionFactory">
 <!-- 目标ConnectionFactory对应真实的可以产生JMS Connection的ConnectionFactory -->
 <property name="targetConnectionFactory" ref="targetConnectionFactory" />
</bean>

<!--配置主题目的地,一对多的 -->
<bean id="topicDestination" class="org.apache.activemq.command.ActiveMQTopic">
 <constructor-arg value="itemAddTopic" />
</bean>

<!-- 接收消息 -->
<!-- 监听商品添加消息,同步生成静态页面 -->
<bean id="htmlGenListener" class="cn.e3mall.item.message.HtmlGenListener"/>
<bean class="org.springframework.jms.listener.DefaultMessageListenerContainer">
 <property name="connectionFactory" ref="connectionFactory" />
 <property name="destination" ref="topicDestination" />
 <property name="messageListener" ref="htmlGenListener" />
</bean>
至此,功能就实现了。
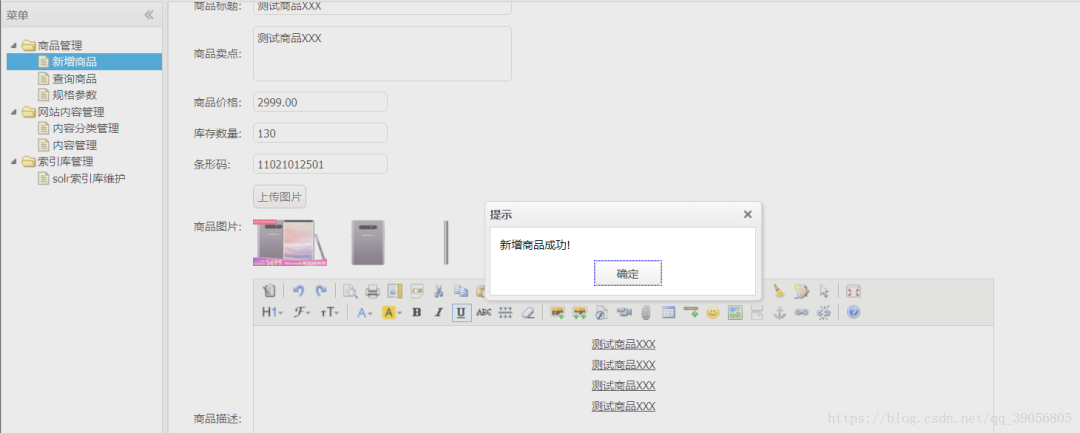
功能测试
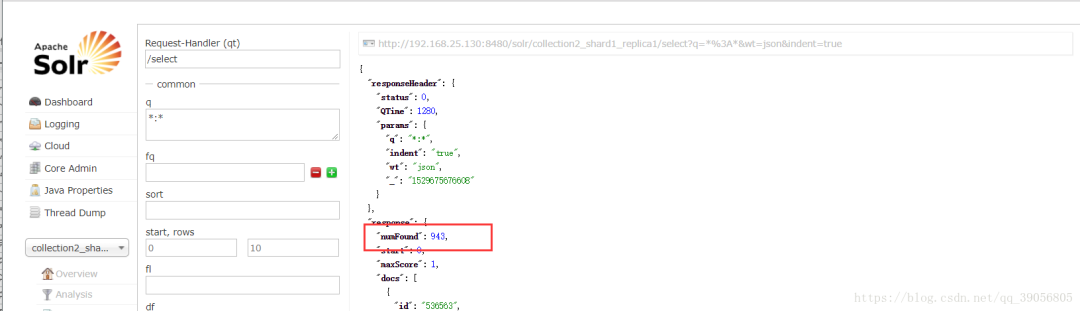
首先查看一下索引库,可以看到目前有943条商品数据
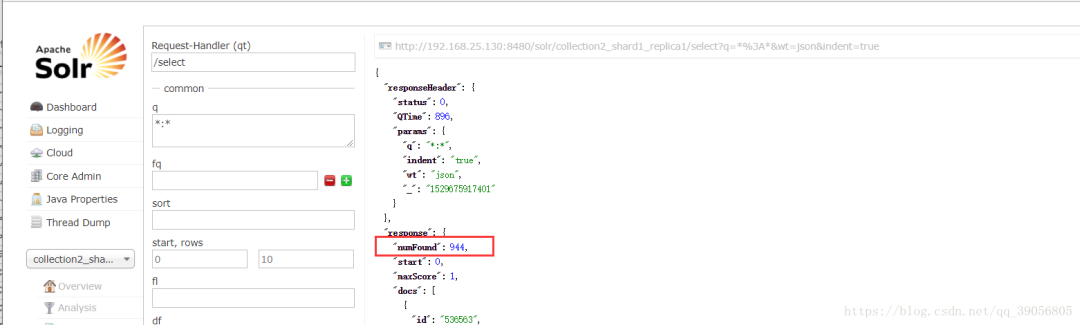
再次查看索引库,可以看到新增加了一条数据,现在有944条数据:
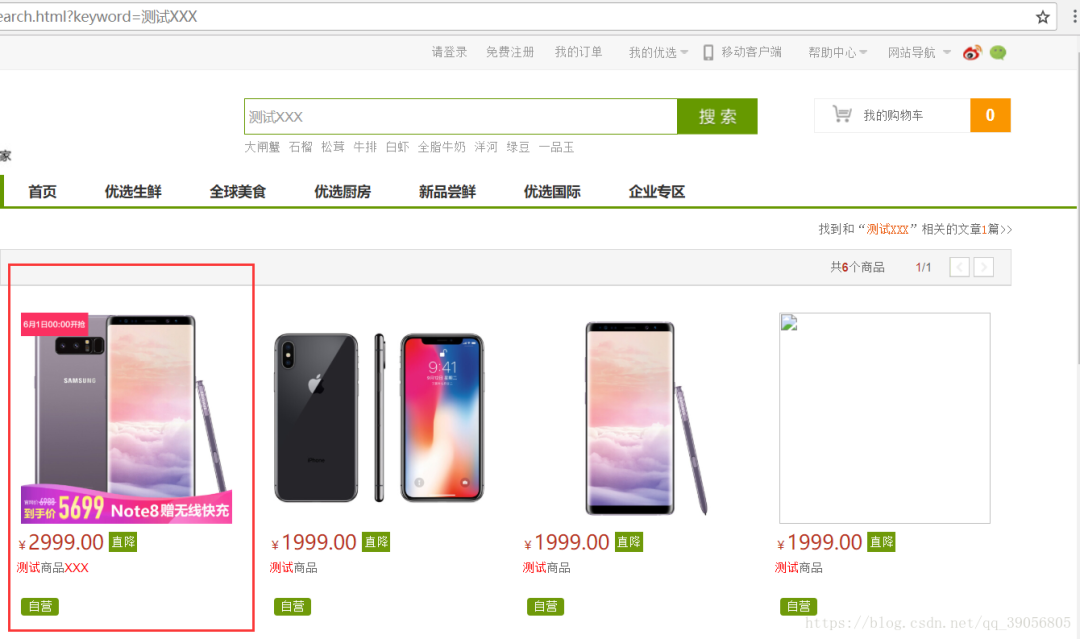
搜索新添加的商品:,可以看到,已经能够查到了:
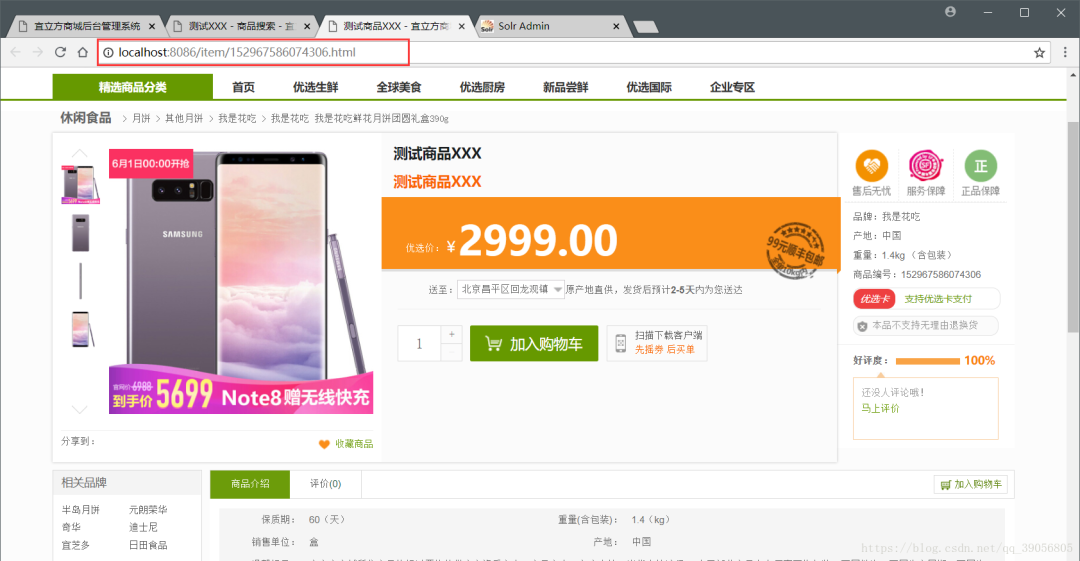
查看商品详情,与本地生成的静态页面进行对比:
本地生成静态文件:

访问本地静态文件(这里使用了Nginx服务器访问静态文件)
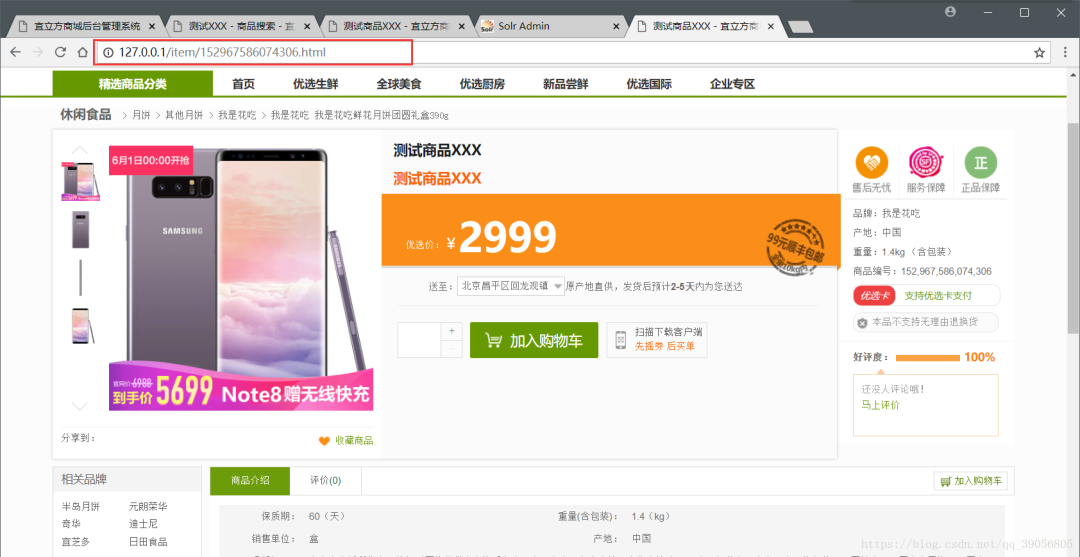
可以对比一下,两个绝对是一模一样的,这样以后用户访问商品详情的时候就可以返回给其一个静态页面,大大减小了服务器压力,访问速度加快,也提升了用户体验。
1. 面试官扎心一问:如何使用Redis实现电商系统的库存扣减?
最近面试BAT,整理一份面试资料《Java面试BATJ通关手册》,覆盖了Java核心技术、JVM、Java并发、SSM、微服务、数据库、数据结构等等。
获取方式:点“在看”,关注公众号并回复 Java 领取,更多内容陆续奉上。
文章有帮助的话,在看,转发吧。
谢谢支持哟 (*^__^*)
