
spring-boot之webSocket · 上
共 15652字,需浏览 32分钟
· 2021-07-31
前言
昨天我们已经分享完了security的相关知识点,所以从今天开始我们要开始学习spring-boot另一个组件——webSocket。
websocket也算是spring-boot的一个核心组件,目前我能想到的应用场景就是群聊,所以我们今天的内容核心就是搭建一个简易版的网络聊天室。
webSocket
websocket是什么
在开始正文之前,我们先看下什么是webSocket,下面是我在一本springboot书籍上找到的解释:
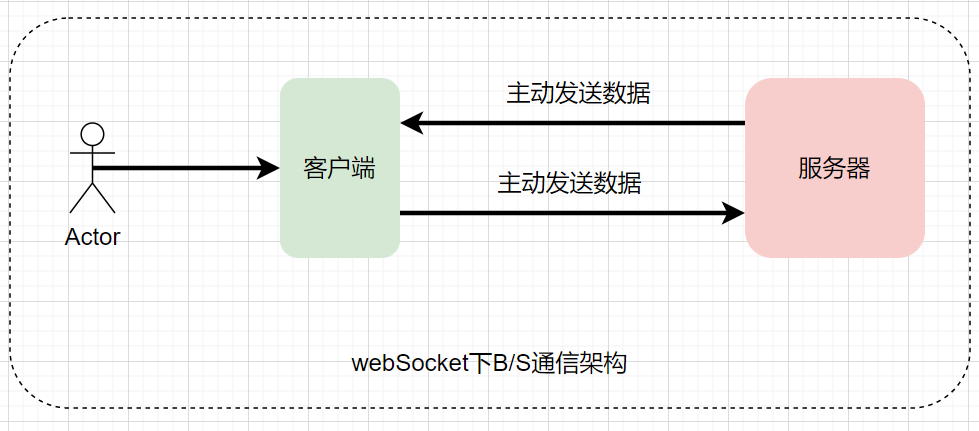
WebSocket协议是基于TCP的一种新的网络协议 。它实现了浏览器与服务器全双工(full-duplex)通信一一允许服务器主动发送信息给客户端,这样就可以实现从客户端发送消息到服务器 ,而服务器又可以转发消息到客户端,这样就能够实现客户端之间的交互。对于WebSocket的 开发 ,Spring也提供了 良好 的支持 。目前很多浏览器己经实现了Web Socket协议 ,但是依旧存在着很多浏览器没有实现该协议,为了 兼容那 些没有实现该协议的浏览器 , 往往还需要通过 STOMP 协议来完成这些兼容。
简单来说,webSocket就是一种新的网络协议,在这种协议的加持下,运行服务端给客户端直接发送消息,而且服务器也可以把消息转发给客户端。
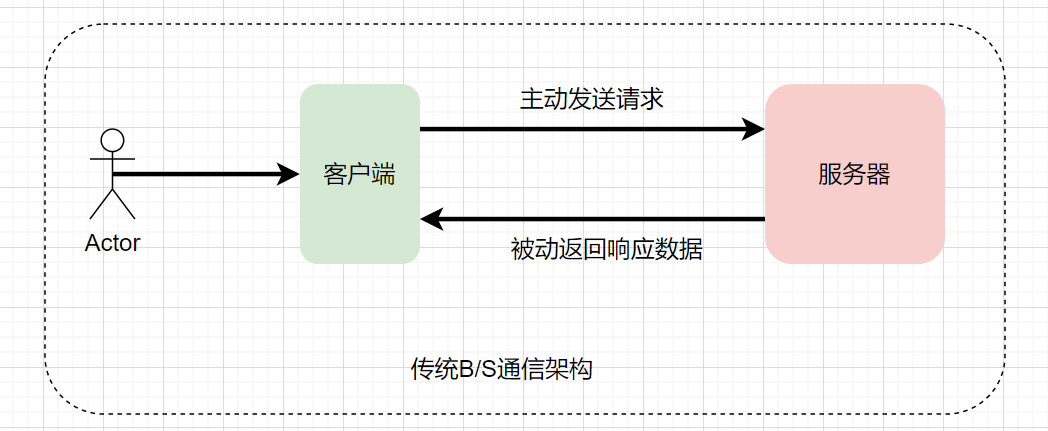
在以前的网络协议中,服务端只能被动接受客户端的请求,然后才能给客户端发送数据,但是有了webSocket协议,我们就可以实现类似于打电话这样的双工通信,确实方便了很多。
简易聊天室
下面我们通过webSocket来搭建一个简易的网络聊天室。
项目依赖
首先创建一个spring-boot项目,然后引入websocket的依赖:
 <dependency>
     <groupId>org.springframework.boot</groupId>
     <artifactId>spring-boot-starter-websocket</artifactId>
 </dependency>
同时我还加入了security、thymeleaf等附属依赖:
<dependency>
    <groupId>org.springframework.boot</groupId>
    <artifactId>spring-boot-starter-security</artifactId>
</dependency>

<dependency>
    <groupId>org.springframework.boot</groupId>
    <artifactId>spring-boot-starter-thymeleaf</artifactId>
</dependency>
这两个依赖就不过多说明了,security昨天才分享完,还是热乎的。
websocket配置类
websocket的配置比较简单,主要就是创建一个服务端实例,就相当于往容器中注入了一个ServerEndpointExporter实例对象。
@Configuration
public class WebSocketConfig {
    @Bean
    public ServerEndpointExporter serverEndpointExporter() {
        return new ServerEndpointExporter();
    }
}
websokcet服务实现
这里就是websocket服务的关键,也就是服务提供者。
@ServerEndpoint("/ws")
@Service
public class WebSocketService {
    private final Logger logger = LoggerFactory.getLogger(WebSocketService.class);

    private Map<String, String> nameMap = Maps.newHashMap();

    {
        nameMap.put("nezha", "哪吒");
        nameMap.put("pangu", "盘古");
        nameMap.put("zhongkui", "钟馗");
        nameMap.put("fuxi", "伏羲");
        nameMap.put("shennongshi", "神农氏");
        nameMap.put("kuafu", "夸父");
        nameMap.put("nvwa", "女娲");
        nameMap.put("jiangziya", "姜子牙");
        nameMap.put("jingwei", "精卫");
    }

    // 在线数量
    private static AtomicInteger onlineCount = new AtomicInteger(0);
 // 保存已建立连接的客户端(在线)
    private static CopyOnWriteArraySet<WebSocketService> webSocketServiceSet = Sets.newCopyOnWriteArraySet();

    private Session session;

    public Session getSession() {
        return session;
    }

    public void setSession(Session session) {
        this.session = session;
    }

    @OnOpen
    public void onOpen(Session session) {
        String name = nameMap.get(session.getUserPrincipal().getName());
        this.session = session;
        webSocketServiceSet.add(this);
        addOnlineCount();
        logger.info("有新连接加入!当前在线人数为: {}", onlineCount.get());
        webSocketServiceSet.parallelStream().forEach(item -> {
            try {
                sendMessage(item.getSession(), String.format("%s加入群聊!", name));
            } catch (Exception e) {
                logger.error("发送消息异常:", e);
            }
        });
    }

    @OnMessage
    public void onMessage(String message, Session session) {
        logger.info("来自客户端的消息:{}", message);
        webSocketServiceSet.parallelStream().forEach(item -> {
            String name = nameMap.get(session.getUserPrincipal().getName());
            logger.info("{}发送了一条消息:{}", name, message);
            try {
                item.sendMessage(item.getSession(), String.format("%s:%s", name, message));
            } catch (IOException e) {
                e.printStackTrace();
            }
        });
    }

    @OnClose
    public void onClose() {
        webSocketServiceSet.remove(this);
        subOnlineCount();
    }

    @OnError
    public void onError(Session session, Throwable t) {
        logger.error("发生错误:", t);
    }

    /**
     * 在线人数加一
     */
    private void addOnlineCount() {
        onlineCount.incrementAndGet();
    }

    /**
     * 在线人数减一
     */
    private void subOnlineCount() {
        onlineCount.decrementAndGet();
    }

    private void sendMessage(Session session, String message) throws IOException {
        session.getBasicRemote().sendText(message);
    }
}
@ServerEndpoint注解制定了我们服务的节点路径,这样也确定了我们wesocket服务的访问地址:
ws://localhost:8080/ws
地址中的ws表示协议类别,也就是websocket的缩写,紧跟着的是我们springboot服务的地址(主机、端口等),然后就是我们的websocket的节点地址。
@service注解也就是我们最常用的服务注解,就是把他标记成springboot可以管理的组件,没有这个注解,websocket是访问不到的:
紧接着,我们写了四个监听方法,方法上都有对应的注解标注:
OnOpen:客户端首次连接服务端时会调用该方法OnMessage:客户端发送消息时会调用该方法OnClose:客户端断开连接时,会调用该方法OnError:发生错误时会调用该方法
用户登录配置
为了更好的演示,我加入security组件,这样用户登录之后,session中就保留了用户的用户信息,方便前端对数据进行展示:
@Configuration
public class SecurityConfig extends WebSecurityConfigurerAdapter {
    @Autowired
    private PasswordEncoder passwordEncoder;

    @Override
    protected void configure(AuthenticationManagerBuilder auth) throws Exception {
        auth.inMemoryAuthentication().withUser("zhongkui").password(passwordEncoder.encode("123456")).roles("user")
                .and().withUser("fuxi").password(passwordEncoder.encode("123456")).roles("user")
                .and().withUser("pangu").password(passwordEncoder.encode("123456")).roles("user")
                .and().withUser("nezha").password(passwordEncoder.encode("123456")).roles("user")
                .and().withUser("nvwa").password(passwordEncoder.encode("123456")).roles("user")
                .and().withUser("jiangziya").password(passwordEncoder.encode("123456")).roles("user")
        .and().passwordEncoder(passwordEncoder);
    }

    @Override
    protected void configure(HttpSecurity http) throws Exception {
        http.authorizeRequests()
                .anyRequest().authenticated()
                .and()
                .formLogin().and()
                .httpBasic()
                .and().logout().logoutUrl("/logout");
    }

    @Bean
    public PasswordEncoder passwordEncoder() {
        return new BCryptPasswordEncoder();
    }

}
在websocket服务中,我还构建了用户名和用户姓名的映射,这样在用户建立连接的时候或者发送消息的时候,我就可以根据session的用户名拿到用户的姓名了。
前端页面实现
这里最核心的就是websocket连接的那段js了:
<!DOCTYPE html>
<html lang="en">
<head>
<meta charset="UTF-8">
<title>test page</title>
</head>
<body>
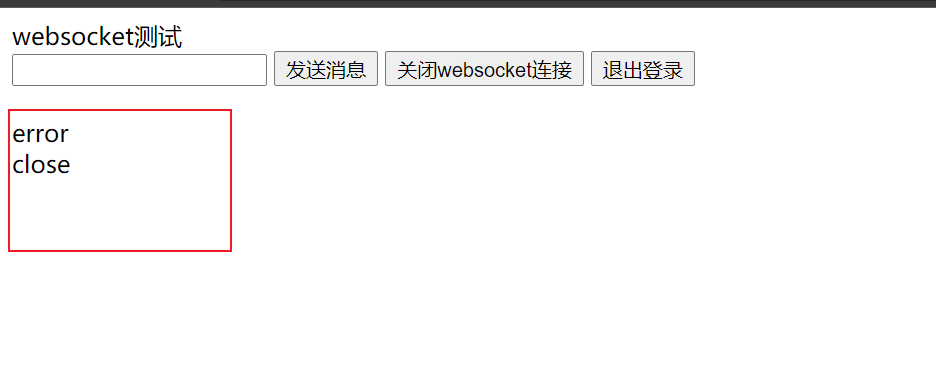
websocket测试<br>
<input id = "message" type="text">
<button onclick="sendMessage()">发送消息</button>
<button onclick="closeWebSocket()">关闭websocket连接</button>
<button onclick="logout()">退出登录</button>
<div id="context"></div>
<script src="http://libs.baidu.com/jquery/2.0.0/jquery.min.js"></script>
<script type="application/javascript">
function logout() {
closeWebSocket();
$.ajax({
url: "/logout",
type: "POST",
success: function (rsp) {
console.log("退出登录成功")
console.log(rsp)
}
})
}
var websocket = null;
// 判断当前浏览榕是否支持 WebSocket
if ('WebSocket' in window) {
// 创建 WebSocket 对象,连接服务器端点
websocket = new WebSocket("ws://localhost:8080/ws");
} else {
alert('Not support websocket')
}
// 连接发生错误的 回调方法
websocket.onerror = function () {
appendMessage("error");
}
// 连接成功建立的回调方法
websocket.onopen = function (event) {
appendMessage("open ");
}
// 接收到消息的回调方法
websocket.onmessage = function (event) {
appendMessage(event.data);
}
// 连接关闭的回调方法
websocket.onclose = function () {
appendMessage(" close ");
}
// 监听窗口关闭事件,当窗口关闭时,主动关闭 websocket 连接
// 防止连接还没断开就关闭窗口,server 端会抛异常
window.onbeforeunload = function () {
websocket.close();
}
// 将消息显示在网页上
function appendMessage(message) {
var context = $("#context").html() + "<br/>" + message;
$("#context").html(context);
}
// 关闭连接
function closeWebSocket() {
websocket.close();
logout();
}
// 发送消息
function sendMessage() {
var message = $("#message").val();
websocket.send(message);
}
</script>
</body>
</html>
首先我们判断浏览器是否支持WebSocket,如果支持会建立websocket连接,然后设定WebSocket的一些回调函数,和服务器端对应,而且页面还是比较简单的。
测试
下面我们简单测试下,我们分别登录三个账号:nezha,nvwa、伏羲,然后用三个账号分别发送消息:
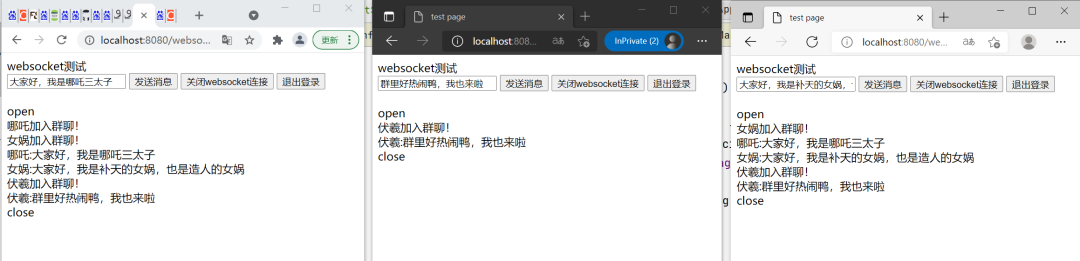
效果还是可以的,首先是哪吒三太子加入群聊,然后时女娲加入群聊,然后他们分别发送消息,接着伏羲加入群聊,发送消息。第一个进群的人,会收到后面进群的所有人的消息,是不是和我们的微信差不多呢?
总结
websocket还是蛮有意思的,而且很容易上手。如果你有做一款自己的聊天工具,那么websocket应该是最佳选择,相比于socket,它更轻量,也更灵活,相比于传统的http通信,它支持双工通信。
总之,用websocket做一款聊天工具,真的是太简单了。后面有时间的话,用它做一个简易版的微信。好了,今天就先到这里吧!
最后,附上今天项目的源码地址,有兴趣的小伙伴可以自己动手练练,还挺有意思的:
https://github.com/Syske/learning-dome-code/tree/dev/sping-boot-websocket-demo