思路
case MotionEvent.ACTION_UP:if (mVelocityTracker != null) {mVelocityTracker.addMovement(ev);mVelocityTracker.computeCurrentVelocity(1000);float yvel = mVelocityTracker.getYVelocity(mActivePointerId);fling(parent, child, -getScrollRangeForDragFling(child), 0, yvel);}
final boolean fling(CoordinatorLayout coordinatorLayout, V layout, int minOffset,int maxOffset, float velocityY) {if (mFlingRunnable != null) {layout.removeCallbacks(mFlingRunnable);mFlingRunnable = null;}if (mScroller == null) {mScroller = new OverScroller(layout.getContext());}mScroller.fling(0, getTopAndBottomOffset(), // curr0, Math.round(velocityY), // velocity.0, 0, // xminOffset, maxOffset); // yif (mScroller.computeScrollOffset()) {mFlingRunnable = new FlingRunnable(coordinatorLayout, layout);ViewCompat.postOnAnimation(layout, mFlingRunnable);return true;} else {onFlingFinished(coordinatorLayout, layout);return false;}}
private class FlingRunnable implements Runnable {private final CoordinatorLayout mParent;private final V mLayout;FlingRunnable(CoordinatorLayout parent, V layout) {mParent = parent;mLayout = layout;}@Overridepublic void run() {if (mLayout != null && mScroller != null) {if (mScroller.computeScrollOffset()) {setHeaderTopBottomOffset(mParent, mLayout, mScroller.getCurrY());// Post ourselves so that we run on the next animationViewCompat.postOnAnimation(mLayout, this);} else {onFlingFinished(mParent, mLayout);}}}}
具体实现

通过前面三块代码,我们知道AppBarLayout的Fling效果是通过scroller实现的,滑动的边界时通过minOffset和maxOffset来控制的,当滑动的offset超出范围时,scroller调用computeScrollerOffset就为false,顶部view就停止移动了。
mScroller.fling(0, getTopAndBottomOffset(), // curr0, Math.round(velocityY), // velocity.0, 0, // xminOffset-5000, maxOffset); // 设置一个很大的值,在向上滑动时不会因为低于minOffset而停止滑动
class FlingRunnable implements Runnable {private final CoordinatorLayout mParent;private final V mLayout;private int minOffset;FlingRunnable(CoordinatorLayout parent, V layout, int min) {mParent = parent;mLayout = layout;minOffset = min;}@Overridepublic void run() {if (mLayout != null && mScroller != null) {if (mScroller.computeScrollOffset()) {int currY = mScroller.getCurrY();if (currY < 0 && currY < minOffset) {scrollNext(minOffset - currY);setHeaderTopBottomOffset(mParent, mLayout, minOffset);} else {setHeaderTopBottomOffset(mParent, mLayout, currY);}// Post ourselves so that we run on the next animationViewCompat.postOnAnimation(mLayout, this);} else {onFlingFinished(mParent, mLayout);}}}}
在构造FlingRunnable时传入minOffset
final boolean fling(CoordinatorLayout coordinatorLayout, V layout, int minOffset,int maxOffset, float velocityY) {if (mFlingRunnable != null) {layout.removeCallbacks(mFlingRunnable);mFlingRunnable = null;}if (mScroller == null) {mScroller = new OverScroller(layout.getContext());}mScroller.fling(0, getTopAndBottomOffset(), // curr0, Math.round(velocityY), // velocity.0, 0, // xminOffset-5000, maxOffset); // yif (mScroller.computeScrollOffset()) {mFlingRunnable = new FlingRunnable(coordinatorLayout, layout, minOffset);ViewCompat.postOnAnimation(layout, mFlingRunnable);return true;} else {...}}
class FlingRunnable implements Runnable {private final CoordinatorLayout mParent;private final V mLayout;private int minOffset;private ScrollItem scrollItem;FlingRunnable(CoordinatorLayout parent, V layout, int min) {mParent = parent;mLayout = layout;minOffset = min;initNextScrollView(parent);}private void initNextScrollView(CoordinatorLayout parent) {int count = parent.getChildCount();for (int i = 0; i < count; i++) {View v = parent.getChildAt(i);CoordinatorLayout.LayoutParams lp = (CoordinatorLayout.LayoutParams) v.getLayoutParams();if (lp.getBehavior() instanceof AppBarLayout.ScrollingViewBehavior) {scrollItem = new ScrollItem(v);}}@Overridepublic void run() {if (mLayout != null && mScroller != null) {if (mScroller.computeScrollOffset()) {int currY = mScroller.getCurrY();if (currY < 0 && currY < minOffset) {scrollItem.scroll(minOffset - currY); //处理逻辑在ScrollItem中setHeaderTopBottomOffset(mParent, mLayout, minOffset);} else {setHeaderTopBottomOffset(mParent, mLayout, currY);}// Post ourselves so that we run on the next animationViewCompat.postOnAnimation(mLayout, this);} else {onFlingFinished(mParent, mLayout);}}}}
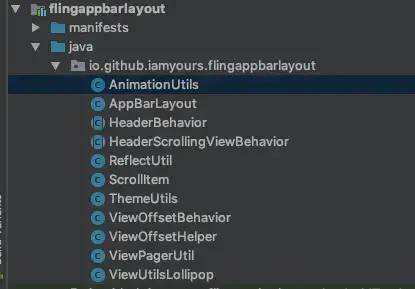
public class ScrollItem {private int type; //1: NestedScrollView 2:RecyclerViewprivate WeakReference<NestedScrollView> scrollViewRef;private WeakReference<LinearLayoutManager> layoutManagerRef;public ScrollItem(View v) {findScrollItem(v);}/*** 查找需要滑动的scroll对象** @param v*/protected boolean findScrollItem(View v) {if (findCommonScroll(v)) return true;if (v instanceof ViewPager) {View root = ViewPagerUtil.findCurrent((ViewPager) v);if (root != null) {View child = root.findViewWithTag("fling");return findCommonScroll(child);}}return false;}private boolean findCommonScroll(View v) {if (v instanceof NestedScrollView) {type = 1;scrollViewRef = new WeakReference<NestedScrollView>((NestedScrollView) v);stopScroll(scrollViewRef.get());return true;}if (v instanceof RecyclerView) {RecyclerView.LayoutManager lm = ((RecyclerView) v).getLayoutManager();if (lm instanceof LinearLayoutManager) {LinearLayoutManager llm = (LinearLayoutManager) lm;type = 2;layoutManagerRef = new WeakReference<LinearLayoutManager>(llm);stopScroll((RecyclerView) v);return true;}}return false;}/*** 停止NestedScrollView滚动** @param v*/private void stopScroll(NestedScrollView v) {try {Field field = ReflectUtil.getDeclaredField(v, "mScroller");if (field == null) return;field.setAccessible(true);OverScroller scroller = (OverScroller) field.get(v);if (scroller != null) scroller.abortAnimation();} catch (Exception e) {e.printStackTrace();}}/*** 停止RecyclerView滚动** @param*/private void stopScroll(RecyclerView rv) {try {Field field = ReflectUtil.getDeclaredField(rv, "mViewFlinger");if (field == null) return;field.setAccessible(true);Object obj = field.get(rv);if (obj == null) return;Method method = obj.getClass().getDeclaredMethod("stop");method.setAccessible(true);method.invoke(obj);} catch (Exception e) {e.printStackTrace();}}public void scroll(int dy) {if (type == 1) {scrollViewRef.get().scrollTo(0, dy);} else if (type == 2) {layoutManagerRef.get().scrollToPositionWithOffset(0, -dy);}}}
public class ViewPagerUtil {public static View findCurrent(ViewPager vp) {int position = vp.getCurrentItem();PagerAdapter adapter = vp.getAdapter();if (adapter instanceof FragmentStatePagerAdapter) {FragmentStatePagerAdapter fsp = (FragmentStatePagerAdapter) adapter;return fsp.getItem(position).getView();} else if (adapter instanceof FragmentPagerAdapter) {FragmentPagerAdapter fp = (FragmentPagerAdapter) adapter;return fp.getItem(position).getView();}return null;}}
好了,基本的滑动逻辑处理完了,我们自己的AppBarLayout可以惯性fling了。会看ScrollItem代码,我加了stopScroll的逻辑。那是因为在底部recyclerView或NestedScrollView快速向下滑动至AppBarLayout展开,而这时在AppBarLayout想要快速向上滑动,应为底部正在滑动,导致两者冲突,不能正常向上滑动,所以AppBarLayout在向上快速滑动时,要停止底部滑动。通过NestedScrollView和RecyclerView的源码,我们找到控制滑动逻辑的OverScroller和ViewFlinger,我们可以通过反射来停止对应的滑动。
源码地址:


