Spring Security Web 权限方案
共 42498字,需浏览 85分钟
· 2021-04-25
点击上方蓝色字体,选择“标星公众号”
优质文章,第一时间送达
作者 | 我係死肥宅
来源 | urlify.cn/fiqQ3y
3.1 设置登录系统的账号、密码
方式一:在 application.properties
spring.security.user.name=atguigu
spring.security.user.password=atguigu
方式二:编写类实现接口
package com.atgugui.securitydemo1.config;

import org.springframework.context.annotation.Configuration;
import org.springframework.security.config.annotation.authentication.builders.AuthenticationManagerBuilder;
import org.springframework.security.config.annotation.web.configuration.WebSecurityConfigurerAdapter;
import org.springframework.security.crypto.bcrypt.BCryptPasswordEncoder;

@Configuration
public class SecurityConfig extends WebSecurityConfigurerAdapter {
    @Override
    protected void configure(AuthenticationManagerBuilder auth) throws Exception {
        BCryptPasswordEncoder encoder = new BCryptPasswordEncoder();
        String password = encoder.encode("123");

        auth.inMemoryAuthentication()
                .passwordEncoder(encoder)
                .withUser("lucy")
                .password(password)
                .roles("admin");
    }
}
方式三:自定义编写实现类
package com.atgugui.securitydemo1.config;

import org.springframework.beans.factory.annotation.Autowired;
import org.springframework.context.annotation.Bean;
import org.springframework.context.annotation.Configuration;
import org.springframework.security.config.annotation.authentication.builders.AuthenticationManagerBuilder;
import org.springframework.security.config.annotation.web.configuration.WebSecurityConfigurerAdapter;
import org.springframework.security.core.userdetails.UserDetailsService;
import org.springframework.security.crypto.bcrypt.BCryptPasswordEncoder;
import org.springframework.security.crypto.password.PasswordEncoder;

@Configuration
public class SecurityConfig1 extends WebSecurityConfigurerAdapter {
    @Autowired
    private UserDetailsService userDetailsService;

    @Override
    protected void configure(AuthenticationManagerBuilder auth) throws Exception {
        auth.userDetailsService(userDetailsService)
                .passwordEncoder(password());
    }

    @Bean
    PasswordEncoder password() {
        return new BCryptPasswordEncoder();
    }
}
package com.atgugui.securitydemo1.service;

import org.springframework.security.core.GrantedAuthority;
import org.springframework.security.core.authority.AuthorityUtils;
import org.springframework.security.core.userdetails.User;
import org.springframework.security.core.userdetails.UserDetails;
import org.springframework.security.core.userdetails.UserDetailsService;
import org.springframework.security.core.userdetails.UsernameNotFoundException;
import org.springframework.security.crypto.bcrypt.BCryptPasswordEncoder;
import org.springframework.stereotype.Service;

import java.util.List;

@Service("userDetailsService")
public class MyUserDetailService implements UserDetailsService {
    @Override
    public UserDetails loadUserByUsername(String username) throws UsernameNotFoundException {
        List<GrantedAuthority> auths = AuthorityUtils.commaSeparatedStringToAuthorityList("role");
        return new User("mary", new BCryptPasswordEncoder().encode("123"), auths);
    }
}
3.2 实现数据库认证来完成用户登录
完成自定义登录
3.2.1 准备 sql
CREATE TABLE users (
    id BIGINT PRIMARY KEY AUTO_INCREMENT,
    username VARCHAR(20) UNIQUE NOT NULL,
    password VARCHAR(100)
);
INSERT INTO users
VALUES (1, 'lucy', '123');
INSERT INTO users
VALUES (2, 'mary', '456');
3.2.2 添加依赖
<dependencies>
    <dependency>
        <groupId>org.springframework.boot</groupId>
        <artifactId>spring-boot-starter-security</artifactId>
    </dependency>
    <dependency>
        <groupId>org.springframework.boot</groupId>
        <artifactId>spring-boot-starter-web</artifactId>
    </dependency>

    <dependency>
        <groupId>org.springframework.boot</groupId>
        <artifactId>spring-boot-starter-test</artifactId>
        <scope>test</scope>
        <exclusions>
            <exclusion>
                <groupId>org.junit.vintage</groupId>
                <artifactId>junit-vintage-engine</artifactId>
            </exclusion>
        </exclusions>
    </dependency>
    <dependency>
        <groupId>org.springframework.security</groupId>
        <artifactId>spring-security-test</artifactId>
        <scope>test</scope>
    </dependency>

    <!-- https://mvnrepository.com/artifact/com.baomidou/mybatis-plus-boot-starter -->
    <dependency>
        <groupId>com.baomidou</groupId>
        <artifactId>mybatis-plus-boot-starter</artifactId>
        <version>3.4.2</version>
    </dependency>
    <!-- https://mvnrepository.com/artifact/mysql/mysql-connector-java -->
    <dependency>
        <groupId>mysql</groupId>
        <artifactId>mysql-connector-java</artifactId>
        <version>8.0.23</version>
    </dependency>
    <!-- https://mvnrepository.com/artifact/org.projectlombok/lombok -->
    <dependency>
        <groupId>org.projectlombok</groupId>
        <artifactId>lombok</artifactId>
        <version>1.18.20</version>
        <scope>provided</scope>
    </dependency>
</dependencies>
3.2.3 制作实体类
package com.atgugui.securitydemo1.entity;

import lombok.Data;

@Data
public class Users {
    /**
     * id
     */
    private Integer id;

    /**
     * 用户名
     */
    private String username;

    /**
     * 密码
     */
    private String password;
}
3.2.4 整合 MybatisPlus 制作 mapper
package com.atgugui.securitydemo1.mapper;

import com.atgugui.securitydemo1.entity.Users;
import com.baomidou.mybatisplus.core.mapper.BaseMapper;
import org.springframework.stereotype.Repository;

@Repository
public interface UsersMapper extends BaseMapper<Users> {
}
配置文件添加数据库配置
# mysql 数据库连接
spring.datasource.driver-class-name=com.mysql.cj.jdbc.Driver
spring.datasource.url=jdbc:mysql://localhost:3306/test?serverTimezone=GMT%2B8
spring.datasource.username=root
spring.datasource.password=12345678
3.2.5 制作登录实现类
package com.atgugui.securitydemo1.service;

import com.atgugui.securitydemo1.entity.Users;
import com.atgugui.securitydemo1.mapper.UsersMapper;
import com.baomidou.mybatisplus.core.conditions.query.QueryWrapper;
import lombok.extern.slf4j.Slf4j;
import org.springframework.beans.factory.annotation.Autowired;
import org.springframework.security.core.GrantedAuthority;
import org.springframework.security.core.authority.AuthorityUtils;
import org.springframework.security.core.userdetails.User;
import org.springframework.security.core.userdetails.UserDetails;
import org.springframework.security.core.userdetails.UserDetailsService;
import org.springframework.security.core.userdetails.UsernameNotFoundException;
import org.springframework.security.crypto.bcrypt.BCryptPasswordEncoder;
import org.springframework.stereotype.Service;

import java.util.List;

@Slf4j
@Service("userDetailsService")
public class MyUserDetailService implements UserDetailsService {
    @Autowired
    private UsersMapper usersMapper;

    @Override
    public UserDetails loadUserByUsername(String username) throws UsernameNotFoundException {
        // 根据用户名查询
        QueryWrapper<Users> wrapper = new QueryWrapper<>();
        wrapper.eq("username", username);
        Users users = usersMapper.selectOne(wrapper);
        log.info("[Service]users:{}", users);
        if (users == null) {
            throw new UsernameNotFoundException("用户名不存在!");
        }
        System.out.println(users);
        List<GrantedAuthority> auths = AuthorityUtils.commaSeparatedStringToAuthorityList("role");
        return new User(users.getUsername(), new BCryptPasswordEncoder().encode(users.getPassword()), auths);
    }
}
3.2.6 添加注解
package com.atgugui.securitydemo1;

import org.mybatis.spring.annotation.MapperScan;
import org.springframework.boot.SpringApplication;
import org.springframework.boot.autoconfigure.SpringBootApplication;

@SpringBootApplication
@MapperScan("com.atgugui.securitydemo1.mapper")
public class Securitydemo1Application {

    public static void main(String[] args) {
        SpringApplication.run(Securitydemo1Application.class, args);
    }

}
3.2.7 启动测试
2021-04-17 23:35:55.905 INFO 11768 --- [nio-8111-exec-5] c.a.s.service.MyUserDetailService : [Service]users:Users(id=1, username=lucy, password=123)
3.3 未认证请求跳转到登录页
3.3.1 编写页面
<!DOCTYPE html>
<html lang="en">
<head>
    <meta charset="UTF-8">
    <title>Title</title>
</head>
<body>
<form action="/user/login" method="post">
    用户名:<input type="text" name="username"><br>
    密码:<input type="password" name="password"><br>
    <input type="submit" value="login">
</form>
</body>
</html>
3.3.2 编写控制器
package com.atgugui.securitydemo1.controller;
import org.springframework.web.bind.annotation.GetMapping;
import org.springframework.web.bind.annotation.RequestMapping;
import org.springframework.web.bind.annotation.RestController;
@RestController
@RequestMapping("/test")
public class TestController {
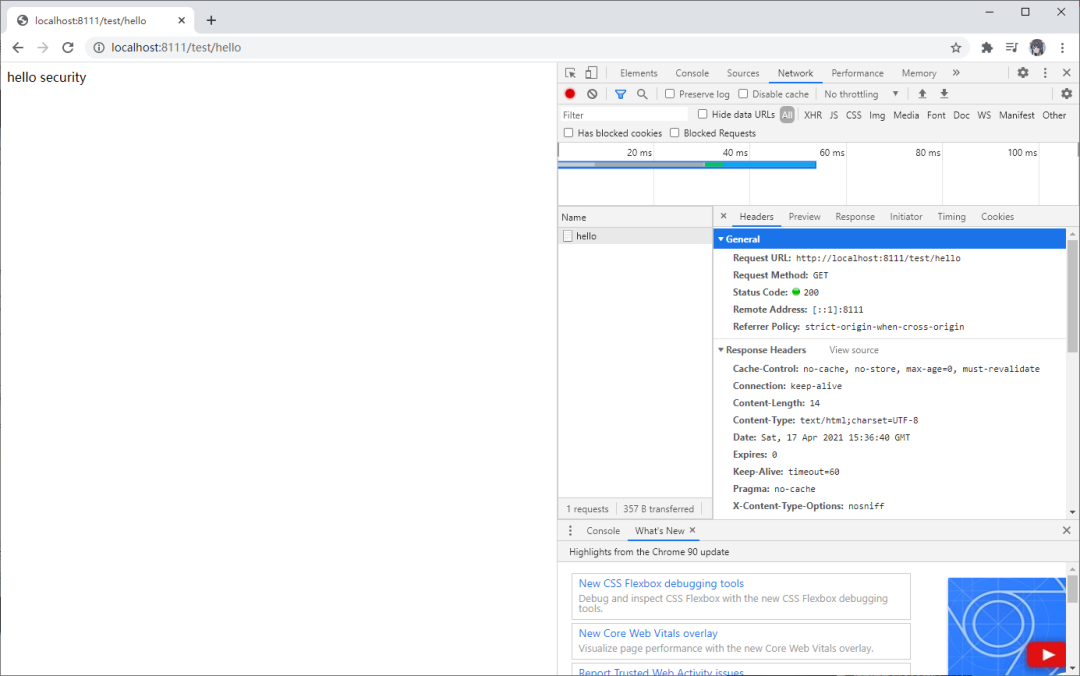
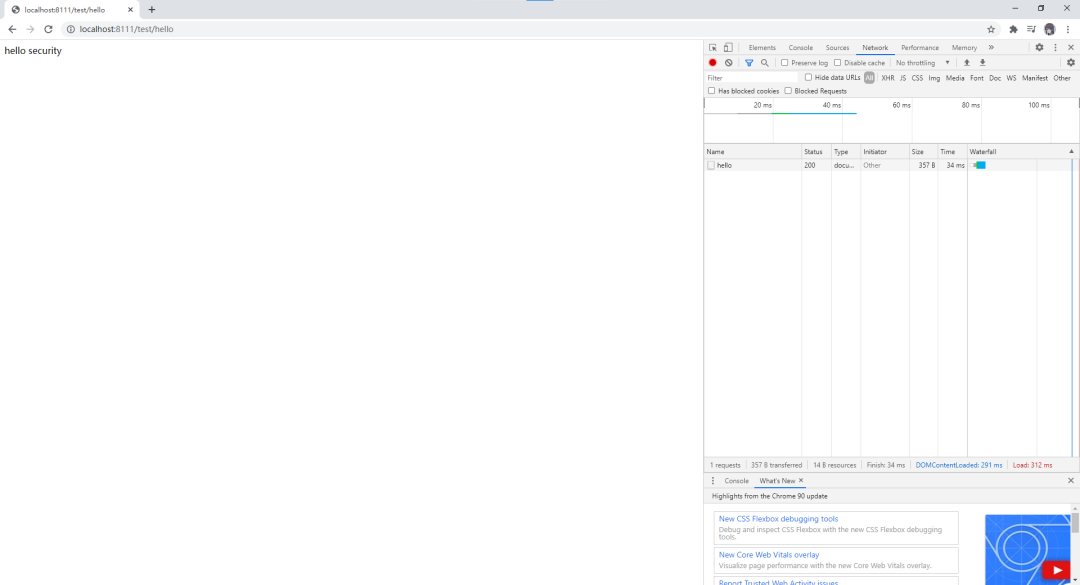
@GetMapping("hello")
public String hello() {
return "hello security";
}
@GetMapping("index")
public String index() {
return "hello index";
}
}
3.3.3 编写配置类放行登录页面以及静态资源
package com.atgugui.securitydemo1.config;

import org.springframework.beans.factory.annotation.Autowired;
import org.springframework.context.annotation.Bean;
import org.springframework.context.annotation.Configuration;
import org.springframework.security.config.annotation.authentication.builders.AuthenticationManagerBuilder;
import org.springframework.security.config.annotation.web.builders.HttpSecurity;
import org.springframework.security.config.annotation.web.configuration.WebSecurityConfigurerAdapter;
import org.springframework.security.core.userdetails.UserDetailsService;
import org.springframework.security.crypto.bcrypt.BCryptPasswordEncoder;
import org.springframework.security.crypto.password.PasswordEncoder;

@Configuration
public class SecurityConfig1 extends WebSecurityConfigurerAdapter {
    @Autowired
    private UserDetailsService userDetailsService;

    @Override
    protected void configure(AuthenticationManagerBuilder auth) throws Exception {
        auth.userDetailsService(userDetailsService)
                .passwordEncoder(password());
    }

    @Override
    protected void configure(HttpSecurity http) throws Exception {
        http.formLogin()    // 自定义编写的登录页面
                .loginPage("/login.html")   // 登录页面设置
                .loginProcessingUrl("/user/login")  // 登录访问路径
                .defaultSuccessUrl("/test/index").permitAll()    // 登录成功之后,跳转路径
                .and().authorizeRequests()
                    .antMatchers("/", "/test/hello", "user/login").permitAll()  // 直接访问,不需要认证
                .anyRequest().authenticated()
                .and().csrf().disable();    // 关闭csrf防护
    }

    @Bean
    PasswordEncoder password() {
        return new BCryptPasswordEncoder();
    }
}
3.3.4 测试

3.4 基于角色或权限进行访问控制
3.4.1 hasAuthority 方法
如果当前的主体具有指定的权限,则返回 true,否则返回 false
修改配置类
@Override
protected void configure(HttpSecurity http) throws Exception {
http.formLogin() // 自定义编写的登录页面
.loginPage("/login.html") // 登录页面设置
.loginProcessingUrl("/user/login") // 登录访问路径
.defaultSuccessUrl("/test/index").permitAll() // 登录成功之后,跳转路径
.and().authorizeRequests()
.antMatchers("/", "/test/hello", "user/login").permitAll() // 直接访问,不需要认证
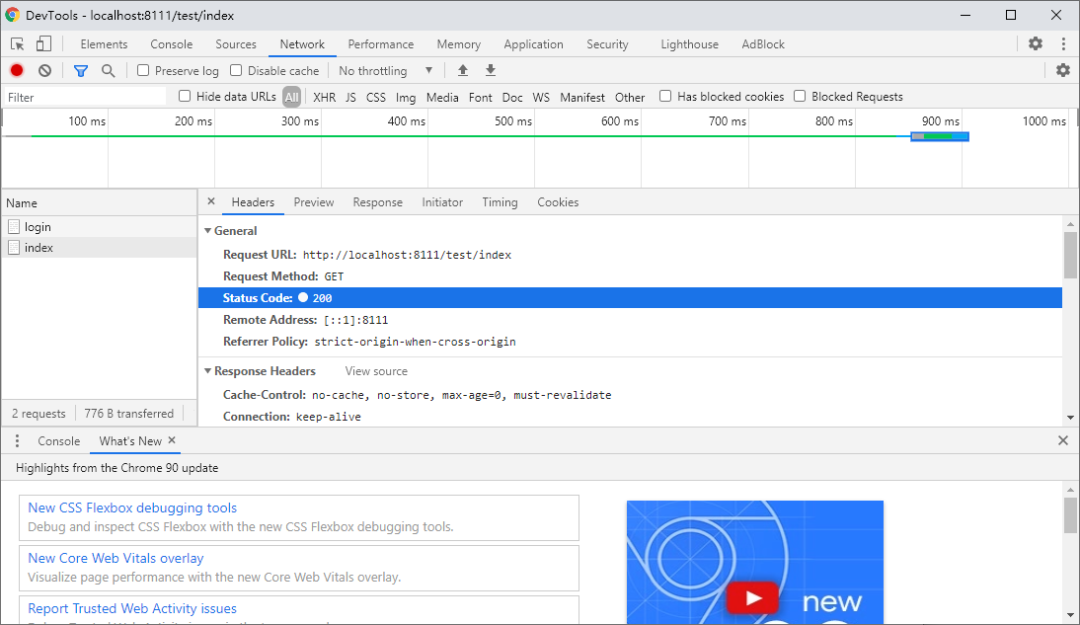
.antMatchers("/test/index").hasAuthority("admins") // 权限
.anyRequest().authenticated()
.and().csrf().disable(); // 关闭csrf防护
}
添加一个控制器
@GetMapping("index")
public String index() {
    return "hello index";
}
给用户登录主体赋予权限
测试
role
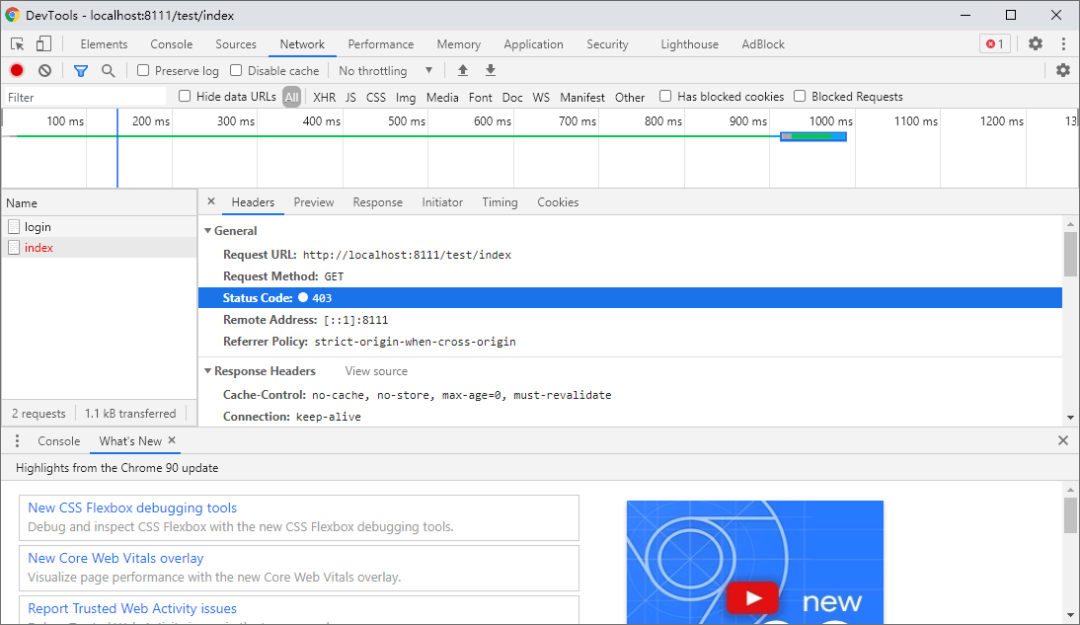
admins
3.4.2 hasAnyAuthority 方法
如果当前的主体有任何提供的角色(给定的作为一个逗号分隔的字符串列表)的话,返回 true
@Override
protected void configure(HttpSecurity http) throws Exception {
    http.formLogin()    // 自定义编写的登录页面
            .loginPage("/login.html")   // 登录页面设置
            .loginProcessingUrl("/user/login")  // 登录访问路径
            .defaultSuccessUrl("/test/index").permitAll()    // 登录成功之后,跳转路径
            .and().authorizeRequests()
                .antMatchers("/", "/test/hello", "user/login").permitAll()  // 直接访问,不需要认证
                .antMatchers("/test/index").hasAnyAuthority("admins,manager")  // 权限
                .anyRequest().authenticated()
            .and().csrf().disable();    // 关闭csrf防护
}
3.4.3 hasRole 方法
如果用户具备给定角色就允许访问,否则出现 403。如果当前主体具有指定的角色,则返回 true。
private static String hasRole(String role) {
   Assert.notNull(role, "role cannot be null");
   if (role.startsWith("ROLE_")) {
      throw new IllegalArgumentException(
            "role should not start with 'ROLE_' since it is automatically inserted. Got '"
                  + role + "'");
   }
   return "hasRole('ROLE_" + role + "')";
}
@Override
protected void configure(HttpSecurity http) throws Exception {
    http.formLogin()    // 自定义编写的登录页面
            .loginPage("/login.html")   // 登录页面设置
            .loginProcessingUrl("/user/login")  // 登录访问路径
            .defaultSuccessUrl("/test/index").permitAll()    // 登录成功之后,跳转路径
            .and().authorizeRequests()
                .antMatchers("/", "/test/hello", "user/login").permitAll()  // 直接访问,不需要认证
                // .antMatchers("/test/index").hasAnyAuthority("admins,manager")  // 权限
                .antMatchers("/test/index").hasRole("sale")
                .anyRequest().authenticated()
            .and().csrf().disable();    // 关闭csrf防护
}
@Override
public UserDetails loadUserByUsername(String username) throws UsernameNotFoundException {
    // 根据用户名查询
    QueryWrapper<Users> wrapper = new QueryWrapper<>();
    wrapper.eq("username", username);
    Users users = usersMapper.selectOne(wrapper);
    log.info("[Service]users:{}", users);
    if (users == null) {
        throw new UsernameNotFoundException("用户名不存在!");
    }
    List<GrantedAuthority> auths = AuthorityUtils.commaSeparatedStringToAuthorityList("admins,ROLE_sale");
    return new User(users.getUsername(), new BCryptPasswordEncoder().encode(users.getPassword()), auths);
}
修改配置文件:注意配置文件中不需要添加”ROLE_“,因为上述的底层代码会自动添加与之进行匹配。
3.4.4 hasAnyRole
表示用户具备任何一个条件都可以访问。
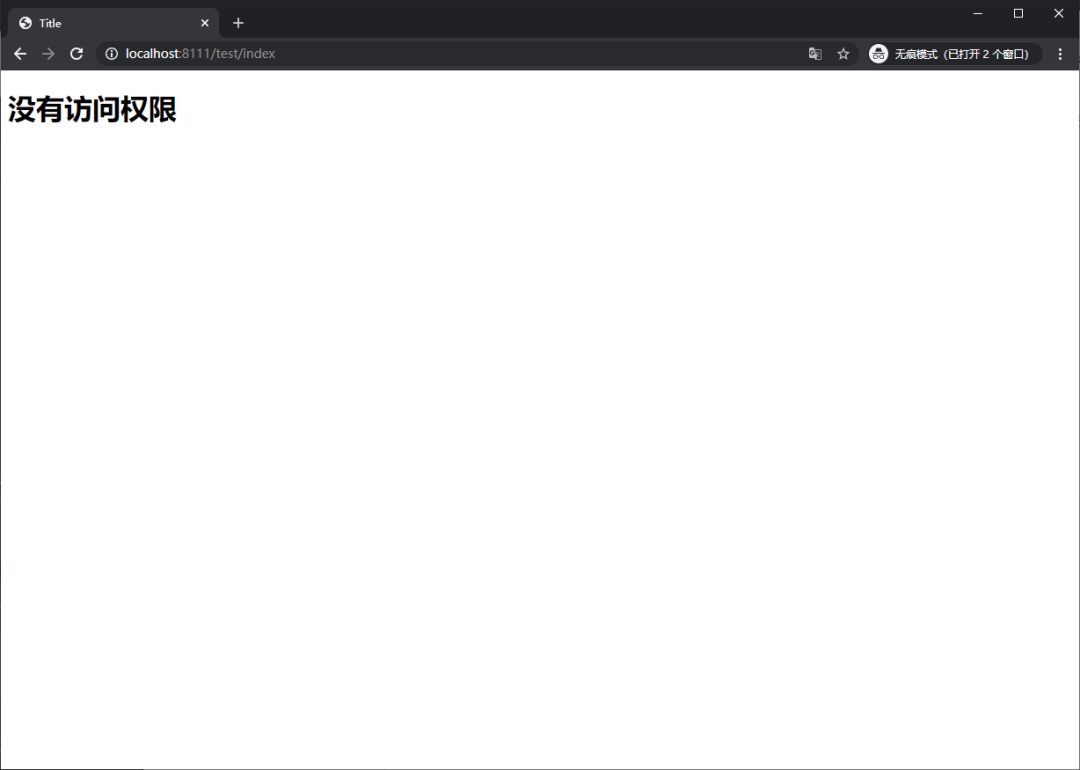
3.5 自定义 403 页面
3.5.1 修改访问配置类
http.exceptionHandling().accessDeniedPage("/unauth.html");
3.5.2 添加对应页面
<!DOCTYPE html>
<html lang="en">
<head>
    <meta charset="UTF-8">
    <title>Title</title>
</head>
<body>
<h1>没有访问权限</h1>
</body>
</html>
3.5.3 测试
3.6 注解使用
3.6.1 @Secured
判断是否具有角色,另外需要注意的是这里匹配的字符串需要添加前缀“ROLE_“。
使用注解先要开启注解功能!
import org.mybatis.spring.annotation.MapperScan;
import org.springframework.boot.SpringApplication;
import org.springframework.boot.autoconfigure.SpringBootApplication;
import org.springframework.security.config.annotation.method.configuration.EnableGlobalMethodSecurity;

@SpringBootApplication
@MapperScan("com.atgugui.securitydemo1.mapper")
@EnableGlobalMethodSecurity(securedEnabled=true)
public class Securitydemo1Application {

    public static void main(String[] args) {
        SpringApplication.run(Securitydemo1Application.class, args);
    }

}
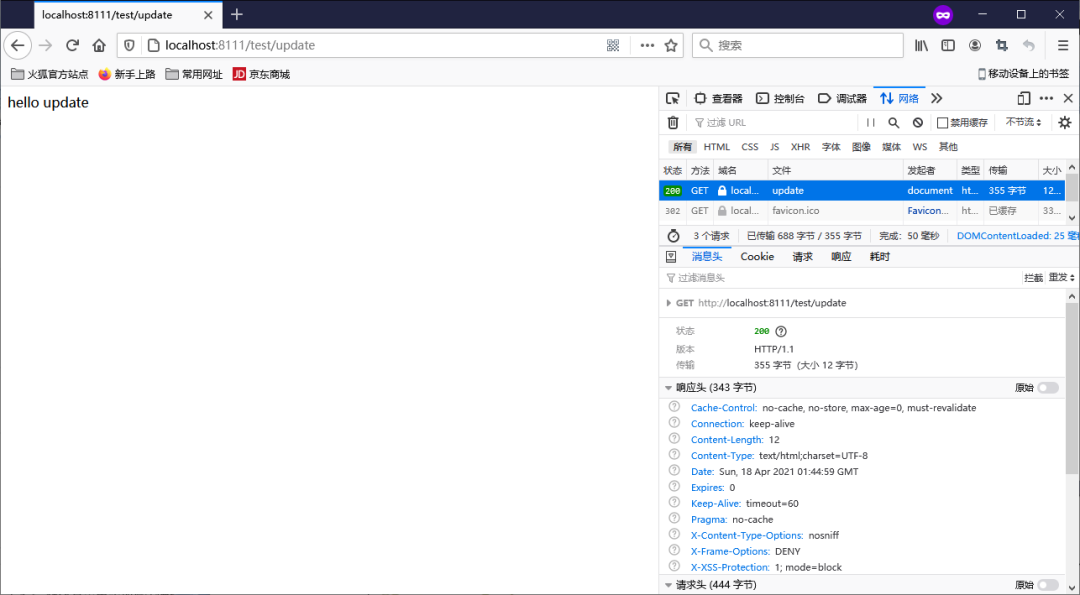
在控制器方法上添加注解
@GetMapping("update")
@Secured({"ROLE_sale", "ROLE_manager"})
public String update() {
    return "hello update";
}
登录之后直接访问控制器
3.6.2 @PreAuthorize
先开启注解功能:@EnableGlobalMethodSecurity(prePostEnabled = true)
@EnableGlobalMethodSecurity(securedEnabled=true, prePostEnabled = true)
public class Securitydemo1Application {
@PreAuthorize:注解适合进入方法前的权限验证,@PreAuthorize可以将登录用户的roles/permissions参数传到方法中
@GetMapping("update")
// @Secured({"ROLE_sale", "ROLE_manager"})
@PreAuthorize("hasAnyAuthority('admins')")
public String update() {
    return "hello update";
}

3.6.3 @PostAuthorize
开启注解功能:@EnableGlobalMethodSecurity(prePostEnabled = true)
@PostAuthorize 注解使用并不多,在方法执行后再进行权限验证,适合验证带有返回值的权限
3.6.4 @PostFilter
@PostFilter:权限验证之后对数据进行过滤留下用户名是admin1的数据
表达式中的 filterObject 引用的是方法返回值List中的某一个元素
@RequestMapping("getAll")
@PostAuthorize("hasAnyAuthority('admins')")
@PostFilter("filterObject.username == 'admin1'")
public List<Users> getAllUser() {
    List<Users> list = Lists.newArrayList();
    list.add(new Users(1, "admin1", "6666"));
    list.add(new Users(2, "admin2", "888"));
    return list;
}

3.6.5 @PreFilter
@PreFilter:进入控制器之前对数据进行过滤
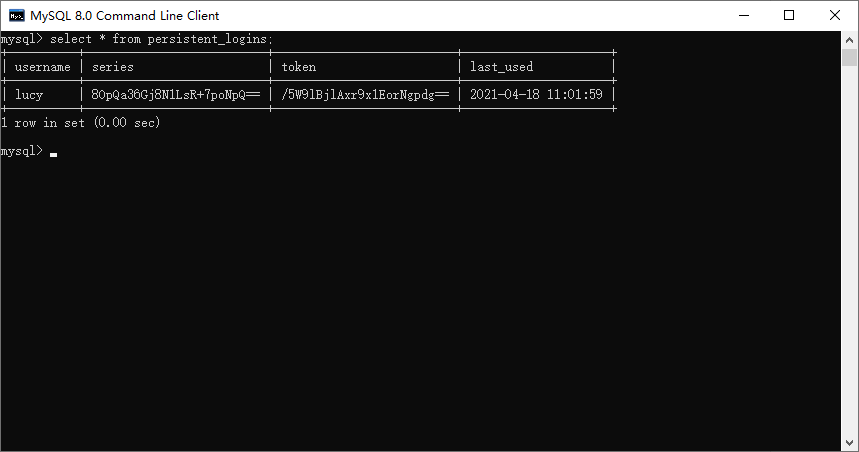
3.7 基于数据库的记住我
3.7.1创建表
CREATE TABLE persistent_logins (
    username varchar(64) NOT NULL,
    series varchar(64) PRIMARY KEY,
    token varchar(64) NOT NULL,
    last_used timestamp NOT NULL
)
/** Default SQL for creating the database table to store the tokens */
public static final String CREATE_TABLE_SQL = "create table persistent_logins (username varchar(64) not null, series varchar(64) primary key, "
      + "token varchar(64) not null, last_used timestamp not null)";
3.7.2 添加数据库的配置文件
spring:
  datasource:
    driver-class-name: com.mysql.jdbc.Driver
    url: jdbc:mysql://192.168.200.128:3306/test
    username: root
    password: root
3.7.3 编写配置类
package com.atgugui.securitydemo1.config;

import org.springframework.beans.factory.annotation.Autowired;
import org.springframework.context.annotation.Bean;
import org.springframework.context.annotation.Configuration;
import org.springframework.security.web.authentication.rememberme.JdbcTokenRepositoryImpl;
import org.springframework.security.web.authentication.rememberme.PersistentTokenRepository;

import javax.sql.DataSource;

@Configuration
public class BrowserSecurityConfig {
    @Autowired
    private DataSource dataSource;

    @Bean
    public PersistentTokenRepository persistentTokenRepository() {
        JdbcTokenRepositoryImpl jdbcTokenRepository = new JdbcTokenRepositoryImpl();
        // 赋值数据源
        jdbcTokenRepository.setDataSource(dataSource);
        // 自动创建表,第一次执行会创建,以后要执行就要删除掉!
        // jdbcTokenRepository.setCreateTableOnStartup(true);
        return jdbcTokenRepository;
    }
}
3.7.4 修改安全配置类
@Autowired
private UserDetailsService userDetailsService;
@Autowired
private PersistentTokenRepository tokenRepository;

@Override
protected void configure(HttpSecurity http) throws Exception {
    // 退出登录
    http.logout().logoutUrl("/logout").logoutSuccessUrl("/index").permitAll();

    // 无权限
    http.exceptionHandling().accessDeniedPage("/unauth.html");

    http.formLogin()    // 自定义编写的登录页面
            .loginPage("/login.html")   // 登录页面设置
            .loginProcessingUrl("/user/login")  // 登录访问路径
            .defaultSuccessUrl("/success.html").permitAll()    // 登录成功之后,跳转路径
            .and().authorizeRequests()
                .antMatchers("/", "/test/hello", "user/login").permitAll()  // 直接访问,不需要认证
                // .antMatchers("/test/index").hasAnyAuthority("admins,manager")  // 权限
                .antMatchers("/test/index").hasRole("sale1")
                .anyRequest().authenticated()
                .and().rememberMe().tokenRepository(tokenRepository)
                    .tokenValiditySeconds(60).userDetailsService(userDetailsService)
            .and().csrf().disable();    // 关闭csrf防护
}
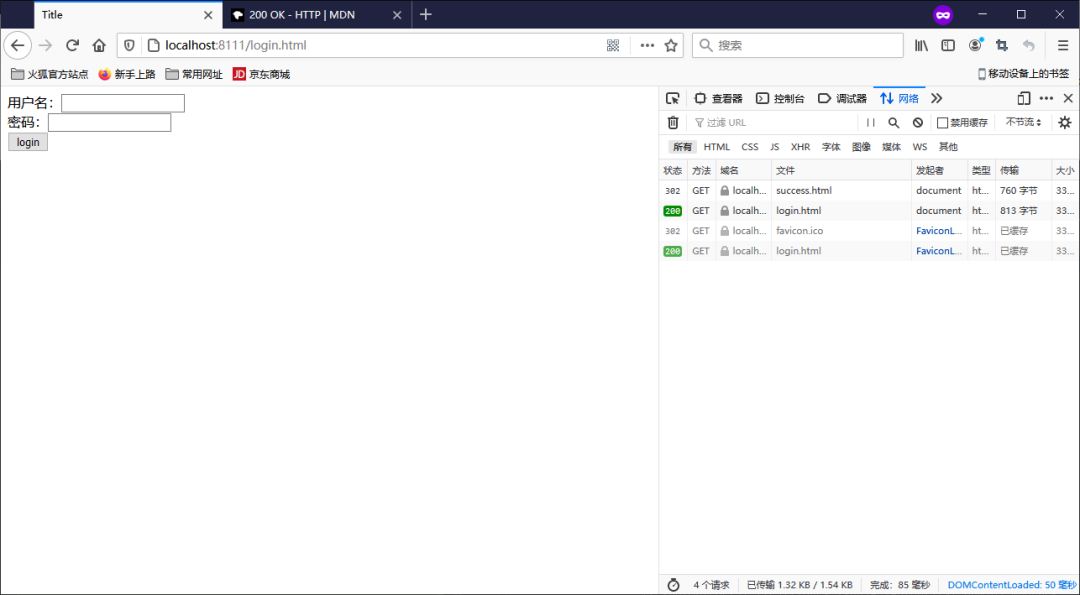
3.7.5 页面添加记住我复选框
<!DOCTYPE html>
<html lang="en">
<head>
    <meta charset="UTF-8">
    <title>Title</title>
</head>
<body>
<form action="/user/login" method="post">
    用户名:<input type="text" name="username"><br>
    密码:<input type="password" name="password"><br>
    记住我:<input type="checkbox" name="remember-me" title="记住密码"><br>
    <input type="submit" value="login">
</form>
</body>
</html>
此处:name 属性值必须位remember-me.不能改为其他值
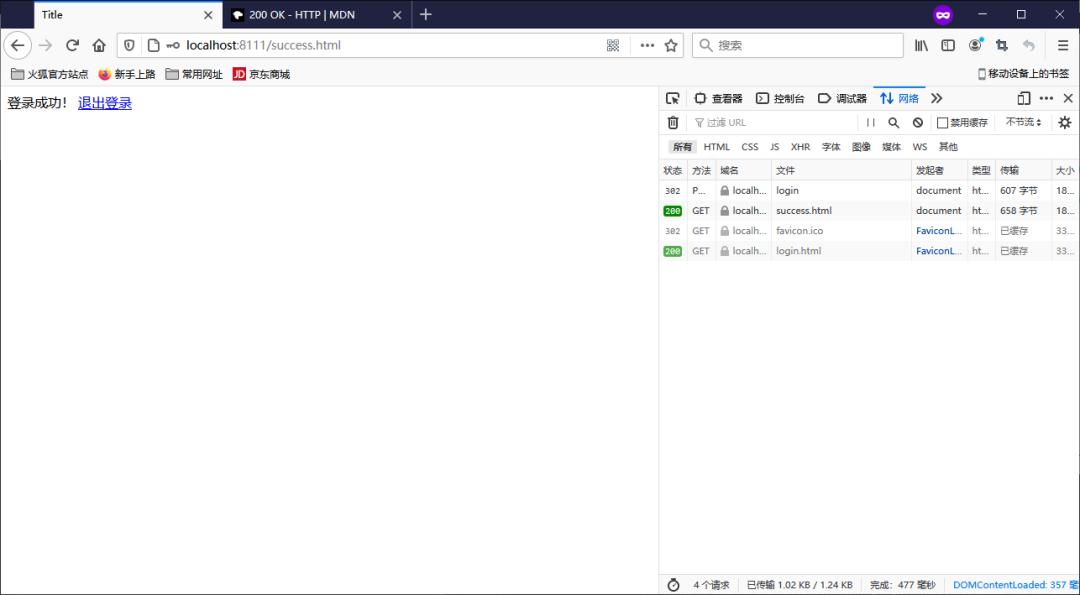
3.7.6 进行登录测试
登录成功之后,关闭浏览器再次访问发现依然可以使用!
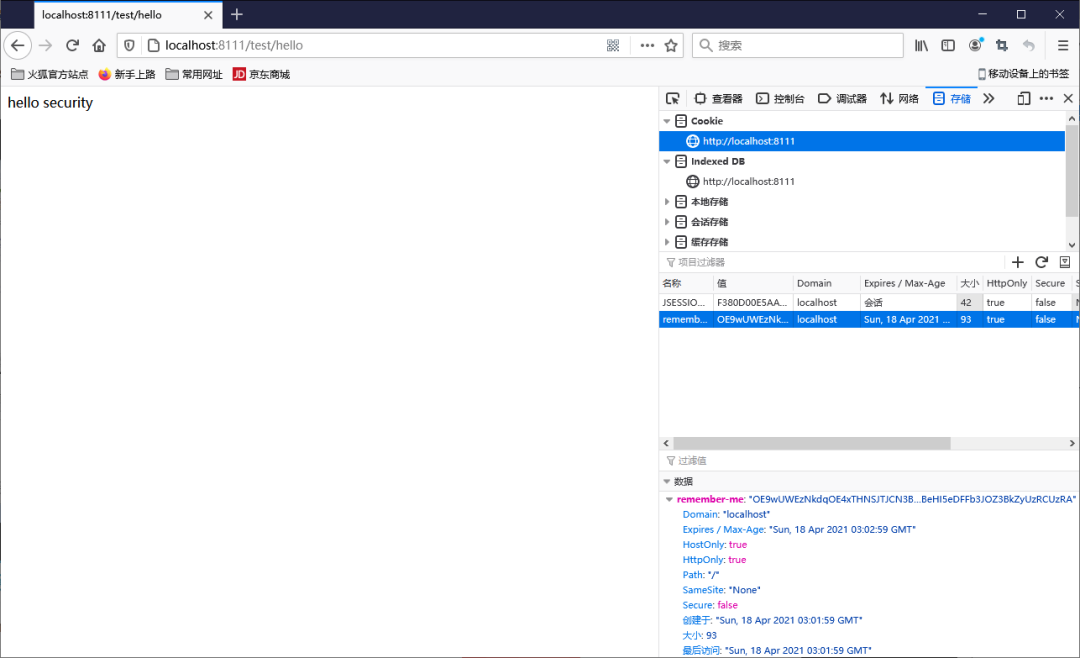
Cookie
数据库
3.7.7 设置有效期
默认2周时间。但是可以通过设置状态有效时间,即使项目重新启动下次也可以正常登录。
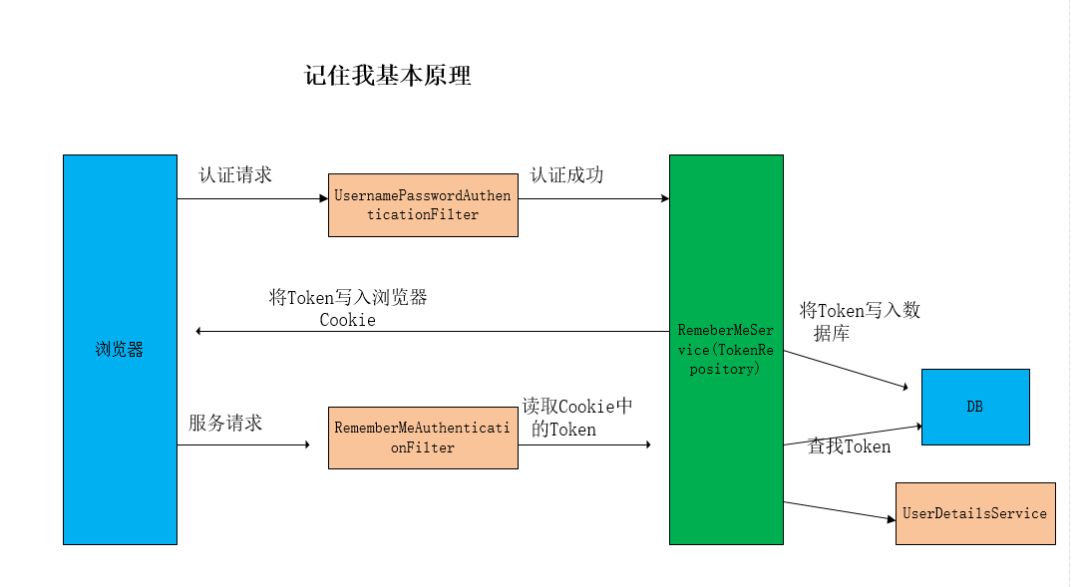
3.7.8 原理
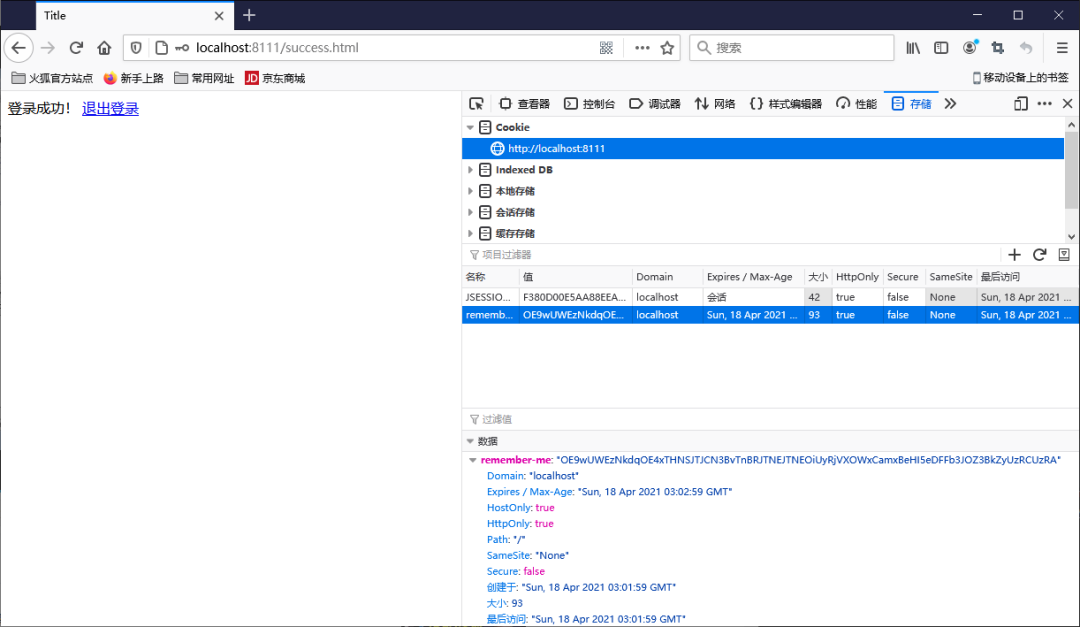
3.8 用户注销
3.8.1 在登录页面添加一个退出链接
<!DOCTYPE html>
<html lang="en">
<head>
    <meta charset="UTF-8">
    <title>Title</title>
</head>
<body>
登录成功!
<a href="/logout">退出登录</a>
</body>
</html>
3.8.2 在配置类中添加退出映射地址
@Override
protected void configure(HttpSecurity http) throws Exception {
    // 退出登录
    http.logout().logoutUrl("/logout").logoutSuccessUrl("/index").permitAll();

    // 无权限
    http.exceptionHandling().accessDeniedPage("/unauth.html");

    http.formLogin()    // 自定义编写的登录页面
            .loginPage("/login.html")   // 登录页面设置
            .loginProcessingUrl("/user/login")  // 登录访问路径
            .defaultSuccessUrl("/success.html").permitAll()    // 登录成功之后,跳转路径
            .and().authorizeRequests()
                .antMatchers("/", "/test/hello", "user/login").permitAll()  // 直接访问,不需要认证
                // .antMatchers("/test/index").hasAnyAuthority("admins,manager")  // 权限
                .antMatchers("/test/index").hasRole("sale1")
                .anyRequest().authenticated()
            .and().csrf().disable();    // 关闭csrf防护
}
3.8.3 测试
退出之后,是无法访问需要登录时才能访问的控制器!
3.9 CSRF
3.9.1 CSRF 理解
跨站请求伪造(英语:Cross-site request forgery),也被称为one-click attack或者session riding,通常缩写为CSRF或者XSRF,是一种挟制用户在当前已登录的Web应用程序上执行非本意的操作的攻击方法。跟跨网站脚本(XSS)相比,XSS利用的是用户对指定网站的信任,CSRF 利用的是网站对用户网页浏览器的信任。
跨站请求攻击,简单地说,是攻击者通过一些技术手段欺骗用户的浏览器去访问一个自己曾经认证过的网站并运行一些操作(如发邮件,发消息,甚至财产操作如转账和购买商品)。由于浏览器曾经认证过,所以被访问的网站会认为是真正的用户操作而去运行。这利用了web中用户身份验证的一个漏洞:简单的身份验证只能保证请求发自某个用户的浏览器,却不能保证请求本身是用户自愿发出的。
从Spring Security 4.0开始,默认情况下会启用CSRF保护,以防止CSRF攻击应用程序,Spring Security CSRF会针对PATCH,POST,PUT和DELETE方法进行防护。
3.9.2 Spring Security 实现CSRF的原理
生成csrfToken 保存到HttpSession 或者Cookie 中。
package org.springframework.security.web.csrf;

import java.io.Serializable;

/**
 * Provides the information about an expected CSRF token.
 *
 * @see DefaultCsrfToken
 *
 * @author Rob Winch
 * @since 3.2
 *
 */
public interface CsrfToken extends Serializable {

   /**
    * Gets the HTTP header that the CSRF is populated on the response and can be placed
    * on requests instead of the parameter. Cannot be null.
    *
    * @return the HTTP header that the CSRF is populated on the response and can be
    * placed on requests instead of the parameter
    */
   String getHeaderName();

   /**
    * Gets the HTTP parameter name that should contain the token. Cannot be null.
    * @return the HTTP parameter name that should contain the token.
    */
   String getParameterName();

   /**
    * Gets the token value. Cannot be null.
    * @return the token value
    */
   String getToken();
SaveOnAccessCsrfToken类有个接口CsrfTokenRepository
private static final class SaveOnAccessCsrfToken implements CsrfToken {
   private transient CsrfTokenRepository tokenRepository;
   private transient HttpServletRequest request;
   private transient HttpServletResponse response;
当前接口实现类:HttpSessionCsrfTokenRepository,CookieCsrfTokenRepository
/**
 * A {@link CsrfTokenRepository} that persists the CSRF token in a cookie named
 * "XSRF-TOKEN" and reads from the header "X-XSRF-TOKEN" following the conventions of
 * AngularJS. When using with AngularJS be sure to use {@link #withHttpOnlyFalse()}.
 *
 * @author Rob Winch
 * @since 4.1
 */
public final class CookieCsrfTokenRepository implements CsrfTokenRepository {
   static final String DEFAULT_CSRF_COOKIE_NAME = "XSRF-TOKEN";

   static final String DEFAULT_CSRF_PARAMETER_NAME = "_csrf";
@Override
public CsrfToken generateToken(HttpServletRequest request) {
   return new DefaultCsrfToken(this.headerName, this.parameterName,
         createNewToken());
}
private String createNewToken() {
   return UUID.randomUUID().toString();
}
请求到来时,从请求中提取csrfToken,和保存的csrfToken 做比较,进而判断当前请求是否合法。主要通过CsrfFilter 过滤器来完成。
@Override
protected void doFilterInternal(HttpServletRequest request, HttpServletResponse response, FilterChain filterChain)
      throws ServletException, IOException {
   request.setAttribute(HttpServletResponse.class.getName(), response);
   CsrfToken csrfToken = this.tokenRepository.loadToken(request);
   boolean missingToken = (csrfToken == null);
   if (missingToken) {
      csrfToken = this.tokenRepository.generateToken(request);
      this.tokenRepository.saveToken(csrfToken, request, response);
   }
   request.setAttribute(CsrfToken.class.getName(), csrfToken);
   request.setAttribute(csrfToken.getParameterName(), csrfToken);
   if (!this.requireCsrfProtectionMatcher.matches(request)) {
      if (this.logger.isTraceEnabled()) {
         this.logger.trace("Did not protect against CSRF since request did not match "
               + this.requireCsrfProtectionMatcher);
      }
      filterChain.doFilter(request, response);
      return;
   }
   String actualToken = request.getHeader(csrfToken.getHeaderName());
   if (actualToken == null) {
      actualToken = request.getParameter(csrfToken.getParameterName());
   }
   if (!equalsConstantTime(csrfToken.getToken(), actualToken)) {
      this.logger.debug(
            LogMessage.of(() -> "Invalid CSRF token found for " + UrlUtils.buildFullRequestUrl(request)));
      AccessDeniedException exception = (!missingToken) ? new InvalidCsrfTokenException(csrfToken, actualToken)
            : new MissingCsrfTokenException(actualToken);
      this.accessDeniedHandler.handle(request, response, exception);
      return;
   }
   filterChain.doFilter(request, response);
}
private RequestMatcher requireCsrfProtectionMatcher = DEFAULT_CSRF_MATCHER;
/**
 * The default {@link RequestMatcher} that indicates if CSRF protection is required or
 * not. The default is to ignore GET, HEAD, TRACE, OPTIONS and process all other
 * requests.
 */
public static final RequestMatcher DEFAULT_CSRF_MATCHER = new DefaultRequiresCsrfMatcher();
private static final class DefaultRequiresCsrfMatcher implements RequestMatcher {

   private final HashSet<String> allowedMethods = new HashSet<>(Arrays.asList("GET", "HEAD", "TRACE", "OPTIONS"));

   @Override
   public boolean matches(HttpServletRequest request) {
      return !this.allowedMethods.contains(request.getMethod());
   }

   @Override
   public String toString() {
      return "CsrfNotRequired " + this.allowedMethods;
   }

}
3.9.3 案例
在登录页面添加一个隐藏域
<input type="hidden" th:if="${_csrf}!=null" th:value="${_csrf.token}" name="_csrf"/>
关闭安全配置的类中的csrf
// http.csrf().disable();
锋哥最新SpringCloud分布式电商秒杀课程发布
👇👇👇
👆长按上方微信二维码 2 秒
感谢点赞支持下哈