 AI算法与图像处理


点击上方“AI算法与图像处理”,选择加"星标"或“置顶”
重磅干货,第一时间送达
大家好,我是程序员啊潘。今天要分享一个有趣的实战项目——视线估计,一个相对小众的研究方向,但是未来大有可为。
相关应用
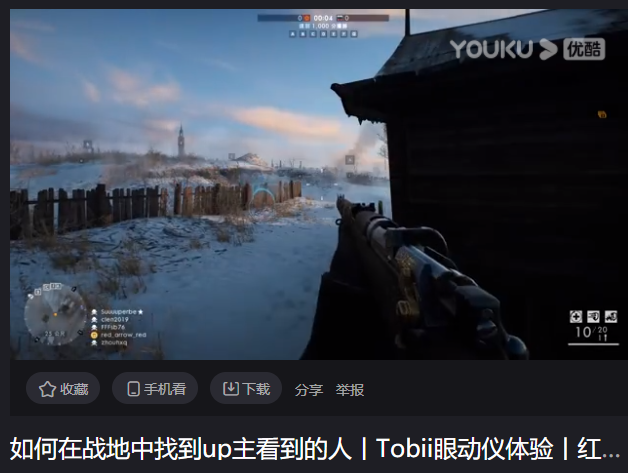
https://v.youku.com/v_show/id_XNDAzNzc3MjEzNg==.html?spm=a2h0k.11417342.soresults.dtitle
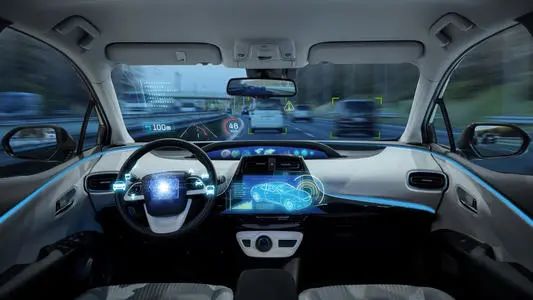
辅助驾驶(智能座舱):gaze在辅助驾驶上有两方面应用。一是检测驾驶员是否疲劳驾驶以及注意力是否集中。二是提供一些交互从而解放双手。
线下零售:我一直认为gaze在零售或者无人超市等领域大有可为,毕竟人的注意力某种程度上反映了其兴趣,可以提供大量的信息。但是我目前并没有看到相关的应用,包括Amazon Go。或许现阶段精度难以达到要求。我导师的公司倒是接过一个超市的项目,通过gaze行为做市场调研。但欧洲公司保密性较高,具体情况不得而知。
其他交互类应用如手机解锁、短视频特效等。
来源:https://zhuanlan.zhihu.com/p/112097446
算法原理和项目实战
好的,介绍了这么多,下面我们来实战一下,老规矩,先看效果
当然我想象中的效果应该是可以替换成下面的样子(本文并没有实现):
代码来源:https://github.com/1996scarlet/Laser-Eye
涉及到的知识点:
1、人脸检测
论文:https://arxiv.org/abs/1905.00641项目代码:https://github.com/1996scarlet/faster-mobile-retinaface
2、人脸关键点检测
默认使用的是MobileNet-v2 version(1.4M)
可选的其他版本https://github.com/deepinx/deep-face-alignment【37M】
3、头部姿态估计
https://github.com/lincolnhard/head-pose-estimation使用 dlib和 OpenCV实现头部姿态的估计(实际使用的是insightface项目中的人脸关键点检测方法)链接:https://github.com/deepinsight/insightface/tree/master/alignment/coordinateReginsightface项目经常会更新一些好东西,非常值得持续关注
4、虹膜分割
论文:https://ieeexplore.ieee.org/document/8818661
本文提出了一种基于单目RGB相机的实时精确的三维眼球注视跟踪方法。我们的关键思想是训练一个深度卷积神经网络(DCNN),自动从输入图像中提取每只眼睛的虹膜和瞳孔像素。为了实现这一目标,我们结合Unet[1]和Squeezenet[2]的能力来训练一个高效的卷积神经网络进行像素分类。此外,我们在最大后验框架中跟踪三维眼睛注视状态,该框架在每一帧中顺序搜索最可能的三维眼睛注视状态。当眼睛眨眼时,眼球注视跟踪器会得到不准确的结果。为了提高眼睛注视跟踪器的鲁棒性和准确性,我们进一步扩展了卷积神经网络用于眼睛的近距离检测。我们的系统在台式电脑和智能手机上实时运行。我们已经在直播视频和网络视频上评估了我们的系统,我们的结果表明,该系统对于不同性别、种族、光照条件、姿势、形状和面部表情都是稳健和准确的。与Wang等人[3]的对比表明,我们的方法在使用单一RGB摄像头的3D眼球跟踪方面取得了先进水平。
测试代码:
#!/usr/bin/python3# -*- coding:utf-8 -*-from service.head_pose import HeadPoseEstimatorfrom service.face_alignment import CoordinateAlignmentModelfrom service.face_detector import MxnetDetectionModelfrom service.iris_localization import IrisLocalizationModelimport cv2import numpy as npfrom numpy import sin, cos, pi, arctanfrom numpy.linalg import normimport timefrom queue import Queuefrom threading import Threadimport sysSIN_LEFT_THETA = 2 * sin(pi / 4)SIN_UP_THETA = sin(pi / 6)def calculate_3d_gaze(frame, poi, scale=256):ends, pupils, centers = poieye_length = norm(starts - ends, axis=1)ic_distance = norm(pupils - centers, axis=1)zc_distance = norm(pupils - starts, axis=1)s0 = (starts[:, 1] - ends[:, 1]) * pupils[:, 0]s1 = (starts[:, 0] - ends[:, 0]) * pupils[:, 1]s2 = starts[:, 0] * ends[:, 1]s3 = starts[:, 1] * ends[:, 0]delta_y = (s0 - s1 + s2 - s3) / eye_length / 2delta_x = np.sqrt(abs(ic_distance**2 - delta_y**2))delta = np.array((delta_x * SIN_LEFT_THETA,delta_y * SIN_UP_THETA))delta /= eye_lengthpha = np.arcsin(delta)# print(f"THETA:{180 * theta / pi}, PHA:{180 * pha / pi}")# delta[0, abs(theta) < 0.1] = 0# delta[1, abs(pha) < 0.03] = 0inv_judge = zc_distance**2 - delta_y**2 < eye_length**2 / 4inv_judge] *= -1*= -1delta *= scale# cv2.circle(frame, tuple(pupil.astype(int)), 2, (0, 255, 255), -1)# cv2.circle(frame, tuple(center.astype(int)), 1, (0, 0, 255), -1)return theta, pha, delta.Tdef draw_sticker(src, offset, pupils, landmarks,blink_thd=0.22,arrow_color=(0, 125, 255), copy=False):if copy:src = src.copy()left_eye_hight = landmarks[33, 1] - landmarks[40, 1]left_eye_width = landmarks[39, 0] - landmarks[35, 0]right_eye_hight = landmarks[87, 1] - landmarks[94, 1]right_eye_width = landmarks[93, 0] - landmarks[89, 0]for mark in landmarks.reshape(-1, 2).astype(int):tuple(mark), radius=1,color=(0, 0, 255), thickness=-1)if left_eye_hight / left_eye_width > blink_thd:tuple(pupils[0].astype(int)),arrow_color, 2)if right_eye_hight / right_eye_width > blink_thd:tuple(pupils[1].astype(int)),arrow_color, 2)return srcdef main(video, gpu_ctx=-1):cap = cv2.VideoCapture(video)fd = MxnetDetectionModel("weights/16and32", 0, .6, gpu=gpu_ctx)fa = CoordinateAlignmentModel('weights/2d106det', 0, gpu=gpu_ctx)gs = IrisLocalizationModel("weights/iris_landmark.tflite")hp = HeadPoseEstimator("weights/object_points.npy", cap.get(3), cap.get(4))fourcc = cv2.VideoWriter_fourcc(*'XVID')out = cv2.VideoWriter('output.avi',fourcc, 20.0, (960, 540))while True:frame = cap.read()if not ret:breakbboxes = fd.detect(frame)for landmarks in fa.get_landmarks(frame, bboxes, calibrate=True):# calculate head poseeuler_angle = hp.get_head_pose(landmarks)yaw, roll = euler_angle[:, 0]eye_markers = np.take(landmarks, fa.eye_bound, axis=0)eye_centers = np.average(eye_markers, axis=1)# eye_centers = landmarks[[34, 88]]# eye_lengths = np.linalg.norm(landmarks[[39, 93]] - landmarks[[35, 89]], axis=1)eye_lengths = (landmarks[[39, 93]] - landmarks[[35, 89]])[:, 0]iris_left = gs.get_mesh(frame, eye_lengths[0], eye_centers[0])_ = gs.draw_pupil(iris_left, frame, thickness=1)iris_right = gs.get_mesh(frame, eye_lengths[1], eye_centers[1])_ = gs.draw_pupil(iris_right, frame, thickness=1)pupils = np.array([pupil_left, pupil_right])poi = landmarks[[35, 89]], landmarks[[39, 93]], pupils, eye_centerspha, delta = calculate_3d_gaze(frame, poi)if yaw > 30:end_mean = delta[0]elif yaw < -30:end_mean = delta[1]else:end_mean = np.average(delta, axis=0)if end_mean[0] < 0:zeta = arctan(end_mean[1] / end_mean[0]) + pielse:zeta = arctan(end_mean[1] / (end_mean[0] + 1e-7))# print(zeta * 180 / pi)# print(zeta)if roll < 0:roll += 180else:roll -= 180real_angle = zeta + roll * pi / 180# real_angle = zeta# print("end mean:", end_mean)# print(roll, real_angle * 180 / pi)R = norm(end_mean)offset = R * cos(real_angle), R * sin(real_angle)92]] = landmarks[[34, 88]] = eye_centers# gs.draw_eye_markers(eye_markers, frame, thickness=1)offset, pupils, landmarks)frame = cv2.resize(frame, (960, 540))out.write(frame)cv2.resize(frame, (960, 540)))# cv2.imshow('res', frame)if cv2.waitKey(0) == ord('q'):breakcap.release()out.release()if __name__ == "__main__":video = "flame.mp4"main(video)
注意事项:
环境配置:
1、官方并没有提供明确的依赖包和相应的版本,本人测试所用的环境(cpu版本)
mxnet 1.7.0
tensorflow 2.4.0
2、在运行时,显示图片需要按空格键,切换到下一个画面。
3、测试的视频在官方项目的asset文件夹下。
视线估计最终获得的结果包括
三个角度:pitch, yaw, roll
虹膜分割的结果,左右眼分割的结果
计算3维虹膜的值
代码来源:https://github.com/1996scarlet/Laser-Eye
最后
好的,到这里,今天的分享就结束了。
最后,希望大家能点一下“赞”、“在看”和分享到朋友圈,你的举手之劳,是我前进的动力!2021,我会努力分享更多的干货,做好内容!
下载1:何恺明顶会分享
在「AI算法与图像处理」公众号后台回复:何恺明,即可下载。总共有6份PDF,涉及 ResNet、Mask RCNN等经典工作的总结分析
下载2:终身受益的编程指南:Google编程风格指南
在「AI算法与图像处理」公众号后台回复:c++,即可下载。历经十年考验,最权威的编程规范!
下载3 CVPR2020 在「AI算法与图像处理」公众号后台回复:CVPR2020,即可下载1467篇CVPR 2020论文 个人微信(如果没有备注不拉群!) 请注明:地区+学校/企业+研究方向+昵称

觉得不错就点亮在看吧


